Graveyard Keeper 2: Beginner Guide and Tips
Start by following the tutorial, then build a small yard of workstations, a wheat and carrot garden and a working kitchen before you open the trapdoor in your house. Behind it you get the alchemy lab and your first two zombie workers, and from there the game is about setting those zombies up properly and raising faith through the weekly sermon.
The short version: spend red research points on yard workstations, green ones on the garden and your first bread, and save blue ones for graveyard research, because blue is what runs out. Bury corpses that have white skulls to spare and few or no red ones, keep corpses with four or more red skulls for zombies, and strip and cremate the rest. Give every workstation zombie a tool before you expect it to work. Start the quest line that leads to sermons early, since faith pays for skill upgrades and there is only one sermon a week.
This guide names early characters and the first areas you unlock, so expect light spoilers for the opening hours.
Saving
There is no free saving. The game saves automatically after you sleep. That makes a nap a useful tool: if a choice is coming up that you might want to take back, sleep first so you have a save from just before it.
The first day: dungeon, house and village
Once Larry is free, the dungeon has nothing left to collect apart from quest items and mushrooms, so do not spend time searching it. Outside, after you break through the barricade with the axe, pick up materials along the way from old barrels and anything else lying around.
In the house, keep the cheese instead of eating it. When the man falls through the roof, pick up the broken pieces he leaves behind.
After your first night in the new home, the first corpse is waiting. Clean off the blood (corpses differ, so this step is not always the same), bury it, and carry on with the tutorial.
When the tutorial brings you to the innkeeper and the village head:
- Sell the certificate from that first burial.
- Buy two beers straight away. A later quest asks for them.
- Buy 16 wheat seeds from the merchant.
- Go south through the village and pick up the quests from the twins.
The next time you sleep, another quest arrives. Back home, build the sawhorse; the wood research it needs is already unlocked for you at the start.
Inspiration tasks and skill points
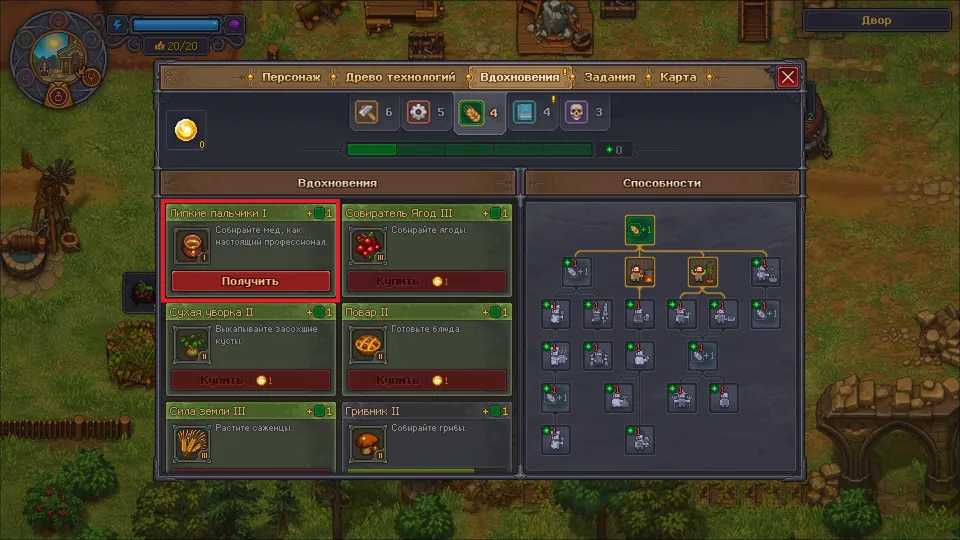
The inspiration tab in your character menu lists small tasks, sorted into the same areas as your skills. Doing a task unlocks a tier of it, and claiming that tier earns points in that area. These skill points are separate from the red, green and blue research points you spend in the research tree. Claiming a tier usually costs faith, but the first tier of any task costs 0 faith, so early on it is worth doing tasks on purpose.
Gathering mushrooms and berries and clearing dry bushes are among the first tasks you can complete.
The garden: wheat, compost and peat
Your first garden goals, in order:
| Step | Cost |
|---|---|
| Research gardening | 5 green research points |
| Lay out 4 beds and plant wheat in all of them | 16 wheat seeds |
| Research the first fertiliser and build the compost heap | 10 green research points |
After your first harvest, start making peat. Peat raises the yield of a bed, and once a bed has been treated it stays treated. You do not have to add peat again before every sowing, which is a change from the first game.
While the wheat grows, turn back to the yard and to the graveyard.
Corpses: bury, raise or cremate
Corpses no longer rot in Graveyard Keeper 2, so there is no timer on any body you receive. Take the time to decide what each one is for.
Every corpse carries a number of red skulls and white skulls, and either can be zero. What they mean depends on where the body goes:
| Corpse | Best use |
|---|---|
| No red skulls, several white (a burial corpse) | Bury it in the graveyard |
| One to three red skulls and more white ones | Bury it only if the grave decoration has a wreath for every red skull (see the grave rating below) |
| Four or more red skulls (a zombie corpse) | Keep it for a zombie |
| Anything else | Take the organs, then use the crematorium in the morgue |
White skulls make no difference to a zombie. Only the red ones count.
In the first days, most corpses are more useful on the table than in the ground. Without upgrades you cannot work with every organ, and there is a chance of a surgical mistake, so high-quality corpses are hard to produce anyway. Early bodies are better spent on:
- Fat, until the garden lets you switch to oil.
- A stock of organs, and skulls for teeth.
- Future zombies.
The graveyard rating can still grow without burials. Expand the graveyard and place benches, busts or even urns, and upgrade the fence and paths when the game offers it. The exception is a burial corpse: bury it right away. Digging a body back up later means buying an exhumation permit, and that is a chore you can avoid.
Graveyard research to get first
Graveyard research mostly stalls on blue points, so these are worth unlocking as early as you can:
| Research | Cost |
|---|---|
| Skin and bone work | 5 green, 2 blue |
| The first wooden gravestones | 5 red, 2 green |
| Skull and teeth work | 5 red, 5 blue |
| The next wooden gravestone research | 20 red, 5 blue |
| The first corpse pallet | 5 red, 5 green |
The corpse pallet research only opens once your anvil has a hardening bucket, which comes from a 30-red research in the kiln and furnace stage below.
How the grave rating works
A corpse buried with no headstone and no grave border only counts its red skulls, at minus one point each.
Headstones and borders carry wreaths. Each wreath cancels one red skull first. Wreaths left over after that go to the white skulls, and each one that lands on a white skull adds one point to the graveyard rating. Wreaths beyond that do nothing.
Two worked examples, using the first wooden cross (2 wreaths) and the first wooden grave border (1 wreath):
| Corpse | Decoration | Result |
|---|---|---|
| 2 red, 3 white | Cross and border, 3 wreaths | +1. Two wreaths cancel the red skulls, one counts on a white skull |
| 0 red, 2 white | Cross and border, 3 wreaths | +2. The cross alone already covers both white skulls, so the border adds nothing |
Storing corpses for zombies
Each red skull on a corpse is one inspiration level that the resulting worker zombie can reach through experience. That is why four or more red skulls already makes a strong zombie corpse, and why one is worth storing if you find it before you are able to raise zombies.
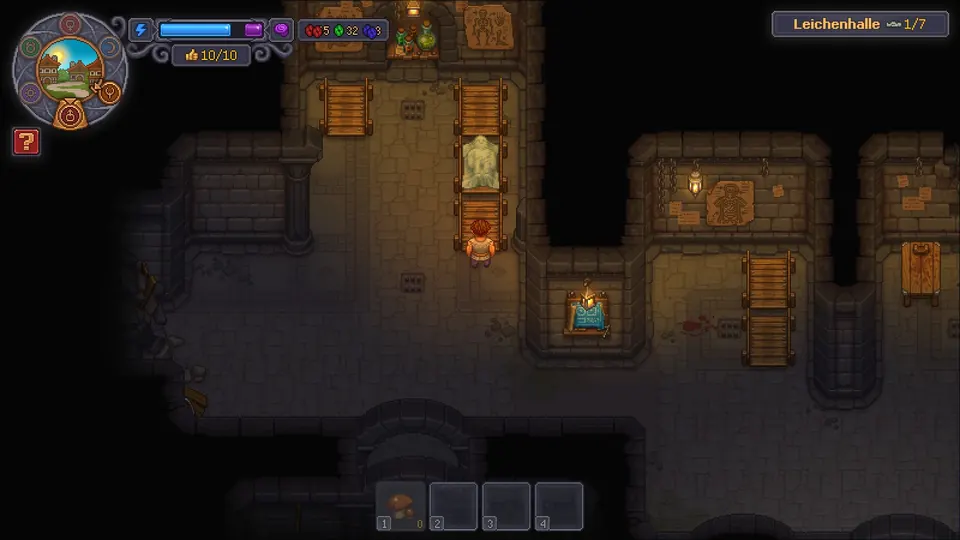
Corpses are stored on corpse pallets in the morgue. Once the pallet research is done (see graveyard research above), each pallet costs only 4 planks and 4 nails to build, and each one you build also gives you a blue research point.
Corpse deliveries stopped
New corpses are delivered by a donkey. At the time of writing it is not clear when or how often it comes. Deliveries seem to stop once the morgue is at capacity, and a crematorium with a body still in it may count toward that limit, so empty both if bodies stop arriving. Later on you can take control of this: on sermon day, the nun takes an order for the week’s corpses, and she then shows up as a small icon on the week calendar.
Building up the yard
Clear the yard below your house, the garden and the graveyard as you go, since clearing earns research points. The research for the first yard workstations costs mostly red points. A sensible build order:
| Order | Workstation | Research cost |
|---|---|---|
| 1 | Chopping block | 8 red |
| 2 | Wooden anvil | 5 red |
| 3 | Wooden workbench | 10 red |
| 4 | Stonemason’s workbench | Unlocked through the stone research |
| 5 | Potter’s wheel | 10 red, 5 green |
Workstations now take extensions that sit nearby and serve every station in range. A single tool rack (35 red research points) upgrades both the wooden workbench and the stonemason’s workbench at once, so leave 5 small squares between the two workbenches for the rack to share. Anvils get the same kind of shared upgrade later with a hardening bucket.
Plan the layout with two more things in mind:
- A zombie supply station has to fit between all the workstations later.
- Some stations are wider than they look while you place them. A one-column gap between two stations may not be enough to walk through.
The first village quests
With planks, wheat and clay discs in hand, you can finish three village quests in one trip:
- Hand in the items and pick up the follow-up quests.
- Equip the fishing rod you get as a reward and fish in the pond at the village entrance.
- Take the fish back to the merchant to finish another quest.
- Buy 16 carrot seeds from the merchant.
- Talk to the innkeeper last to improve his opinion of you.
Then go home and sleep.
The kitchen
Before expanding the yard any further, you want to be able to build chests, repair the kitchen, build the millstone inside it and stock up on firewood.
Firewood is no longer kept inside ovens or stoves. It goes in a woodshed, and every station in its range draws from it. The kitchen needs a woodshed of its own.
Two research items get the kitchen producing:
| Research | Cost |
|---|---|
| Millstone | 10 green, 5 red |
| Bread | 25 green |
With the kitchen working, turn wheat into flour and dough, then bake bread and berry pie.
Carrots, the kiln and the furnace
After a night’s sleep, plant 4 carrot beds next to the 4 wheat beds.
Back in the yard, research brick making (15 red, 5 green) and build the kiln. It fires the bricks you need for the furnace. Leave space on the left side of the furnace; the placement preview shows it too.
Two more red research items finish this stage:
| What it unlocks | Cost |
|---|---|
| The hardening bucket for the anvil | 30 red |
| Smelting ore in the furnace | 20 red |
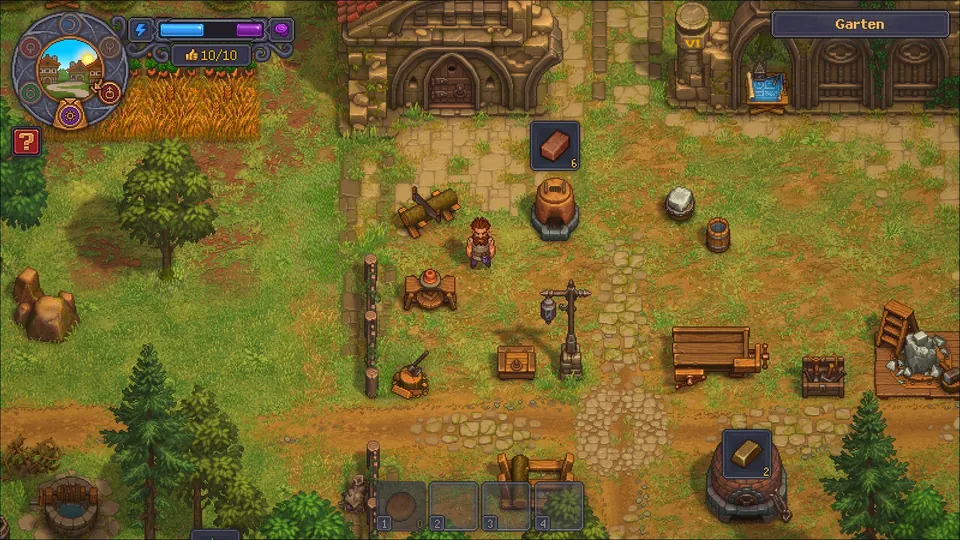
By now the yard can look something like the screenshot below, with the kiln and furnace built and the first wheat ripening in the corner.
Opening the trapdoor
With that done, you can finally open the trapdoor in your house. Below it is a cellar where you cannot build anything except chests yet.
The important part is the plague doctor, who sits behind a pile of rubble that you have to dig through. He gives you the combination for the alchemy lab.
The alchemy lab
At the research table, take apart the first experiment book for research points. More are slow to come by, so spend them carefully.
For now, research only blood and water. Make a container at the bottle rack, build a woodshed for the lab, and then mix blood and water together for your first alchemy product.
Some ingredients carry runes. When you research, those take priority, and two ingredients with the same runes are interchangeable.
Later, once you have points to spare, a few more recipes help if fights are giving you trouble.
| Ingredients to research | Result |
|---|---|
| Rendered fat and sand | Healing potion, tier 2 |
| Salt, then combine it with sand | Tier 2 potion that gives unlimited stamina in combat for a while |
| Water and sand | A potion that deals damage |
Your first zombie workers
At the end, the plague doctor also gives you your first two worker zombies. Before you can use them, build a zombie supply station, ideally in the middle of the yard where it can reach every workstation easily.
The zombie at the supply station carries raw materials from your chests to the workers and puts their finished goods away. One supplier can serve several workers, and when it has nothing to do it waits at its station.
Only a zombie working at a station gains experience, so put the zombie with fewer red skulls on the supply station. The other one goes to a workstation, and the sawhorse is a good place to start.
The kitchen works the same way: a zombie cooking there also needs a supplier from a supply station.
Zombies not working
A freshly placed zombie stands at its station and does nothing. The icons over its head are telling you it lacks the skill for that job.
Zombies have the same inspiration trees you do, but you cannot spend your own points on them. Each zombie earns its own. To get one started, open its menu and equip a tool that gives the skill points the station needs. The slot marked with a hand looks like it only takes weapons, because it shows a damage value, but tools such as the axe or shovel go there too. The skill points each tool gives are shown when you look at it in your own gear.
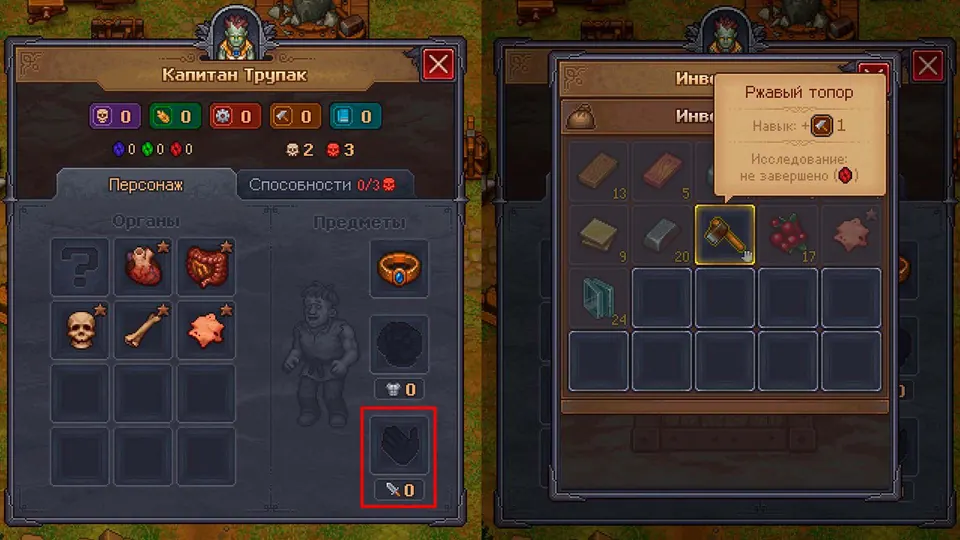
For the sawhorse zombie, hand over your own axe and set up an order list for it. Then research bronze blades and make a bronze axe for yourself. Swap your other tools for bronze versions as you can.
A zombie can only hold one tool at a time, so swap tools when you move it to a different kind of job.
Garden zombies not farming
In the garden, zombies do not need a supply station. Each one only needs its own gardener stand, and the screenshot shows two of them along the bottom edge of the garden, on the left.
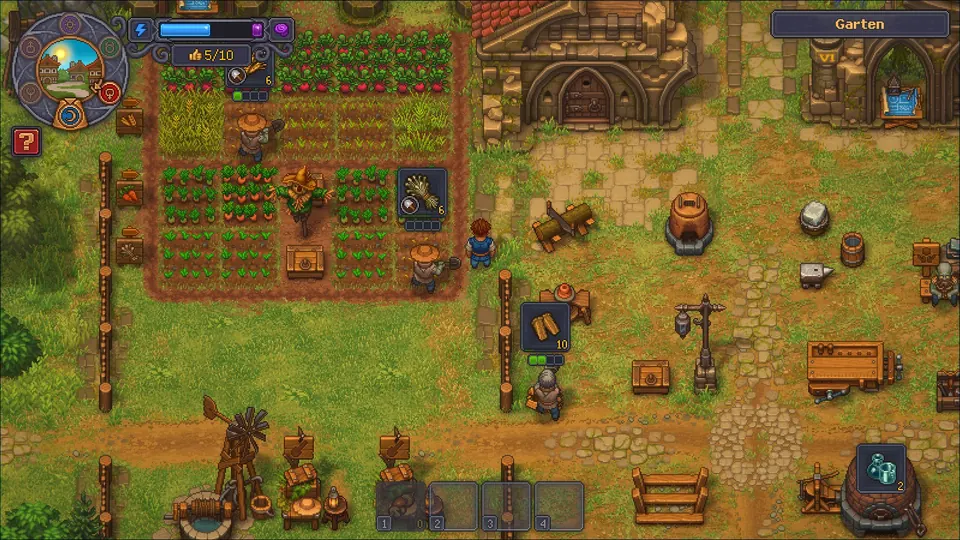
A gardener stand is not enough by itself. You also have to tell the zombies what to grow and where: open the blueprint board, where a new tab has appeared, and place signs marking the crop for each area.
There is a bug to watch for, as of the launch build. If you put a sign for a different crop, flax for example, in a row where wheat is still growing, the zombies will not harvest the wheat. Harvest it yourself, and after that they plant and harvest the flax on their own.
Sermons and faith
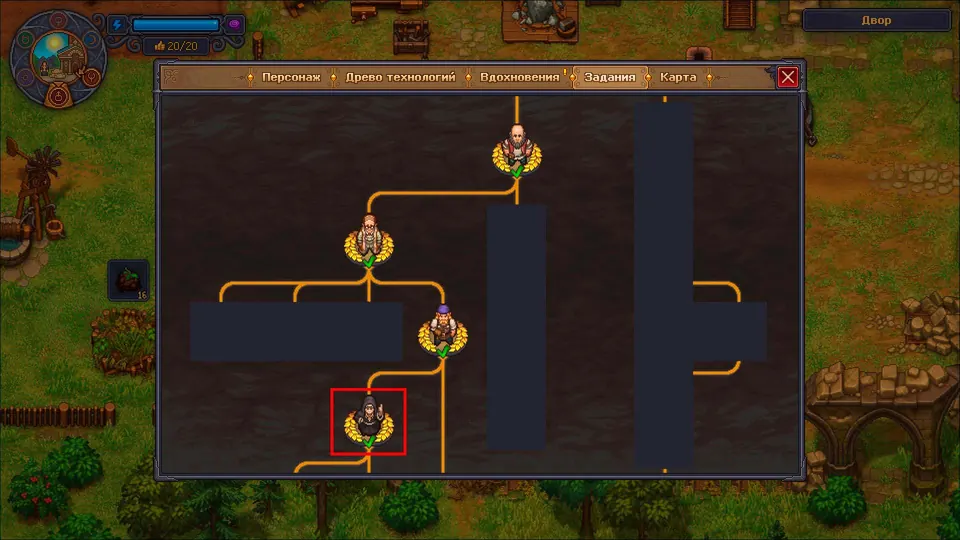
Faith matters even more than it did in the first game, and it is easy to miss that sermons are not introduced right away. The quest system also branches much more, so you can end up working on the wrong quests at the start. Follow the quest chain that leads to sermons and leave the others for later, so you can start collecting faith as early as possible. In the quest tab, it is the branch ending at the hooded figure highlighted here.
Faith comes from the inside of the church. The graveyard mostly adds to your income. To raise faith:
- Upgrade the church building itself.
- Follow the nun’s quests.
- Fill the church with benches. The last bench tier does not use expensive materials, so you can go straight to the maximum.
Prayers: don’t rush higher quality
At each sermon you use a prayer, and prayers come in quality tiers. A better one needs a skill upgrade, and even once you have one, for example a silver faith prayer, you are unlikely to use it early. Each tier needs a minimum number of points to work at all, and more for full success:
| Prayer quality | Points needed to work | Points for full success |
|---|---|---|
| Bronze | 7 | 15 |
| Silver | 20 | 40 |
The points come from the respect of your townsfolk (see farming respect below), and early on your town is too small to reach 40. Points beyond 15 on a bronze prayer are not wasted: together with your church decoration points, they give extra faith.
Short on faith for a skill
Faith runs out fast, and waiting a whole week for the next sermon is slow. If you are just short of a skill upgrade, look in the inspiration tab for tasks you have never done, such as collecting honey or making candles. Claiming a first tier spends no faith and still earns skill points, so it can get you to the upgrade without waiting for the next sermon.
Farming respect
At the time of writing this works, but it looks likely to be patched. Townsfolk respect you more when you sell them goods marked with the respect symbol. You can buy such goods from a trader and sell them straight back. You lose a little money, and the respect counts toward your next sermon.
Each trader caps how much respect a single item can give. Buy several different items, then move on to another trader and repeat.
The six-day week
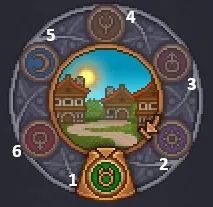
A week in Graveyard Keeper 2 has 6 days, and each one has its own symbol on the week calendar around the minimap. These are the days with something to act on:
| Day | What happens |
|---|---|
| 1 | Zombie day: electricity is available for creating zombies, and blue crystals appear in the swamp |
| 2 | Traders restock |
| 3 | Sermon day, with the inquisitor symbol from the first game. Sermons do not work at night |
| 4 | Smugglers and other new characters arrive |
| 6 | The Venus (female) symbol. New residents for the town: spend flyers on this day to raise your maximum townsfolk |
Flyers drop when you repair houses in town, and the repairs can happen on any day.
Sleep, madness and sleep deprivation
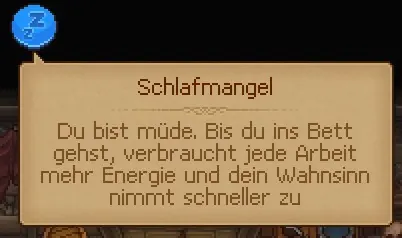
The tutorial says sleep helps against madness. In practice, sleeping only lowers madness when the keeper has the sleep deprivation status, shown by the blue icon, and not when he is merely low on energy.
Urns and the experiment table
Urns are crafted at the experiment table once you have researched them.
The experiment table research sits right next to the church candle research: look in the bottom row of the research group where the candle and the first candle holder for the church unlock, in the second slot. Finishing urns also needs the research that unlocks the urn hall for the graveyard.
The pre-order bathhouse
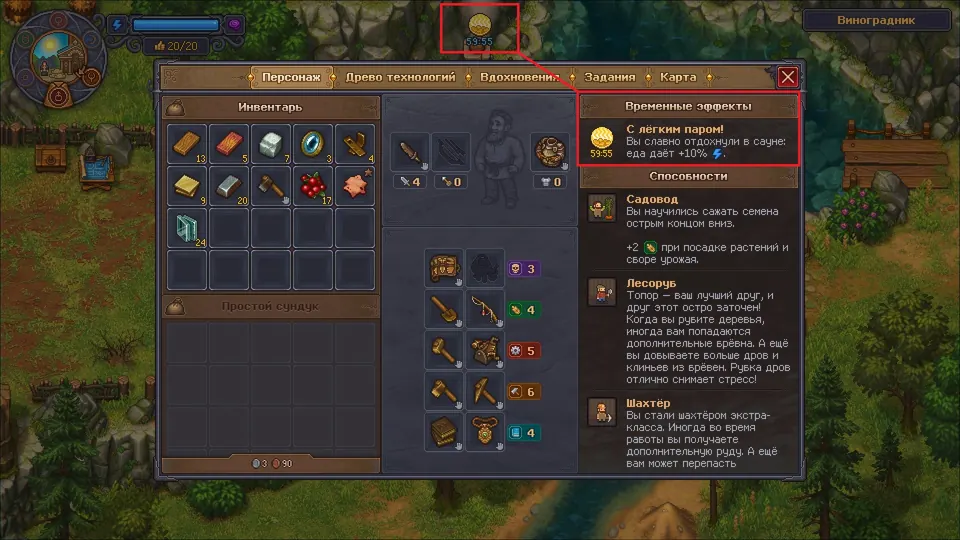
The bathhouse started as a pre-order bonus, and since a hotfix it should be available to everyone. It sits to the left of your base, over the bridge to the vineyards, and that bridge opens fairly early.
Using it gives a buff for one real-time hour: any food restores 10% more energy on top of its normal value. It is not a big effect, but it helps.
Where to find basic resources
| Resource | Where |
|---|---|
| Logs | Chop trees at first. A later quest opens the forest and the mine, and lets you build a lumberjack’s spot. The forest is to the left of the village |
| River sand | Left of the base and the garden, by the river. Follow it downstream |
| Clay | Below and to the right of the base. Leave your base through its fence and head straight down |
| Stone | Follow the path straight down from your base to a large stone deposit. It looks like a lump of brick, but it never runs out |
| Copper | A copper ore vein between the garden and the river. Smelting it needs tin, made from river sand in the sieve |
| Iron | Iron boulders near the base, in the forest and in the swamp. The quest mine has an endless iron vein that only zombies can work |
More Graveyard Keeper 2 guides
-
MechanicsGraveyard Keeper 2: Zombie Mechanics Guide
How zombies work in Graveyard Keeper 2, including talents, quality, speed, tech points, tools, skulls, collars, workstations, and practical roles.
Published September 23, 2026