BeaterCore Beginner Guide: Cars, Parts and Tips
In BeaterCore, an event only pays if you finish all of it. Your whole job is getting the car to the end of the event’s last race still running, then paying for what broke on the way.
The short version: check the track surfaces before you enter an event, keep a spare on the spare tire mount, and fill the trunk with spare brake parts, an air filter and spark plugs. Use every field repair to rotate worn tires and brakes. Most parts only start misbehaving below 50%, so a set at 60 to 70% is still worth racing on easier events. Buy smaller tires if you never reach top gear, and bigger ones for fast track days.
Your Car and How It Wears
Every engine belongs to one of four classes: 1400, 1600, 1800 and 2000. You start with the ZAM Zap, handed over when the tutorial ends. Besides the engine, each car has a transmission, suspension, a spare tire mount and a trunk.
The engine, transmission and suspension all lose condition as you race. How fast depends on your driving and on the surface. Off-road stages punish the suspension far more than asphalt does, while running flat out at high speed is what wears the engine and gearbox. Look at the courses in an event before you start it and plan for the car to last until the final race.
A few parts show no condition number at all and simply break: spark plugs, brake tubes and the emergency brake line. They are covered under Failure Parts below.
You can step out of the car whenever it is stopped. If something breaks mid-race, pulling onto the verge to swap the part yourself can be the only way to stay in. It is worth it: a DNF earns nothing, while third place still earns a little.
The Garage
The garage is your base between races and between cars. More garage slots are for sale: walk up to any of the other doors and a purchase prompt appears. Each new slot costs 500 more than the one before.
Every slot is cramped. Until you buy storage, spare parts and trophies end up in heaps on the floor. The decor on offer is shelves, tire hooks, posters and a rolling rack. All of it is cheap, and everything except the posters does a job. Once you own the rolling rack, you can wheel broken parts out to the dumpsters at the end of the driveway.
You can also drive your car out of the garage, either to reposition it or to try out a change.
Boris
Boris runs the garages and waits next to the first one with his own DAIWAI Materia beside him. Ask him to sponsor you and he lends you the Materia, which is the fallback if yours ever becomes undriveable. The deal costs 15% of your winnings, and repairs on his car come out of your money, so bring it back in one piece.
He also answers questions about looking after your car. You can challenge him to a one-on-one race. Beating him pays 3K and a trophy, once.
The Race Track
The Race Track is where you pick events. Drag the map around to browse them. Each event previews its courses and their layouts, and the early ones lean heavily on dirt and rally stages.
Finishing an event leaves a bronze, silver or gold medal beside its title card, showing your latest result. Events appear to be repeatable for their prize money, so an event you can finish on a tired car is worth remembering.
Events are sorted by engine class, and each title states what unlocks it. Some unlock without any announcement, so scan the map for new entries each time you come back.
You are paid only for completing the whole event. You can return to the hub and abandon at any point with no penalty. If you crash badly early in the first race, pull over, pick up any tire you lost, and head back to the hub to look at the damage.
Field repair
Between the races of an event you get a field repair session. Use it to check part conditions, rotate tires and brakes, and swap in spares from the trunk.
A tire left behind on a course is lost for good unless you stop and pick it up. That applies whether you had to fit the spare or crossed the line on three wheels, so save that kind of finish for the last race of an event.
The Autoshop
The autoshop sells replacement parts, tires, paint, decals and garage decor, and you will be back here constantly. Pavel is the one you deal with here, and he delivers every purchase and trophy to your garages after each visit.
The stock refreshes each time you rest or race, and between refreshes you get only what is on the shelves. Keep some money back and check tire sizes before you buy.
Pavel will also buy back parts that are still in perfect condition, which is meant for undoing a mistaken purchase. At the time of writing this did not work reliably and may be a bug.
Paint cans change your car’s colour and the cleaning kit keeps it looking fresh for a few race sessions. Liveries (decals) can be bought and applied too, and the scraper appears to be the tool for taking them off. All of this is cosmetic.
Pavel
After you win the 1400 National Rallycross, Pavel will sponsor you and lend you his LADSTER Novator. Once you own a 1600 class car you can race him for 5K and a trophy.
Tires and tire sizes
Tires are sold in sets of four, in several sizes and four types. A poster at the back of the shop explains how the tire labels are read.
| Tire | Best on | What to know |
|---|---|---|
| Street | Asphalt | The tires you start with. A middle ground that still copes with dirt and wet roads in the lower classes. |
| Off-road | Dirt and mud | Bite sooner and slide less than street tires on rally stages. Performance on wet asphalt is unclear. |
| Slicks | Dry asphalt | Grip faster and hold tighter lines than street tires, but lose grip in the rain. |
| Winter | Snow and ice | Grip drops steadily as they wear, and at 50% they feel like driving on ice. |
Size changes your gearing. A smaller tire shortens the final drive: the car accelerates harder and moves through the gears sooner, and top speed falls. A larger tire does the reverse, trading acceleration for top speed, and it also rides over rough ground better. If you never reach your last gear on the straights, fit smaller tires. Keep bigger ones for courses where you hit the redline often, such as track days.
Wider tires seem to add grip. Once you find a size you like, hang one of the worn ones on a tire hook in the garage so you remember what to buy on the next shop visit.
How tires wear depends on your driving. Sliding the tail around eats the rears, while hard braking into sharp asphalt corners eats the fronts. They also come off easily in contact, so avoid rubbing against other cars and obstacles if you have no spare. Rotate them at every field repair so you never lose steering to bald fronts.
Parts
Here is what each part does, grouped the way the car is. Anything marked as uncertain is still being worked out by players.
Engine parts
| Part | What it does | Wear and tips |
|---|---|---|
| Engine rebuild kit | Restores the engine’s overall condition. Sold per engine class. | Rarely needed if you keep the air filter and oil in good shape. A worn engine loses power and wears faster. |
| Air filter | Shields the engine. A dirty one makes everything else wear faster. | Wear follows RPM, so it clogs fastest on track events. Carry a spare for high speed racing. |
| Clutch | Connects the engine to the transmission. | A slipping clutch costs power and causes failed shifts. Keeping it above roughly 70% seems to avoid most of them. |
| Engine oil | Slows overall engine wear. | Keep it topped up or carry a spare jug. |
| Flywheel (stock, light, heavy) | Uncertain. It seems to set how quickly revs build. | A light flywheel appears to speed up acceleration a little at some cost to top speed. |
| Class upgrade | Appears to move your current car up to the next racing class. | Unconfirmed whether it can be undone or whether it bars you from the old class. |
Transmission parts
| Part | What it does | Wear and tips |
|---|---|---|
| Transmission bearings | Restore the gearbox’s overall condition. | A worn gearbox grinds, misses gears, can leave you stuck in neutral briefly, and wears the gears faster. |
| Gears (1 to 5, reverse) | One part per gear. | Each wears with use. Middle gears go first. Worn gears slip, whine and engage slowly. Rally shifting wears them all, and long track stints wear top gear. |
| Differential (open, closed) | Open lets the driven wheels turn at different speeds. Closed locks them together. | A closed differential makes the car slide much more readily, so fit one if you want to drift. Does not wear. |
Suspension parts
| Part | What it does | Wear and tips |
|---|---|---|
| Tires (street, off-road, slicks, winter) | Grip. | See Tires and tire sizes above. |
| Brakes | The brake pads that stop the car. | Braking in corners wears the fronts. The handbrake wears almost only the rears. Rotate them to suit how you drive. |
| Shock absorbers | Damping. | Worn shocks make the car bounce on dirt and lean more on asphalt. Smooth driving keeps even tired ones usable. |
| Wheel bearings | Let the wheels spin freely. | Badly worn bearings add rolling resistance. Wear follows wheel spin, so a rear wheel drive car spinning up in dirt wears the rears. Swap front and back at a field repair. A failed bearing can seize and lock the wheel. |
| Springs (stock, soft, stiff) | Control how the suspension rebounds. | Stiff springs keep the nose down and cut body roll on asphalt but bounce you around off-road. They do not wear, so buy a set and swap per event. |
Failure parts
These three parts have no condition number. They work until they suddenly do not.
| Part | When it fails | What to do |
|---|---|---|
| Spark plugs | A cylinder stops firing. You lose power mid-race, and the engine inspection shows the dead cylinder. | Check them at the field repair if the engine feels weak. A dead cylinder can start firing again, but that is a sign the plugs are wearing out, and worn plugs may add engine wear. Carry a spare set. |
| Brake tubes | Your brakes stop working until the tubes are replaced. | Carry a spare set. Use the handbrake to finish if you must. |
| Emergency brake line | The handbrake stops working. | Carry a spare. Without one, you have only the foot brake. |
The Used Car Dealership
Viktor runs the dealership. Talk to him to buy one of his cars, sell one of yours, read the details of what he has in stock, or ask for a test drive. You need an empty garage slot before you can buy.
His cars come in mixed shape, usually with worn engines and gearboxes and bald tires. Price rises with class, and rarer variants of some models turn up now and then. His stock is regenerated whenever you rest or race.
Test drives
Test drives start locked. To open them, take Viktor’s quest: a rival marked in red has to lose a tire in one of your future races. Other racers shed tires all the time, so visit him early and just race as normal. You do not need to knock the tire off yourself. After that, you can test any car on his lot on one of the road courses.
Car List and Stats
These are the cars known so far, with the stats listed for each. PWR is the listed power to weight ratio, and higher is usually better. Drive is RWD (rear wheel drive), FWD (front wheel drive) or AWD (all wheel drive).
1400 class
| Car | Drive | Horsepower | Weight | Trunk | PWR |
|---|---|---|---|---|---|
| ZAM Zap | RWD | 37 | 850 | 10 | 0.043 |
| Citrus 4WV | AWD | 37 | 600 | 10 | 0.063 |
| LADSTER Tura | FWD | 31 | 665 | 15 | 0.046 |
| DAIWAI Materia | FWD | 40 | 950 | 10 | 0.043 |
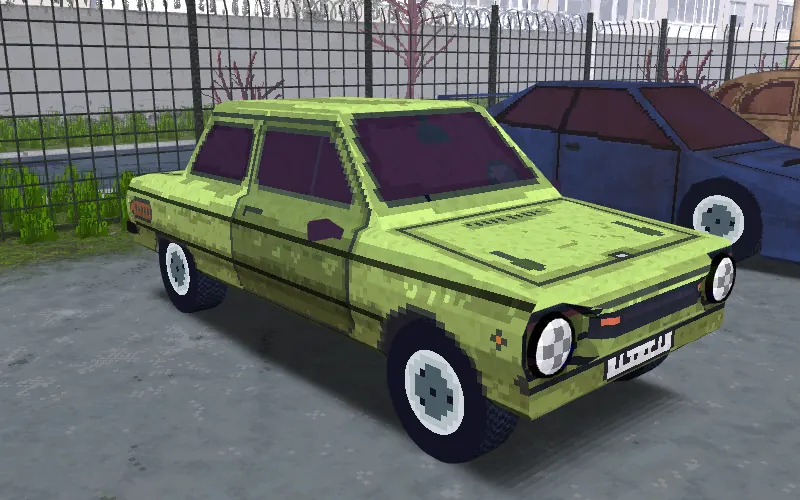
ZAM Zap: the car the tutorial hands you, and the only RWD car in the 1400 class.
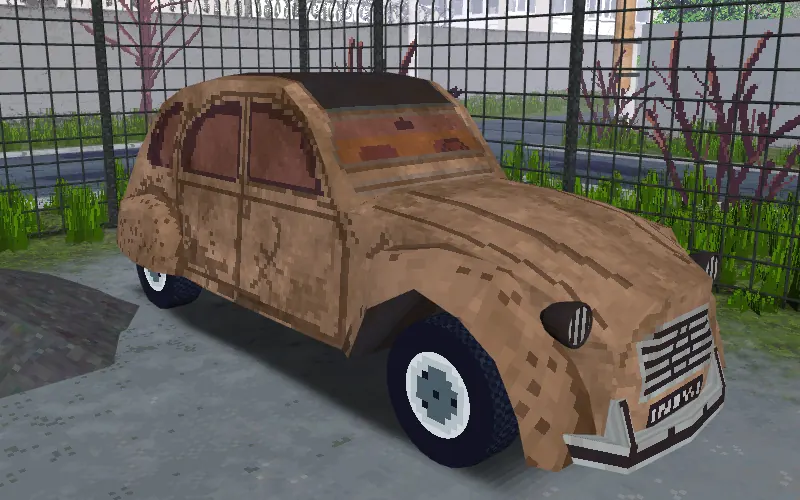
Citrus 4WV: the only AWD car in the 1400 class, and the lightest.
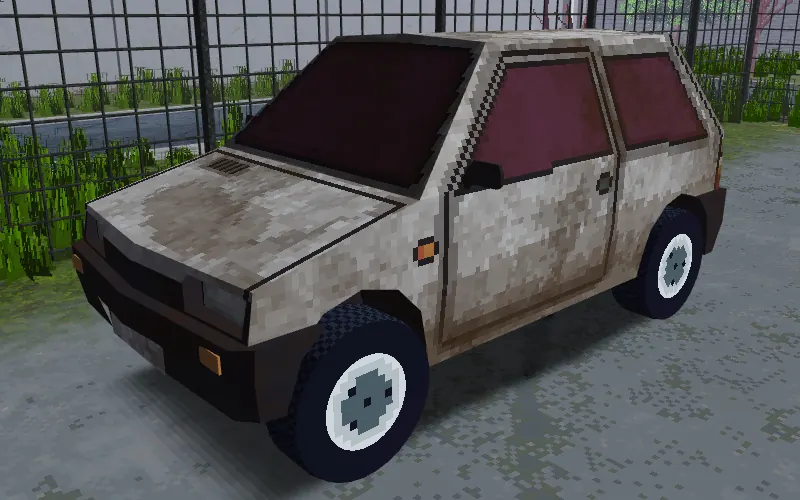
LADSTER Tura: the 1400 class car with the most trunk space.
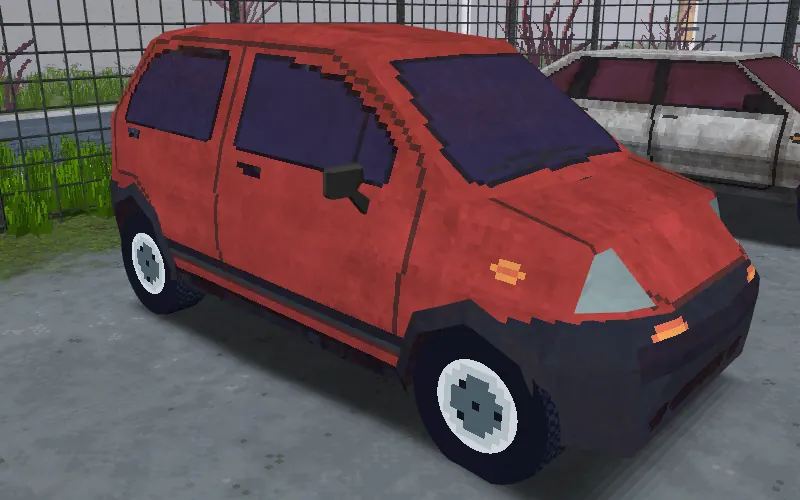
DAIWAI Materia: the 1400 class model Boris lends out when he sponsors you.
1600 class
| Car | Drive | Horsepower | Weight | Trunk | PWR |
|---|---|---|---|---|---|
| ZAM Lizard | RWD | 82 | 1200 | 10 | 0.068 |
| LADSTER Bureaucrat | RWD | 90 | 1500 | 10 | 0.060 |
| LADSTER Novator | AWD | 84 | 1300 | 15 | 0.065 |
| DAIWAI Sunlight | FWD | 73 | 850 | 10 | 0.087 |
ZAM Lizard: one of two RWD cars in the 1600 class.
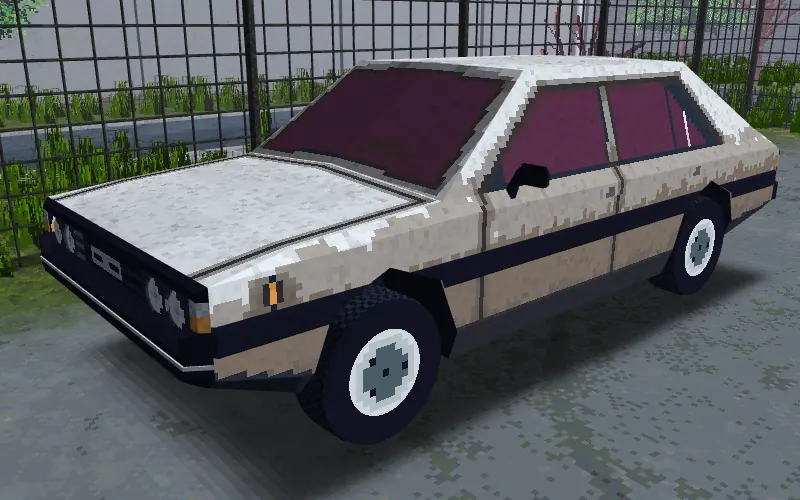
LADSTER Bureaucrat: the most powerful 1600 class car, and also the heaviest.
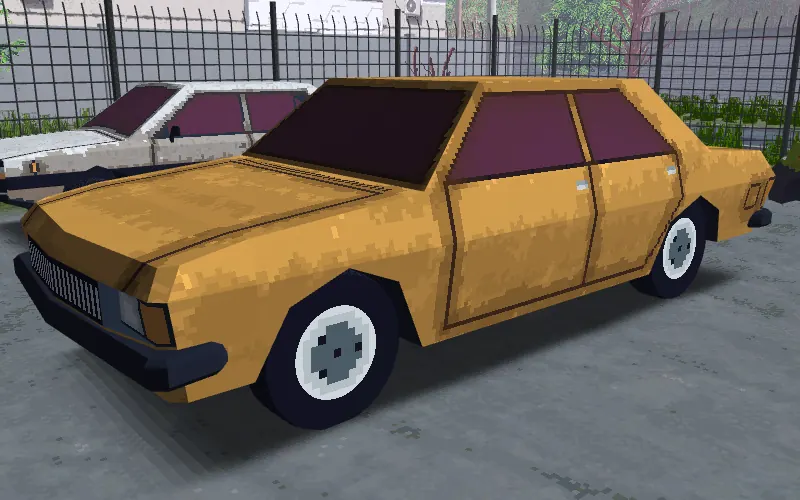
LADSTER Novator: the 1600 class model Pavel lends out, and the only AWD car in the class.
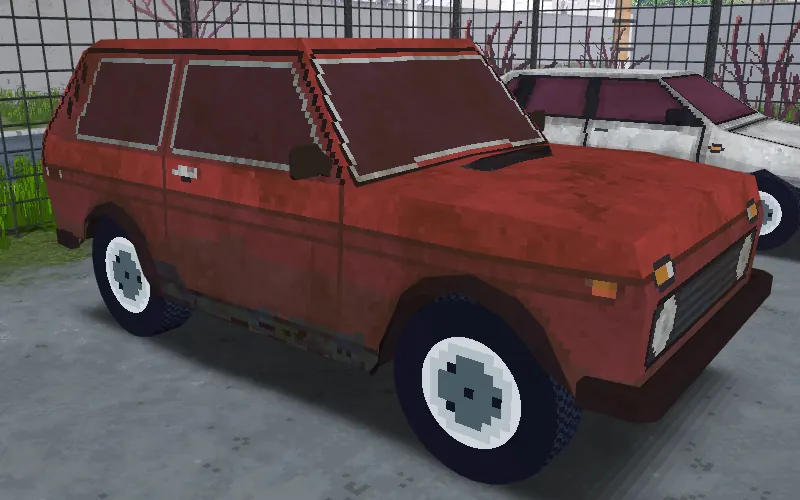
DAIWAI Sunlight: the only FWD car in the 1600 class, and the lightest by a wide margin.
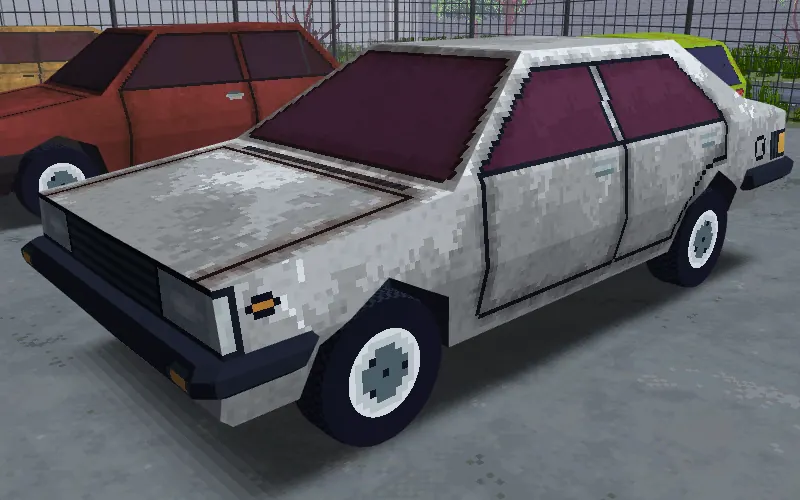
1800 class
| Car | Drive | Horsepower | Weight | Trunk | PWR |
|---|---|---|---|---|---|
| ZAM Arrow | FWD | 113 | 1300 | 10 | 0.086 |
| ZAM Arrow Wagon | FWD | 113 | 1400 | 20 | 0.080 |
| LADSTER Symphony | RWD | 105 | 1000 | 10 | 0.105 |
| LADSTER Symphony 4X4 | AWD | 99 | 1150 | 10 | 0.086 |
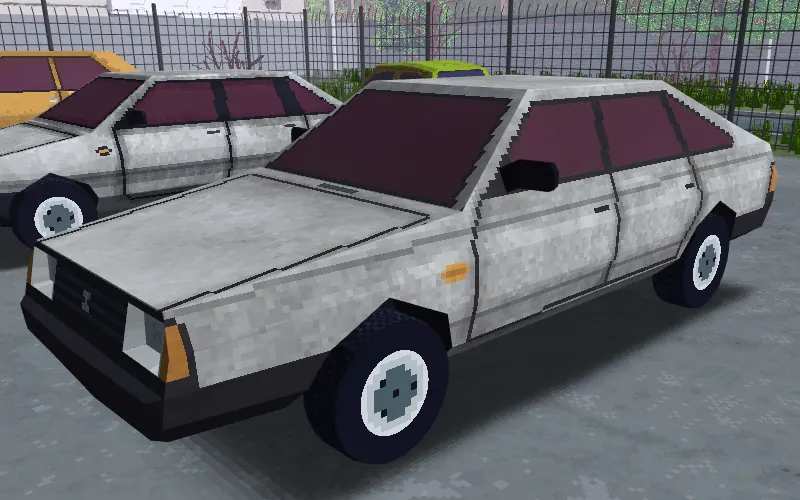
ZAM Arrow: the standard FWD body in the 1800 class, with less weight than the estate.
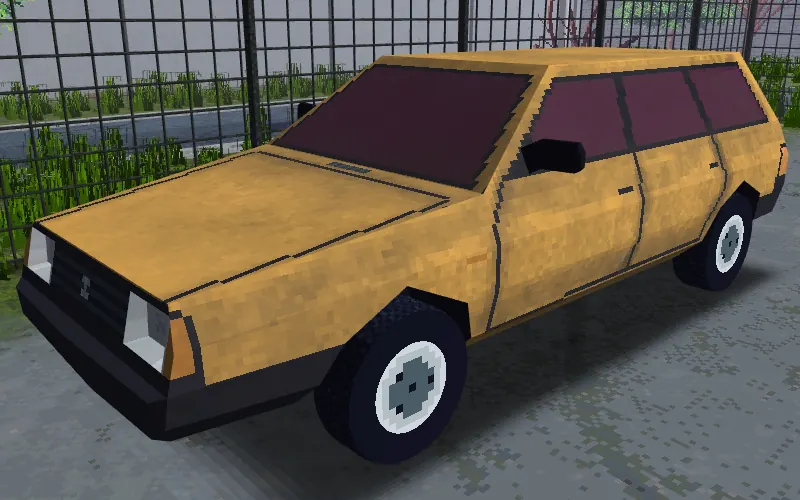
ZAM Arrow Wagon: the same 1800 class FWD car as an estate, with the biggest trunk of any car listed.
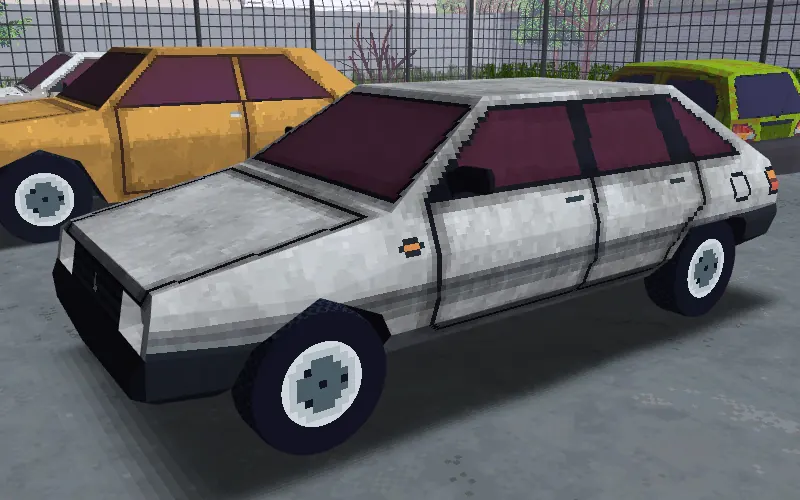
LADSTER Symphony: the only RWD car in the 1800 class, and the lightest of the four.
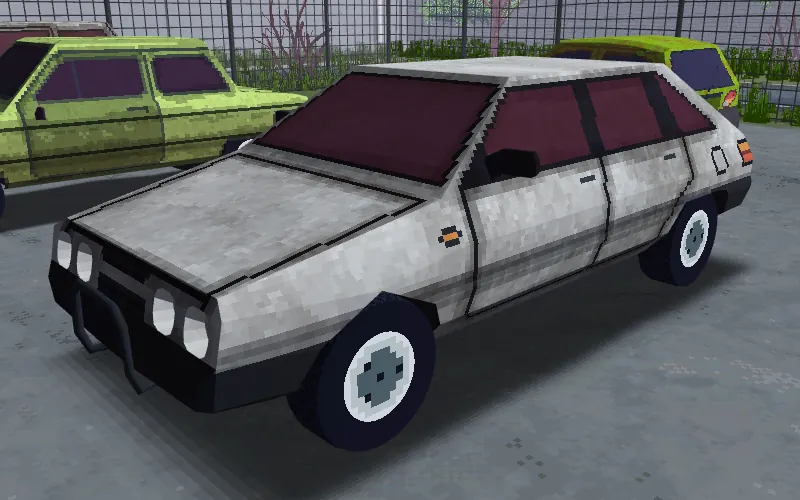
LADSTER Symphony 4X4: the AWD Symphony in the 1800 class, easy to spot by the four spotlights on its front bumper.
2000 class
| Car | Drive | Horsepower | Weight | Trunk | PWR |
|---|---|---|---|---|---|
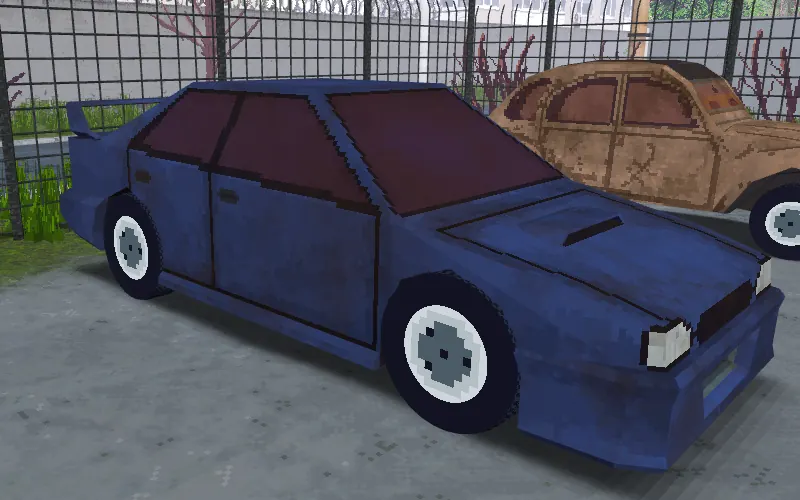
| DAIWAI Eternity | RWD | 164 | 1800 | 10 | 0.091 |
| Voxol Impression | AWD | 138 | 1800 | 10 | 0.077 |
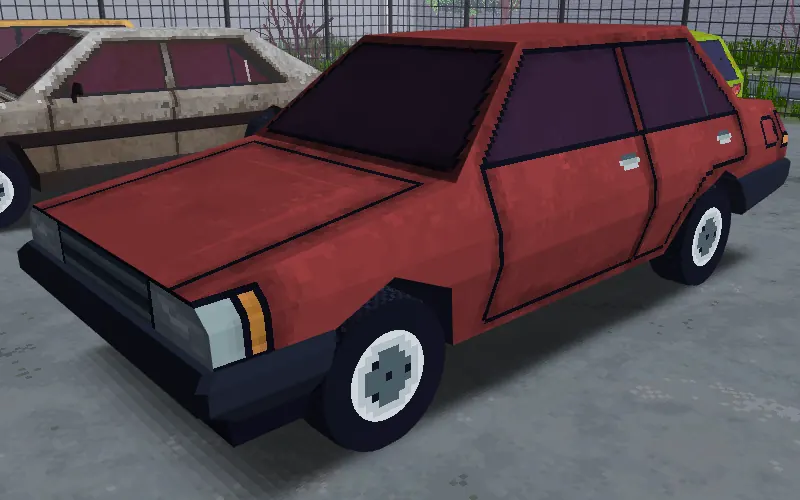
| DAIWAI Runner | FWD | 164 | 1100 | 10 | 0.149 |
DAIWAI Eternity: the only RWD car in the 2000 class, and tied for the most powerful engine listed.
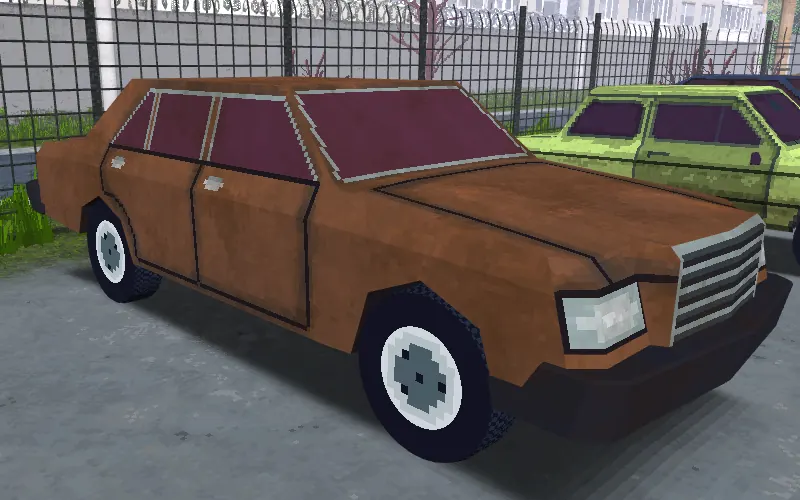
Voxol Impression: the only AWD car in the 2000 class.
DAIWAI Runner: the only FWD car in the 2000 class, and the best listed PWR of any car here.
Tips for Keeping Your Car Alive
- Buy fresh parts for a hard event, keep the old ones. New parts are expensive, but they can be the difference for a gold medal. Put the lightly worn originals back on when you go back to farm an event you know you can win.
- Replace the worse pair, not all four. Buying two brake pads or two wheel bearings for whichever axle is more worn is cheaper and safer than waiting until you can afford four.
- Learn how parts fail before it matters. When you already have the money for replacements, drive a familiar course on badly worn parts on purpose. It is better to find out what breaks there than on the last lap of an event you need.
- Use your part stock. Spare brakes, bearings or shocks at 60 to 70% are fine for easier events. Most parts do not really start failing until they drop below 50%.
- Fill the trunk. Spare brake parts and a second air filter to swap between races keep the car in much better shape.
- Fit the best tire to the front. Your spare does not need to stay at 100%. Put your healthiest tire on the front axle to fight understeer, and keep the most worn one as the spare.
- A mismatched tire beats no tire. If you have no spare at all, check the dumpster for an emergency tire before the event.
Racing Tips
- Keep your distance from rivals. The other drivers brake check and swerve into you. Avoid getting boxed in or spun, and draft close behind at your own risk.
- Build a big lead and drive clean. At the time of writing, rivals speed up to catch you when you lead. The further ahead you get, the more often they crash or flip trying.
- Grass, trees and checkpoints grab your wheels. Clipping the flat grass sprites, trees or checkpoint markers slows the car and tugs it toward them. That is normally bad, but it can help turn in on slippery tires or scrub speed when the brakes are gone.
Where to Grind Money
Track day events go easy on worn shock absorbers and pay well if you are quick on asphalt. For an off-road grind, try the snow championships: winter tires cost less than most, and the rival drivers there are usually much slower. It is worth finding a reliable earner in each engine class.
More BeaterCore guides
-
beginnerBeaterCore: Map Editor Guide
Learn how to use BeaterCore’s map editor, from terrain tools and scenery brushes to checkpoints, circuit paths, rally calls, and test drives.
Published September 23, 2026