Wand & Order: All Item Placements and Chest Keys
This page shows where every tarot card, wand and magical ingredient goes in Wand & Order: Tidy up the magic shop!, across all three maps, and where the key for each chest is hidden. Search the page for the name of the item in your hand. For an ingredient, the heading it sits under is its section. For a Minor Arcana card, search its suit. For a wand, search the last word of its name. Lists are as of the build current at the time of writing.
The short version: the packaging does most of the work. Tarot boxes are coloured by section, and gold or silver trim splits the Major Arcana into four groups. A wand’s last word decides its school and box colour, and its second word decides the trim: gold for Exotic, silver for Metal, bronze for Wood. Every ingredient label has a colour and an icon that match one of 20 sections spread over three floors. Only one chest is required, the one in Map 1, because it holds the magic that clears cobwebs.
Map 1: Tarot Cards
Map 1 is two rooms, one for the Major Arcana and one for the Minor Arcana. The map on the table shows which wall each group lives on, and within a section the order is up to you. Every card comes in six copies, and you can tell cards apart by the number in the name or the dots along the bottom of the face. Once everything is in place the counters read 78/78 card types and 468/468 cards.
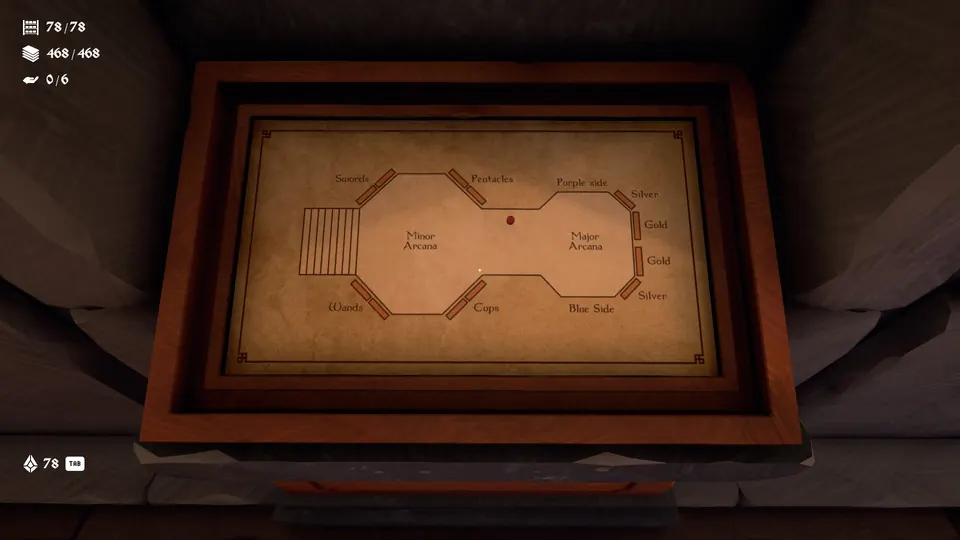
Major Arcana
Major Arcana boxes come in two colours. Blue boxes go to the Blue Side of the room and purple boxes to the Purple Side. Each side is then split by the trim on the box: one shelf for gold trim and one for silver.
Blue Side, gold trim, six cards:
- Strength
- The Chariot
- The Hermit
- The Hierophant
- The Lovers
- Wheel of Fortune
Blue Side, silver trim, five cards:
- The Emperor
- The Empress
- The Fool
- The High Priestess
- The Magician
Purple Side, gold trim, six cards:
- Judgement
- The Moon
- The Star
- The Sun
- The Tower
- The World
Purple Side, silver trim, five cards:
- Death
- Justice
- Temperance
- The Devil
- The Hanged Man
Minor Arcana
The four suits each have a box colour and their own section. On the table map, Swords and Pentacles share one long wall and Wands and Cups share the opposite one. Each suit has 14 ranks: Ace, Two to Ten, then Page, Knight, Queen and King. Any arrangement within a suit’s section works. Rank sequence is just the tidy choice: each shelf row has six slots, so Ace to Six fill the first row, Seven to Knight the second, and Queen and King follow.
| Suit | Box colour | Box icon | Wall on the map |
|---|---|---|---|
| Cups | Light blue | Goblet | Shared with Wands |
| Swords | Grey | Two crossed blades | Shared with Pentacles |
| Wands | Red | Curled sprout | Shared with Cups |
| Pentacles | Brown | Five-pointed star | Shared with Swords |
Map 1 Chest: Cobweb Magic
This chest is the one you cannot skip. It holds a potion that gives you the magic to clear cobwebs, and without it you can’t finish cleaning any map or move the story on. The chest itself sits in the Minor Arcana room.
Its key is in the Major Arcana room. Step through the entrance, turn right, and look on the floor behind the potted flower that stands beside the painting of a cat.
Map 2: Wands
All wands follow the same two rules, and both are printed on the box. The box colour gives the school of magic, and the trim gives the class. Inside the right section, it does not matter which slot each wand type takes. The table map shows three schools per floor.
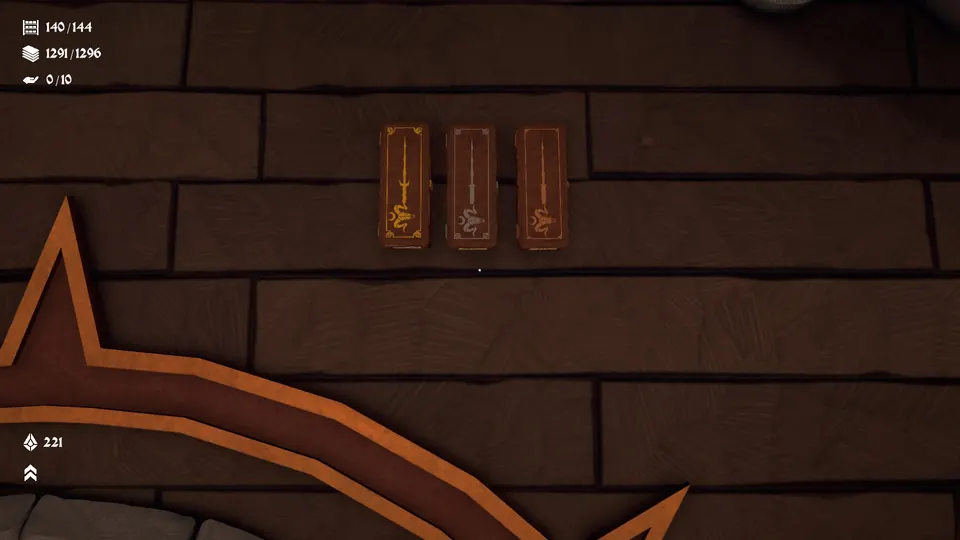
Which School a Wand Belongs To
Wand names follow one pattern: two descriptors, then “wand of”, then a school term. Only that final term differs between schools. Walls are as you come up the stairs onto each floor.
| Name ends in | School | Box colour | Floor | Wall |
|---|---|---|---|---|
| Shape, Shift, Transmute, Twist, Warp | Alteration | Grey | 1st | Left |
| Crypt, Death, Decay, Grave, Soul | Necromancy | Brown | 1st | Far |
| Mirage, Phantom, Shadow, Shroud, Veil | Illusion | Dark blue | 1st | Right |
| Cure, Heal, Relief, Remedy, Restore | Restoration | Light blue | 2nd | Left |
| Blaze, Ember, Flame, Inferno, Pyre | Destruction | Red | 2nd | Far |
| Calling, Gate, Portal, Rift, Summon | Conjuration | Purple | 2nd | Right |
Exotic, Metal and Wood Wands
Each school’s section is split three ways by trim, running from left to right: gold for Exotic, silver for Metal, bronze for Wood. The material in a wand’s name tells you which. Every wand type comes in nine copies, numbered No.1 to No.9 on the box end, and the nine fill a three by three block of slots. The number also shows after the name when you look at a wand.
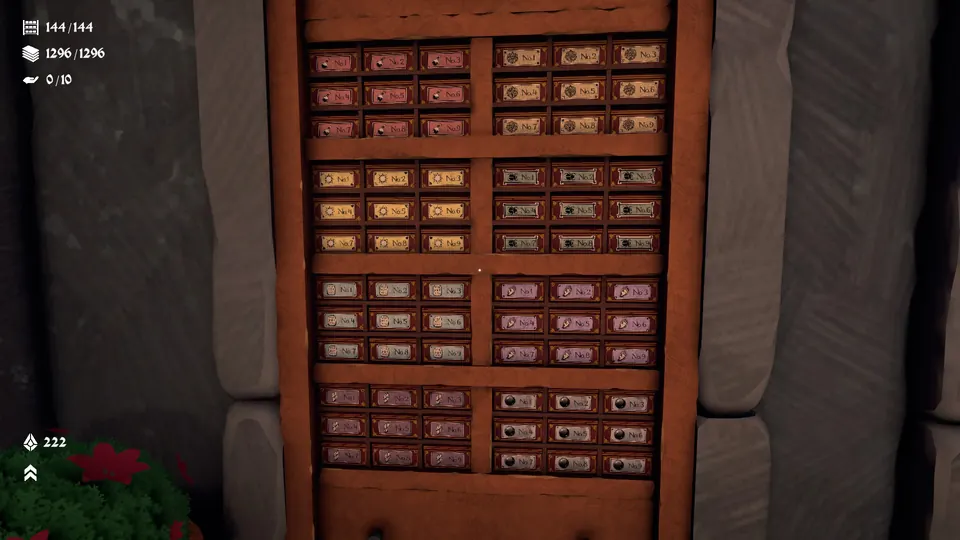
| Class | Trim | Materials | Wands (first two words) |
|---|---|---|---|
| Exotic | Gold | Antler, Chitin, Fossil, Ivory | Ancient Fossil, Cracked Chitin, Haunted Ivory, Ornate Antler, Polished Fossil, Radiant Antler, Runic Chitin, Volatile Ivory |
| Metal | Silver | Brass, Copper, Iron, Silver | Ancient Iron, Cracked Brass, Haunted Silver, Ornate Copper, Polished Iron, Radiant Copper, Runic Brass, Volatile Silver |
| Wood | Bronze | Birch, Elder, Oak, Pine | Ancient Elder, Cracked Birch, Haunted Oak, Ornate Pine, Polished Elder, Radiant Pine, Runic Birch, Volatile Oak |
So a Haunted Oak wand of Mirage is Illusion, bronze trim: right wall of the 1st floor, in the bronze section. Check the ending first, then the material, and you have the exact shelf.
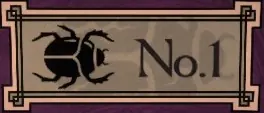
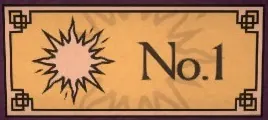
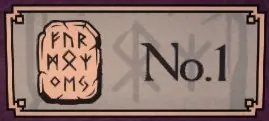
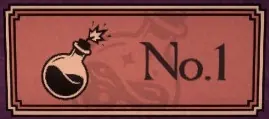
Beside the number, each first word has its own stamp: Ancient, Cracked, Haunted, Ornate, Polished, Radiant, Runic, Volatile.
Map 2 Chests: Double Jump and Carry Capacity
Map 2 has two chests, and you can only reach the second after opening the first. Exactly where the first chest stands isn’t recorded here, so every direction below starts from it: stand at the first chest, facing it. The first gives a double jump potion. Its lid shows a window with curtains, which starts a short puzzle.
Facing the first chest, the curtained window you want is on your right. On the wall beside that window is a small carving of a bust. It is a clue, not the thing you are looking for.
The carving points to a bust statue, the only one in the whole map. It stands to the left of the staircase in the 1st floor shelf area. Push the statue aside and the key is underneath.
The second chest sits above the first, in a niche just under the ceiling. For its key, face the first chest again and head to the far left corner of that room, where a small table with two chairs stands between two curtained windows. The key is on the table. From there, turn back and double jump up into the niche. The potion inside raises how much you can carry to 10 items.
Map 3: Magical Ingredients
Map 3 is where a reference helps most: 20 sections of ten ingredients each, 200 in all across three floors. Walls are given as left, centre (the far wall) and right, as you walk into each side from the stairs. On the 1st floor, a Moon Side and a Sun Side sit either side of the central stairs, with three sections on each. The 2nd floor has six sections per side, two per wall. The 3rd floor is one long hall, with an Abyssal section at one end and a Divine section at the other, marked on both the Moon Side and the Sun Side. Every label has a colour and an icon, listed under each section below. Half of the sections mix six boxes with four glass vials, and the vials go in the same section as the boxes.
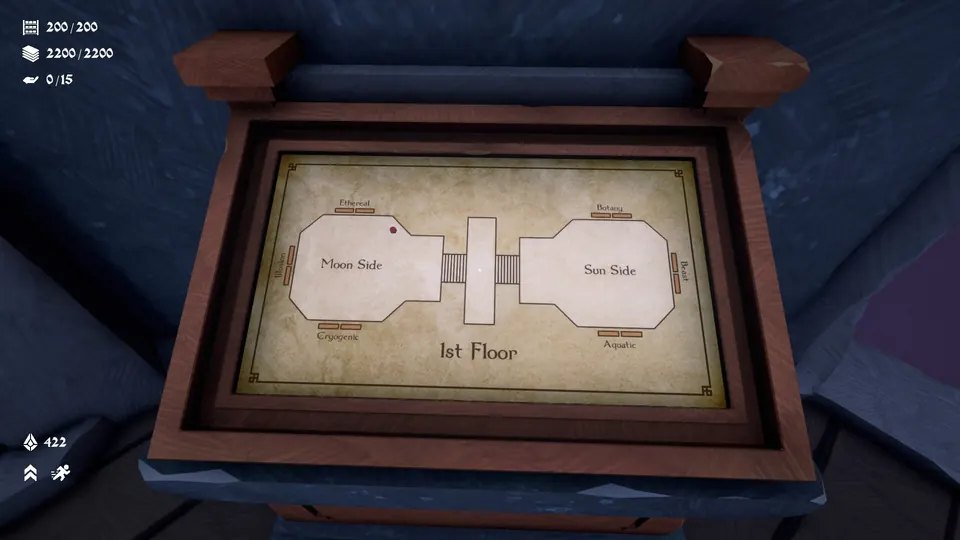
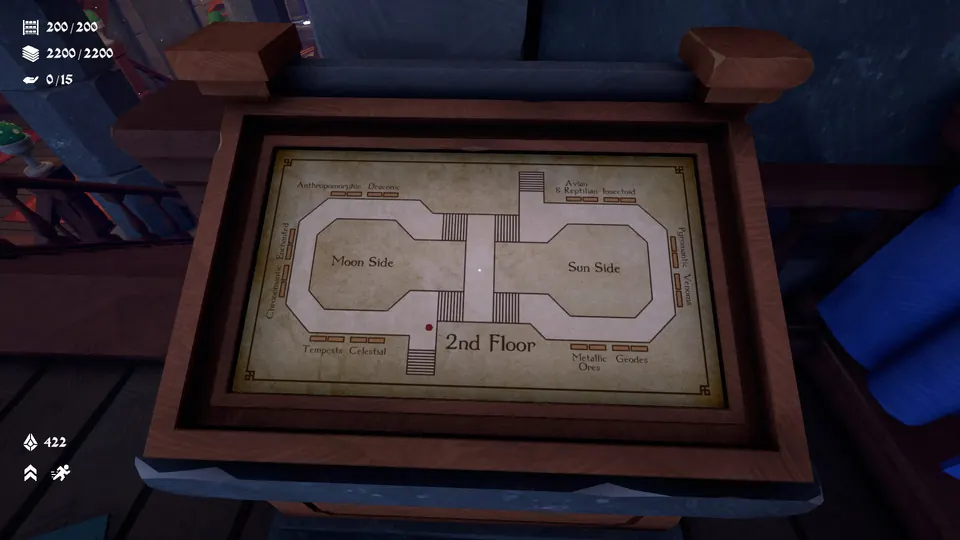
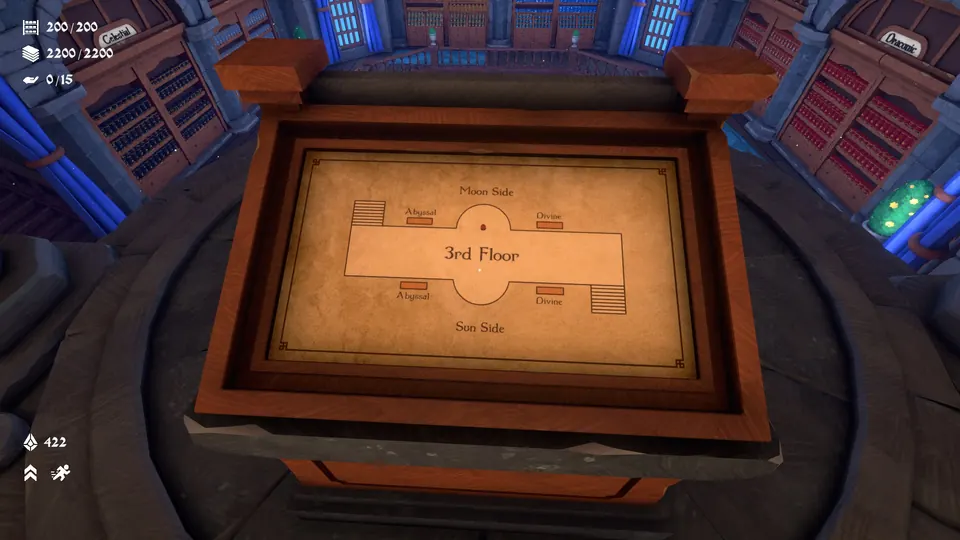
Several label colours repeat (two greens, two navies, two oranges, two creams), so check the icon too.
| Section | Label colour | Icon | Floor | Side | Wall | Contents |
|---|---|---|---|---|---|---|
| Ethereal | Dark purple | Pale lavender flame | 1st | Moon | Right | 6 boxes, 4 vials |
| Illusion | Purple | Magenta eye and crescent moon | 1st | Moon | Centre | 10 boxes |
| Cryogenic | Steel blue | Cream snowflake | 1st | Moon | Left | 6 boxes, 4 vials |
| Botany | Dark green | Copper leaf | 1st | Sun | Left | 6 boxes, 4 vials |
| Beast | Dark brown | Fanged jaws | 1st | Sun | Centre | 10 boxes |
| Aquatic | Dark teal | Copper water drop over waves | 1st | Sun | Right | 6 boxes, 4 vials |
| Draconic | Red | Cream dragon’s head | 2nd | Moon | Right | 10 boxes |
| Anthropomorphic | Orange | White stitched doll’s face | 2nd | Moon | Right | 10 boxes |
| Enchanted | Bright blue | Cream potion flask | 2nd | Moon | Centre | 6 boxes, 4 vials |
| Chronomantic | Cream | Red-orange hourglass | 2nd | Moon | Centre | 6 boxes, 4 vials |
| Tempests | Grey-blue | Orange storm cloud and lightning bolt | 2nd | Moon | Left | 10 boxes |
| Celestial | Navy | Orange ringed star | 2nd | Moon | Left | 10 boxes |
| Avian & Reptilian | Dark red | Brown feather | 2nd | Sun | Left | 10 boxes |
| Insectoid | Green | Yellow-green beetle | 2nd | Sun | Left | 10 boxes |
| Pyromantic | Orange | Red flame | 2nd | Sun | Centre | 6 boxes, 4 vials |
| Venoms | Green | Yellow skull and crossbones | 2nd | Sun | Centre | 6 boxes, 4 vials |
| Geodes | Slate blue | Copper crystal | 2nd | Sun | Right | 10 boxes |
| Metallic Ores | Grey-brown | Red stacked ingots | 2nd | Sun | Right | 10 boxes |
| Abyssal | Navy with red trim | Horned red skull | 3rd | Both | End by the Moon Side stairs | 6 boxes, 4 vials |
| Divine | Cream | Gold wings under a halo | 3rd | Both | End by the Sun Side stairs | 6 boxes, 4 vials |
Ethereal
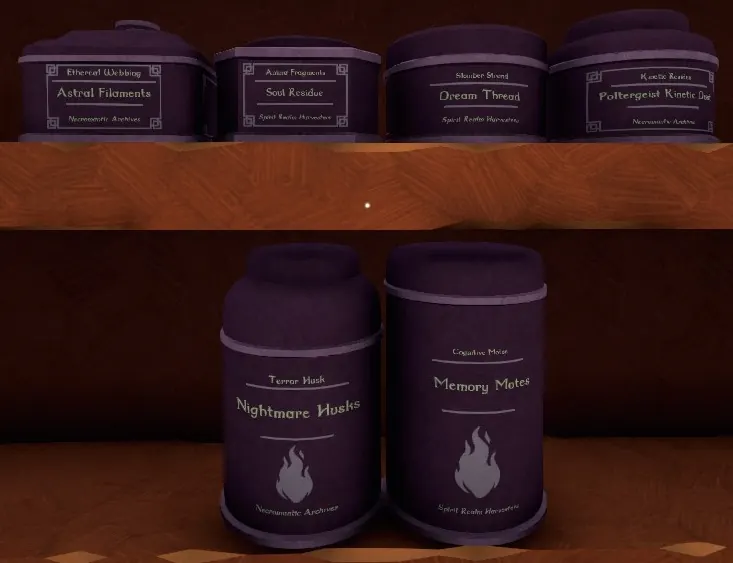
1st floor, Moon Side, right wall. Dark purple labels with a pale lavender flame. The six boxes:
- Astral Filaments
- Dream Thread
- Memory Motes
- Nightmare Husks
- Poltergeist Kinetic Dust
- Soul Residue
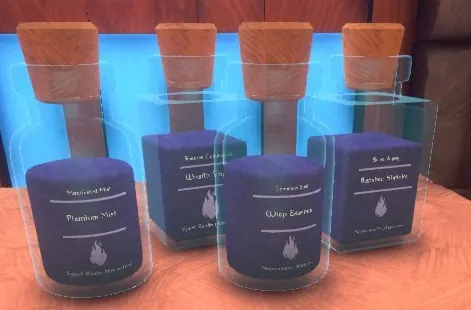
The four vials:
- Banshee Shrieks (square bottle)
- Wraith Vapor (square bottle)
- Phantom Mist (round bottle)
- Wisp Essence (round bottle)
Illusion
1st floor, Moon Side, centre wall. Purple labels with a magenta eye and crescent moon. All ten are boxes.
- Eclipse Petals
- Gloom Shards
- Mirage Dust
- Mirror Shatters
- Obscurity Mist
- Phantom Petals
- Shadow Threads
- Twilight Residue
- Umbral Ink
- Veil Fabric
Cryogenic
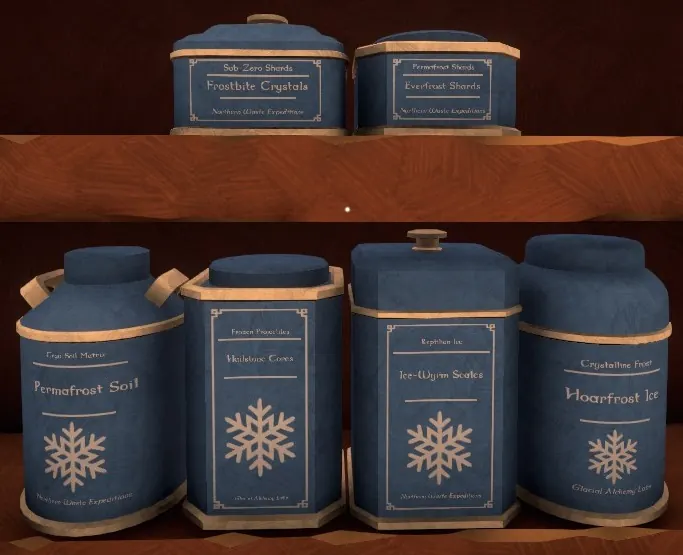
1st floor, Moon Side, left wall. Steel blue labels with a cream snowflake. The six boxes:
- Everfrost Shards
- Frostbite Crystals
- Hailstone Cores
- Hoarfrost Ice
- Ice-Wyrm Scales
- Permafrost Soil
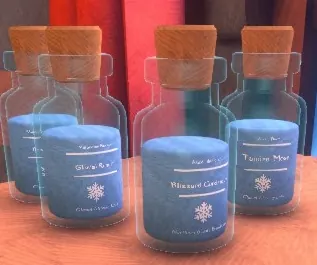
The four vials:
- Blizzard Condensate (round bottle)
- Borealis Dust (round bottle)
- Glacial Runoff (round bottle)
- Tundra Moss (round bottle)
Botany
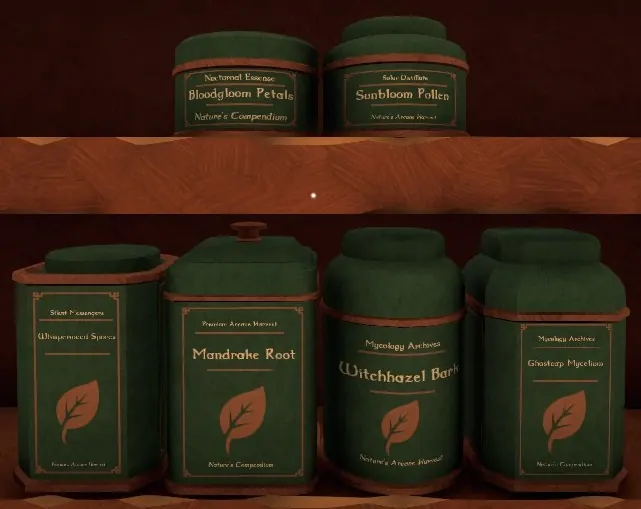
1st floor, Sun Side, left wall. Dark green labels with a copper leaf. The six boxes:
- Bloodgloom Petals
- Ghostcap Mycelium
- Mandrake Root
- Sunbloom Pollen
- Whisperweed Spores
- Witchhazel Bark
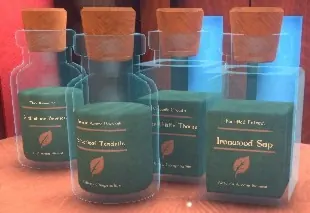
The four vials:
- Cinderthistle Thorns (square bottle)
- Ironwood Sap (square bottle)
- Nightshade Berries (round bottle)
- Silverleaf Tendrils (round bottle)
Beast
1st floor, Sun Side, centre wall. Dark brown labels with fanged jaws. All ten are boxes.
- Bearclaw Powder
- Boar Bristles
- Chimeran Mane
- Direwolf Fangs
- Gryphon Talons
- Jackalope Antlers
- Minotaur Hoof Dust
- Shadowcat Whiskers
- Stagheart Sinew
- Unicorn Horn Shavings
Aquatic
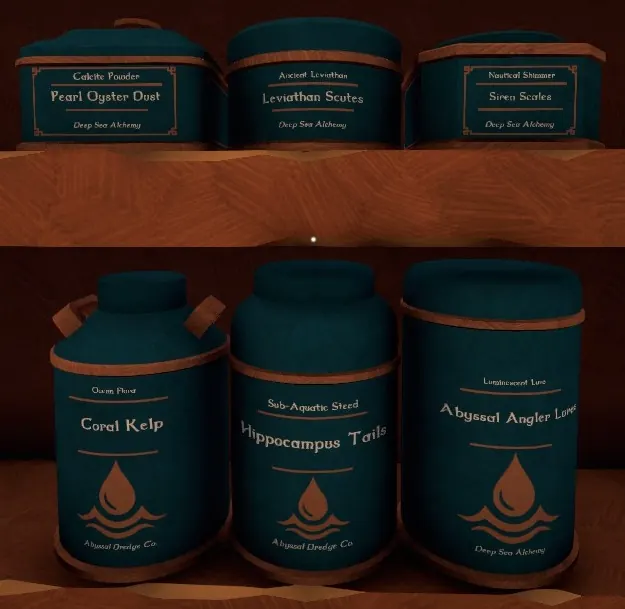
1st floor, Sun Side, right wall. Dark teal labels with a copper water drop over waves. The six boxes:
- Abyssal Angler Lures
- Coral Kelp
- Hippocampus Tails
- Leviathan Scutes
- Pearl Oyster Dust
- Siren Scales
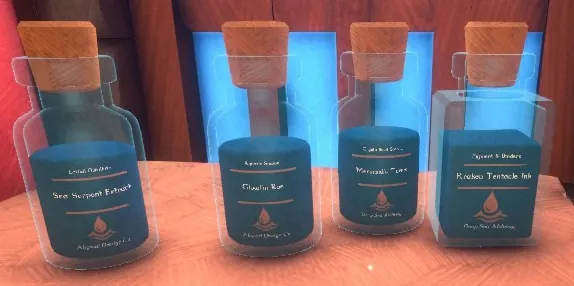
The four vials:
- Kraken Tentacle Ink (square bottle)
- Glowfin Roe (round bottle)
- Mermaid’s Tears (round bottle)
- Sea Serpent Extract (round bottle)
Draconic
2nd floor, Moon Side, right wall. Red labels with a cream dragon’s head. All ten are boxes.
- Dragon Bone Meal
- Dragon Breath Vapor
- Dragon Claw Shavings
- Dragon Horn Tips
- Dragon Scales
- Drake Blood
- Drake Hide Scraps
- Drake Sinew
- Wyrm Bile
- Wyrm Teeth
Anthropomorphic
2nd floor, Moon Side, right wall, next to Draconic. Orange labels with a white stitched doll’s face. All ten are boxes.
- Clay Homunculus Limbs
- Clockwork Spring-Dust
- Gargoyle Stone Chips
- Golem Core Fragments
- Living Doll Glass Eyes
- Mandrake Sprouts
- Mimic Wood Splinters
- Scarecrow Straw
- Stitch-Thread Twine
- Wax Figure Shavings
Enchanted
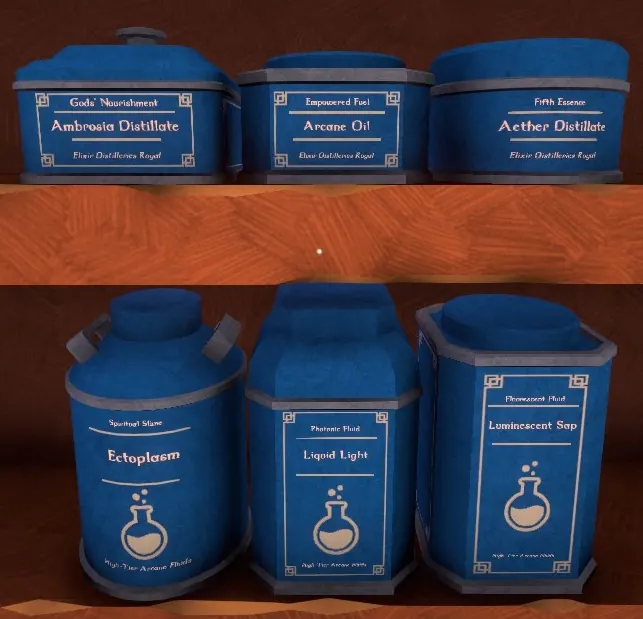
2nd floor, Moon Side, centre wall. Bright blue labels with a cream potion flask. The six boxes:
- Aether Distillate
- Ambrosia Distillate
- Arcane Oil
- Ectoplasm
- Liquid Light
- Luminescent Sap
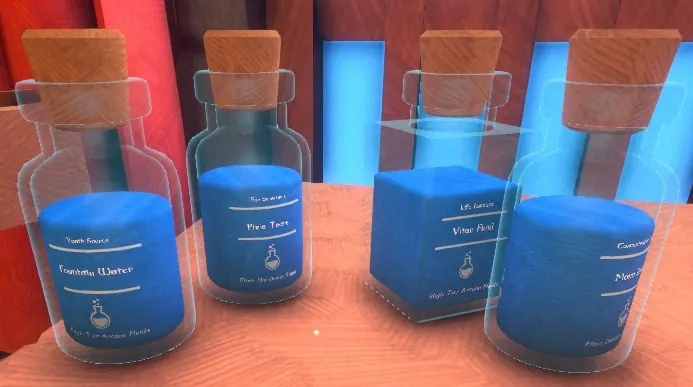
The four vials:
- Vitae Fluid (square bottle)
- Fountain Water (round bottle)
- Mana Drops (round bottle)
- Pixie Tears (round bottle)
Chronomantic
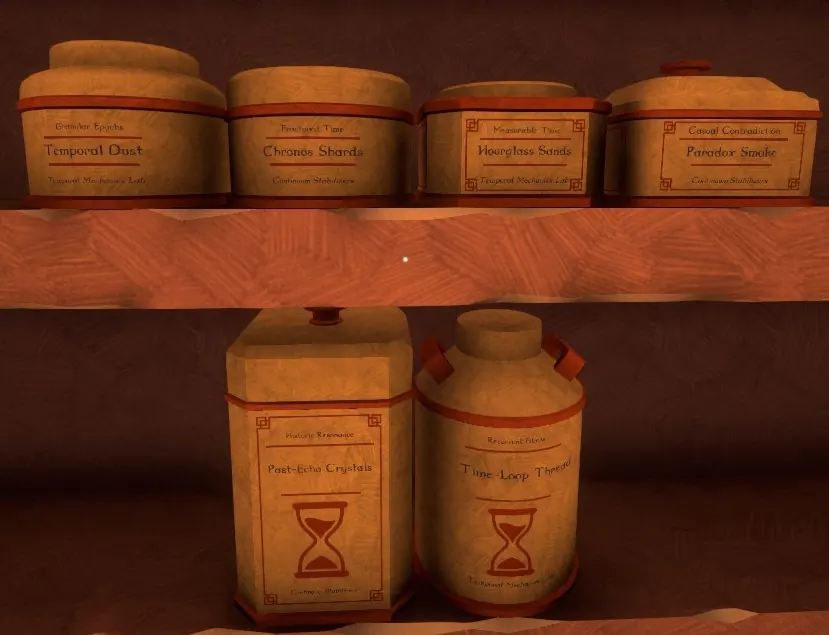
2nd floor, Moon Side, centre wall, next to Enchanted. Cream labels with a red-orange hourglass. The six boxes:
- Chronos Shards
- Hourglass Sands
- Paradox Smoke
- Past-Echo Crystals
- Temporal Dust
- Time-Loop Thread
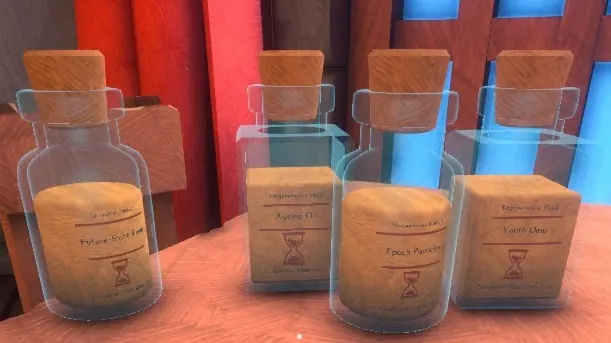
The four vials:
- Ageing Oil (square bottle)
- Youth Dew (square bottle)
- Epoch Particles (round bottle)
- Future-Sight Resin (round bottle)
Tempests
2nd floor, Moon Side, left wall. Grey-blue labels with an orange storm cloud and lightning bolt. All ten are boxes.
- Gale-Force Wind
- Hurricane Eye Dust
- Lightning Striking-Stone
- Ozone Vapor
- Rainstone Shards
- Static Charge
- Stormcloud Condensed
- Tempest Sparks
- Thunderclap Resonance
- Tornado Funnel Shreds
Celestial
2nd floor, Moon Side, left wall, next to Tempests. Navy labels with an orange ringed star. All ten are boxes.
- Astral Dust
- Comet Ice
- Eclipse Residue
- Lunar Amber
- Meteorite Crust
- Nebula Vapor
- Solar Flare Shards
- Stardust Particles
- Void Plasma
- Zodiac Stones
Avian & Reptilian
2nd floor, Sun Side, left wall. Dark red labels with a brown feather. All ten are boxes.
- Basilisk Scales
- Chameleon Skin
- Cockatrice Eggshells
- Harpy Down
- Hydra Fangs
- Phoenix Feathers
- Raven Quills
- Thunderbird Beaks
- Viper Fangs
- Wyvern Talons
Insectoid
2nd floor, Sun Side, left wall, next to Avian & Reptilian. Green labels with a yellow-green beetle. All ten are boxes.
- Beetle Carapace
- Centipede Mandibles
- Cicada Shells
- Firefly Phosphor
- Grub Slime
- Locust Swarm Wings
- Moth Wing Dust
- Scorpion Carapace
- Spider Silk
- Wasp Singer Powder
If you’re looking for Wasp Stinger Powder, it’s here: the label reads Wasp Singer Powder.
Pyromantic
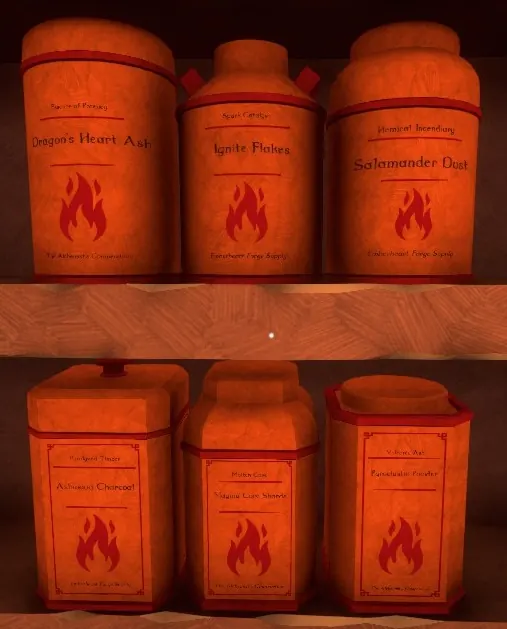
2nd floor, Sun Side, centre wall. Orange labels with a red flame. The six boxes:
- Ashwood Charcoal
- Dragon’s Heart Ash
- Ignite Flakes
- Magma Core Shards
- Pyroclastic Powder
- Salamander Dust
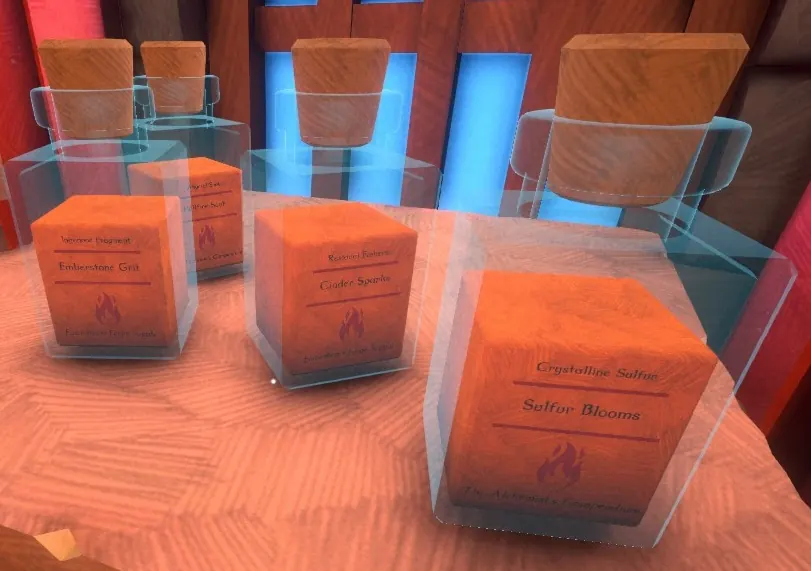
The four vials:
- Cinder Sparks
- Emberstone Grit
- Hellfire Soot
- Sulfur Blooms
Venoms
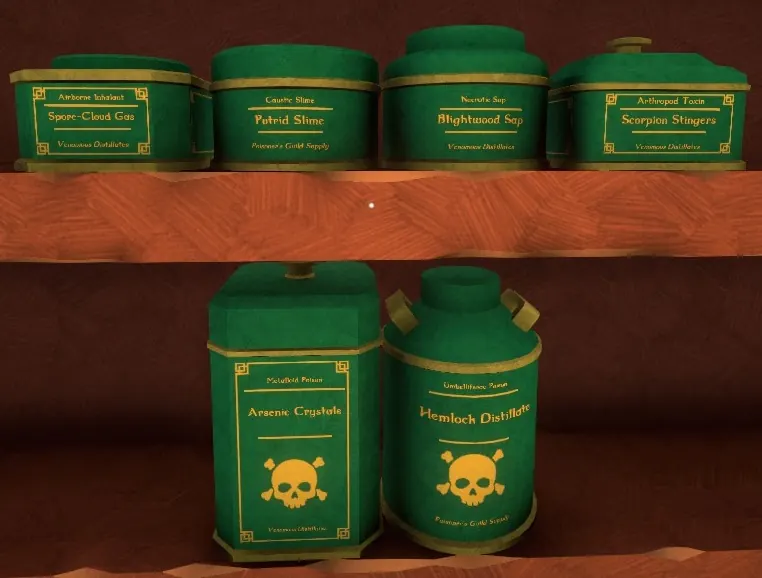
2nd floor, Sun Side, centre wall, next to Pyromantic. Green labels with a yellow skull and crossbones. The six boxes:
- Arsenic Crystals
- Blightwood Sap
- Hemlock Distillate
- Putrid Slime
- Scorpion Stingers
- Spore-Cloud Gas
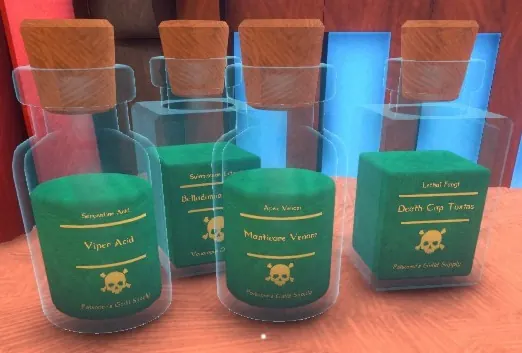
The four vials:
- Belladonna Extract (square bottle)
- Death Cap Toxins (square bottle)
- Manticore Venom (round bottle)
- Viper Acid (round bottle)
Geodes
2nd floor, Sun Side, right wall. Slate blue labels with a copper crystal. All ten are boxes.
- Bloodstone Gems
- Brimstone Crystals
- Lapis Dust
- Lodestone Chips
- Malachite Powder
- Obsidian Shards
- Quartz Geodes
- Quicksilver Ore
- Sunstone Fragments
- Voidsalt
Metallic Ores
2nd floor, Sun Side, right wall, next to Geodes. Grey-brown labels with red stacked ingots. All ten are boxes.
- Adamantite Dust
- Brass Gears
- Cold Iron Shavings
- Copper Verdigris
- Electrum Wire
- Fool’s Gold
- Mithril Filings
- Orichalcum Ingots
- Quicksilver Droplets
- Star-Metal Slag
Abyssal
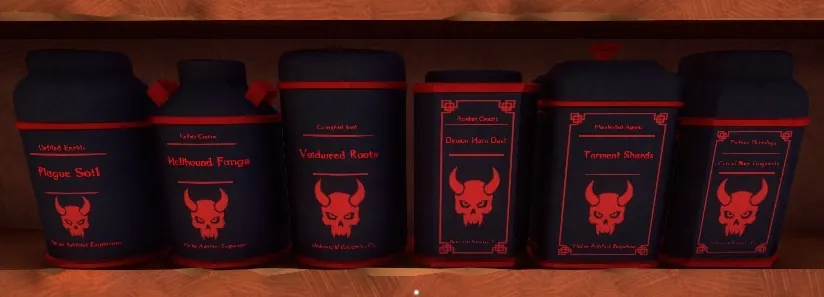
3rd floor, Abyssal section, at the end of the hall by the Moon Side staircase on the table map. The map marks it on both the Moon Side and the Sun Side. Navy labels with red trim and a horned red skull. The six boxes:
- Cursed Bone Fragments
- Demon Horn Dust
- Hellhound Fangs
- Plague Soil
- Torment Shards
- Voidweed Roots
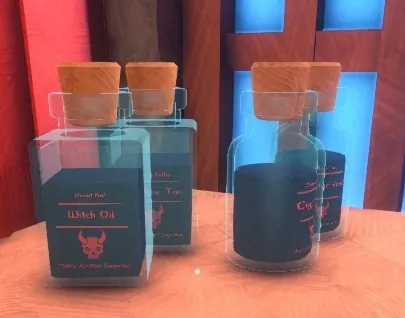
The four vials:
- Brimstone Tar (square bottle)
- Witch Oil (square bottle)
- Crypt Dust (round bottle)
- Malevolent Vapor (round bottle)
Divine
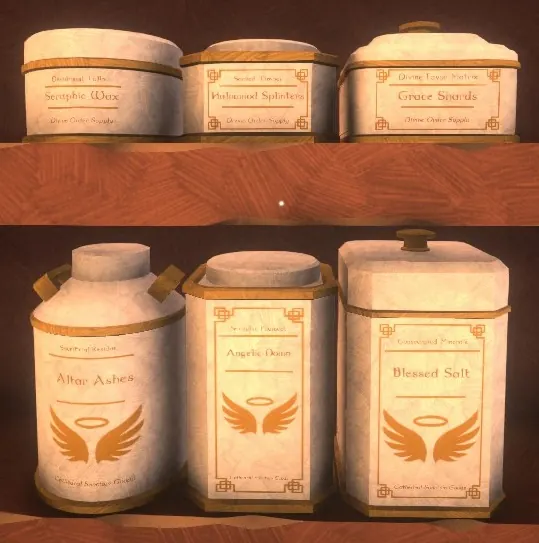
3rd floor, Divine section, at the end of the hall by the Sun Side staircase on the table map. The map marks it on both the Moon Side and the Sun Side. Cream labels with gold wings under a halo. The six boxes:
- Altar Ashes
- Angelic Down
- Blessed Salt
- Grace Shards
- Halowood Splinters
- Seraphic Wax
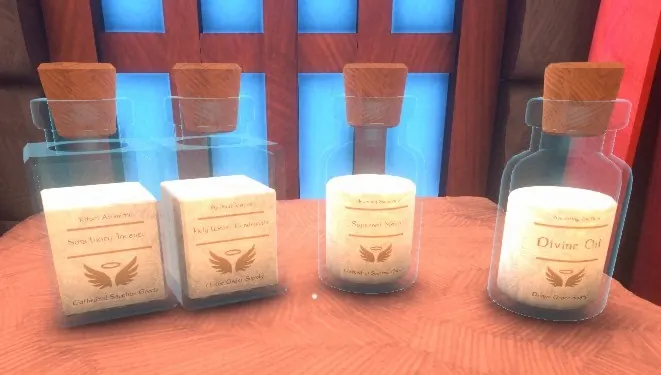
The four vials:
- Holy Water Condensate (square bottle)
- Sanctuary Incense (square bottle)
- Divine Oil (round bottle)
- Supernal Mana (round bottle)
Ingredient Names That Look Alike
A few ingredients share a word with another section’s name or items. Watch these.
| Ingredient | Section | Not to be confused with | Section |
|---|---|---|---|
| Abyssal Angler Lures | Aquatic | The Abyssal section itself | Abyssal |
| Astral Filaments | Ethereal | Astral Dust | Celestial |
| Phantom Mist | Ethereal | Phantom Petals | Illusion |
| Eclipse Petals | Illusion | Eclipse Residue | Celestial |
| Ice-Wyrm Scales | Cryogenic | Wyrm Bile, Wyrm Teeth | Draconic |
| Mandrake Root | Botany | Mandrake Sprouts | Anthropomorphic |
| Void Plasma | Celestial | Voidsalt | Geodes |
| Voidweed Roots | Abyssal | Void Plasma, Voidsalt | Celestial, Geodes |
| Viper Fangs | Avian & Reptilian | Viper Acid | Venoms |
| Scorpion Carapace | Insectoid | Scorpion Stingers | Venoms |
| Quicksilver Ore | Geodes | Quicksilver Droplets | Metallic Ores |
| Brimstone Crystals | Geodes | Brimstone Tar | Abyssal |
| Dragon’s Heart Ash | Pyromantic | Dragon Scales and the other dragon parts | Draconic |
Map 3 Chests: Purple and Green
Both Map 3 chests are on the 3rd floor. The purple chest has a candelabra symbol on the front, and that starts a chain of clues that ends at its key.
The matching candelabra stands to the right of the chest, on the stairs between the 2nd and 3rd floors. In the corner there, a fountain symbol is carved into the wall.
Map 3 has four fountains. Check each one, and one of them carries a small dog symbol.
The dog points to a crooked painting of a dog on the 1st floor. It hangs above a desk with an open book, opposite the storage cupboard, and you may already have passed it while cleaning. Straighten the painting and the purple key drops out onto the desk.
Inside the purple chest’s lid is a second symbol, the start of the last puzzle. You can skip it: that puzzle only leads to the green chest’s key, and the key is simply lying on a table on the 3rd floor, where you may well pick it up while tidying.