Rivage: Complete Walkthrough and Both Endings
This walkthrough takes you through all seven parts of Rivage, from the first password in Miranda’s room to both endings. You win by raising your clearance one access level at a time until you reach level 5, then unlocking Pod 01 for the standard ending, or collecting all seven Tarot Cards and beating the arcade machine for the secret ending.
The short version: every access level comes from a card whose barcode you scan once and keep forever, while energy resets every time you loop at the arcade machine. Access 1 is in Miranda’s safe, Pod Bay Access comes from the Emergency Pharmacy, Access 2 is Amaan’s rebuilt card, the Multi-Pass is in the Pod Bay vending machine, Access 3 is Jahi’s rebuilt card, Access 4 is Rafael’s ID in the Shed, and Access 5 is in the Fusion Core. The Quantum Cell and the train’s duplicator plate are the two tools that let you do more in a single loop.
Spoiler warning: the Part 7 sections name the final events of the story and how each ending is triggered.
How Loops and Energy Work
Every door, dock switch and printer costs energy blocks, and you only get a few per loop. When you run out, walk to the arcade machine in the storage room off the Kitchen and interact with its screen. The storage room door only opens once your energy has run out. You wake in Miranda’s room with full energy. Access cards you have scanned, and everything saved in your K9, stay with you. Items you are carrying are reset, unless you left them on the train’s duplicator plate.
The game only saves when a loop completes. If you quit and continue, you start a fresh loop. That matters for one missable achievement, Optimizer, which asks you to finish the whole game in 25 loops or fewer. Quitting often eats into that budget, and a new game is the only way to retry it.
Controls
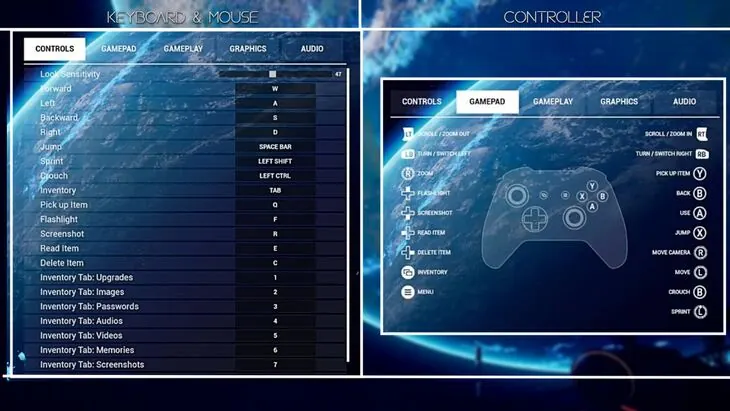
These are the keyboard and mouse defaults. Controller is supported too, and everything can be rebound in the Options menu.
| Action | Key |
|---|---|
| Walk, or rotate an item you are inspecting | WASD |
| Interact | Left mouse (M1) |
| Pick up | Q |
| Flashlight (press twice for the HV lens once you have it) | F |
| Take a screenshot | Hold R |
| Zoom into a saved screenshot | E |
Your K9 panel stays open on the left of the screen, with tabs for upgrades, images, passwords, audios, videos, memories and screenshots. The screenshot folder is the one you will use most. Almost every code in the game is shown once and needed later, so hold R whenever you see a number, a date or a pattern.
Tarot Cards and the Arcade Coin
There are seven Tarot Cards hidden on the ship, plus the Arcade Coin locked in a safe. The secret ending needs every card. The card symbols and names differ between players and playthroughs, so the table lists cards by where you find them.
| Card | Where it is | Earliest access | Section |
|---|---|---|---|
| Amaan’s locker card | Cabinet inside Amaan’s locker, Pod Bay | Railway Access (the train) | Tarot Card: Amaan’s Locker Cabinet |
| Cubik’s Cube card | Bench on a hidden Garage balcony | Railway Access and the cube | Tarot Card: Solving the Cubik’s Cube |
| Microwave card | Rafael’s bedside, enlarged in the Lab microwave | Access 4 | Tarot Card: Rafael’s Tiny Card and the Microwave |
| Xylophone card | Horizon Probe arm, Lobby | Access 4 | Tarot Card: the Lobby Xylophone |
| Chess card | Chess board drawer, Greenhouse | Access 4 | Tarot Card: the Greenhouse Chess Board |
| Record player card | Record player drawer, Miranda’s Room | Access 4 and Jahi’s door handle | Tarot Card: Jahi’s Safe and the Vinyl |
| Recipe card | Garage manufacturing machine | Access 5 | Tarot Card: the Hidden HV Letters |
| Arcade Coin | Safe in the storage room off the Kitchen | All seven cards | The Storage Room Safe |
Part 1: Access 1 and Pod Bay Access
Miranda’s Room: Computer Password
You start every loop in Miranda’s room. There is no rush on the first loop, so look around freely.
At the computer, choose “Forgot password”. The hint points to the title of Miranda’s published book, which sits on the desk beside the keyboard. The password is Stardust.
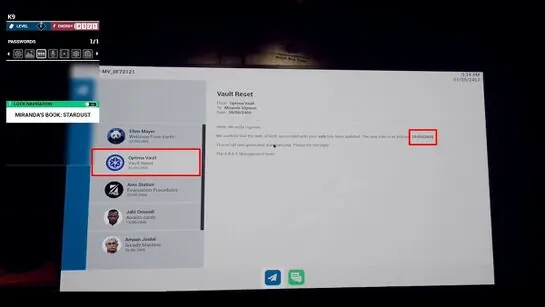
Press the blue arrow at the bottom of the desktop to open the mail. The Optima Vault email mentions a date tied to the safe, which is Miranda’s birthday: 10/09/2435. Hold R to screenshot it.
On the other desk there is a CD player on top of a set of small wooden drawers. The CD is in the third drawer down. Put it in the player to add a recording to your K9. It is optional story.
Miranda’s Room: Safe
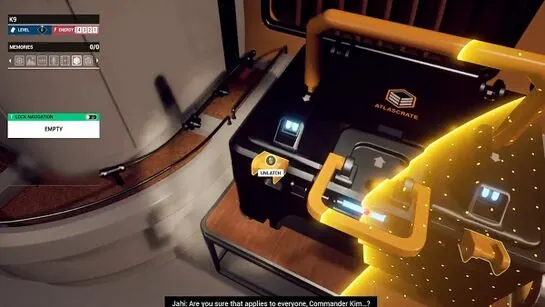
The safe is on the right as you face the bedroom doorway. Before you can use the date, you need the instructions. Step into the hall, grab the floating memory cube, then open the crate to the left of the floor map. Undo both buckles and move both handles, and read the pamphlet inside the crate about opening the safe.
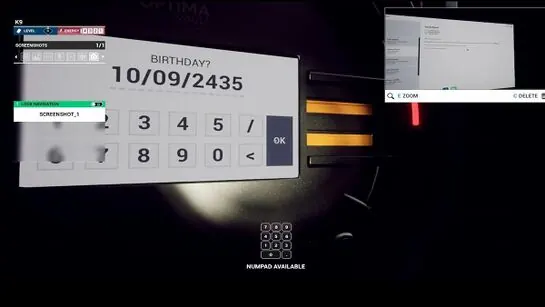
At the safe keypad, type /000/ first. The display switches to a DD/MM/YYYY birthday field, where you enter 10/09/2435. Slide the glowing green ring on the right of the safe to open it.
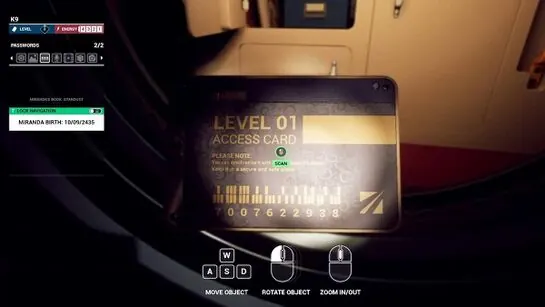
Pick up the I.D. card in front of the cabinets, turn it over, and hold M1 on the barcode on the back to scan it. That is level 1 access. Keep this card in mind, because its barcode numbers are needed in Part 2.
Kitchen: Dock System Clue and Hologram Puzzle
Turn left in the hall and press Open on the Kitchen door. That costs 1 energy block.
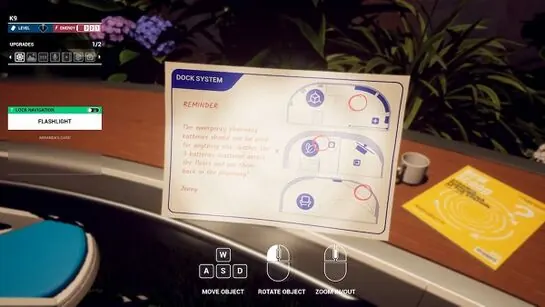
On the desk to the left inside, pick up the Dock System clue card. It tells you three batteries are spread across three areas of the dock.
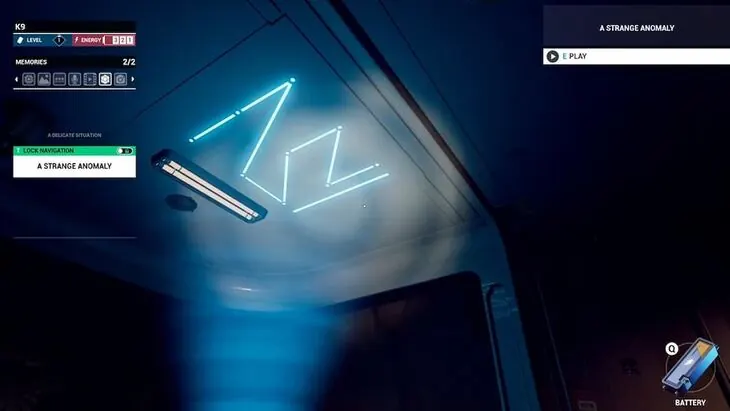
At the booth and table on the left, press the green button on the golden disc to start the hologram. Rotate the pieces until every line connects on all sides. Once it is solved, look straight up and screenshot the glowing mark it projects onto the ceiling. That mark is the dock pattern.
While you are here, the Kitchen vending machine takes any slot code on its keypad. Using it once unlocks the Take a Break achievement.
Kitchen: The First Battery
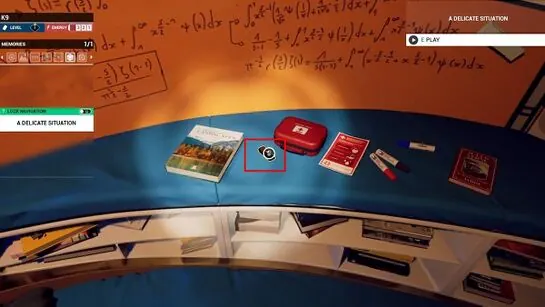
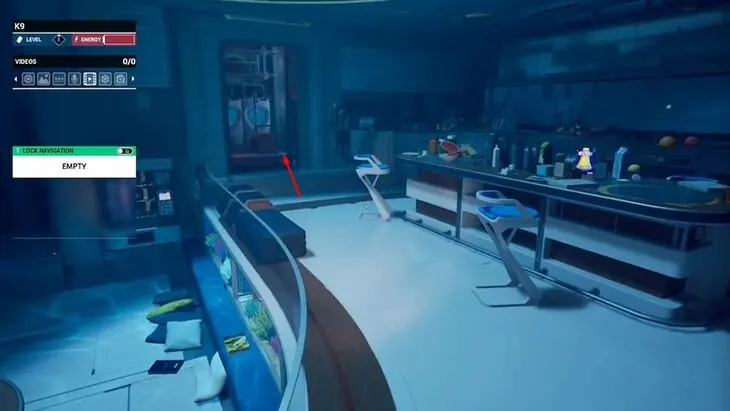
Walk to the lounge by the fish tank. The first battery sits on the counter right below the equations board.
Step up onto the kitchen platform (the island, fridge and counters) for another floating memory cube.
Dock System Pattern
The dock system kiosk is on your right at the edge of the kitchen platform. Draw the ceiling mark on its dot grid as one continuous line, in this order.
- From the top-left dot straight across to the top-right dot.
- Diagonally down to the left end of the middle row.
- Straight down to the bottom-left dot.
- Diagonally up to the centre dot.
- Right to the middle-right dot.
- Diagonally down to the bottom-middle dot, then right to the bottom-right dot.
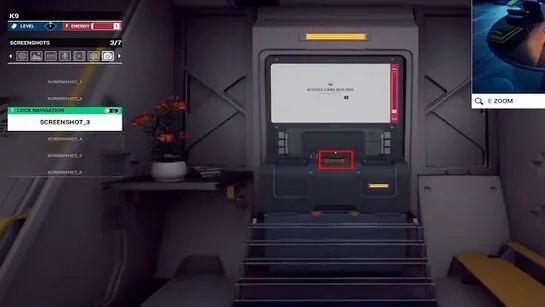
The finished shape on the dock system kiosk matches the ceiling mark, as the zoomed screenshot in the corner shows.
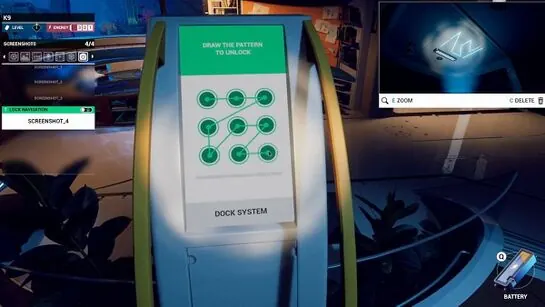
Robot Area: Emergency Pharmacy Batteries
On the unlocked dock, press Robot Area (1 energy). The Emergency Pharmacy dispenser is on the wall to your right. Slot the first battery in under its handle.
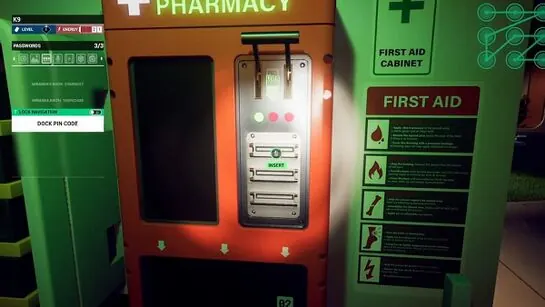
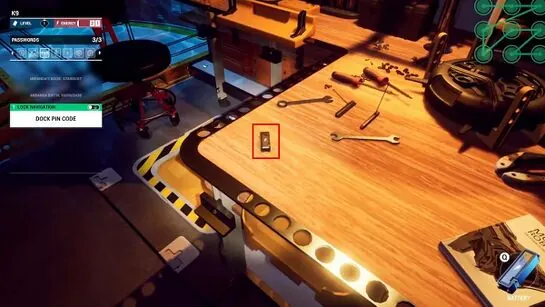
The second battery is on the workbench to the left of the laptop in the Robot Area. Put it in the dispenser too.
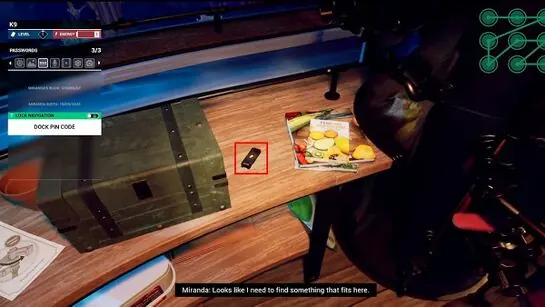
Go back to the dock and choose Cultivation (1 energy). Climb the steps and take the third battery lying beside the locked green box.
Switch the dock back to Robot Area with your last energy. Insert the third battery, pull the dispenser handle, and pick Pod Bay Access on its screen. Scan the barcode on the back of the printed card so it stays with you through every loop. This earns Escape Artist.
The Arcade Machine
You are out of energy now. From the kitchen platform, take the door on the left into the storage room and use the arcade machine’s screen to loop. Your first loop earns Trickster.
Part 2: Access 2 and the Multi-Pass
Pod Bay: Miranda’s Locker
After the loop, go through the Kitchen and straight ahead to the Pod Bay Access door. The vending machine on your left in the Pod Bay holds the Multi-Pass, but you cannot open it yet.
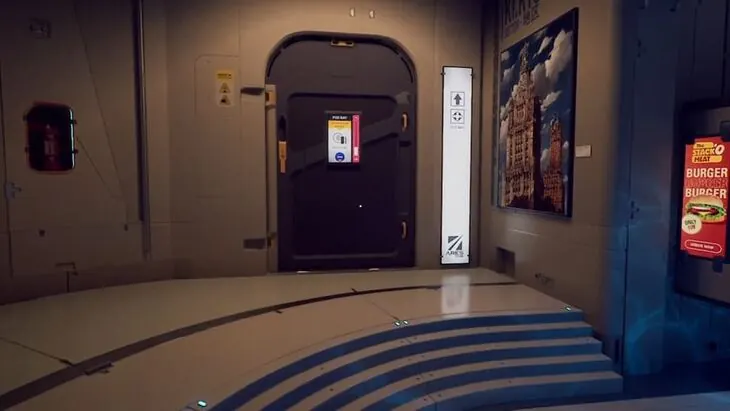
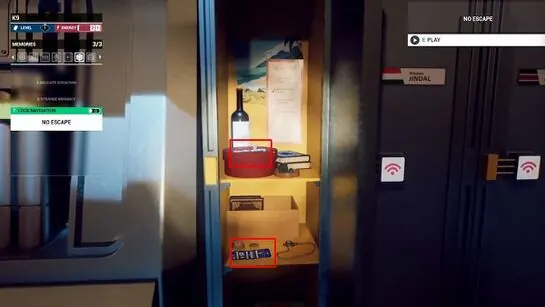
Go ahead and right towards the pods. At the bottom of the steps grab the floating memory, then open Miranda’s locker on the right. It is the only one that opens. Take the key resting on the red box and read the pamphlet about repairing broken access cards.
Cultivation: The Locked Box Key
Back at the Kitchen dock, switch to Cultivation (1 energy) and climb to the locked box. Press Q to hold the key and line up its notches with the lock:
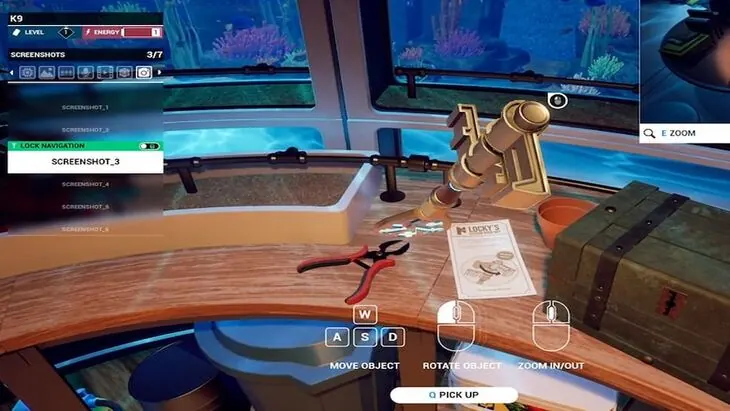
- Turn the key so its round head faces you.
- Turn the first notch straight up.
- Turn the middle and last notches straight down.
Inside the box is Amaan’s broken keycard.
Card Builder: Amaan’s Level 2 Card
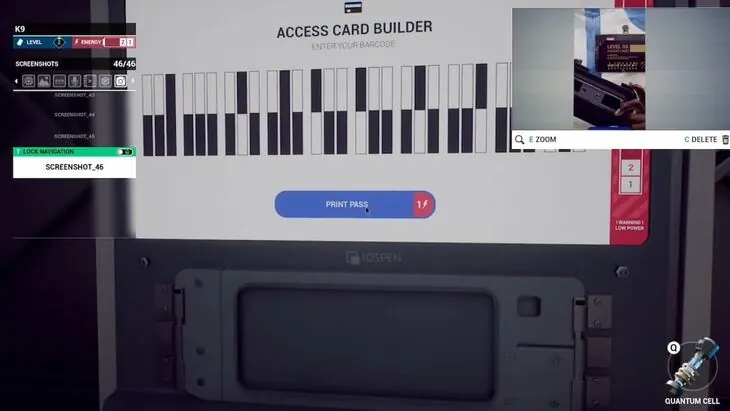
The Card Builder terminal is straight ahead in the Pod Bay. Screenshot the front and back of Amaan’s broken card first, so you can read its numbers and barcode without holding it, then insert it into the slot on the front of the terminal.
Type Amaan’s Identifier, printed on the card’s face: 2-5-6-0-1-3-6. Next, copy the barcode by toggling the dark and light bars. Three of its numbers are missing, and you fill them from the back of Miranda’s level 1 card in her safe: 3, 8, 6.
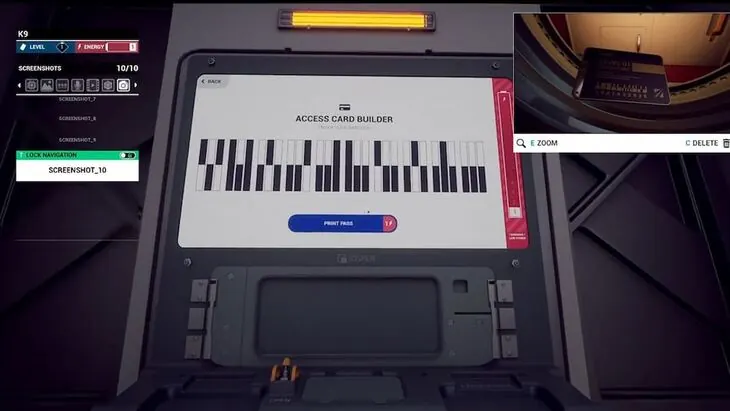
Press Print once the barcode matches (1 energy). Take the level 2 card and scan its back. Printing your first card earns Multi-Pass, the achievement, not the item. You will need to loop again after this.
Lobby Computer Password
After looping, go through the Kitchen, turn right past the lounge, and open the Lobby with level 2 access. Walk past the anomaly zone to the computer and press “Forgot Password”. It wants the first and last name of the Horizon Probe’s creator.
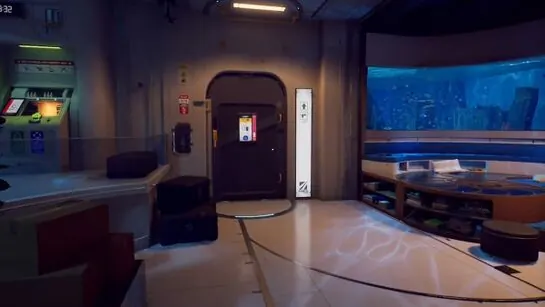
On your left, press Play Audio on the probe model display. The recording gives the first name: Igor.
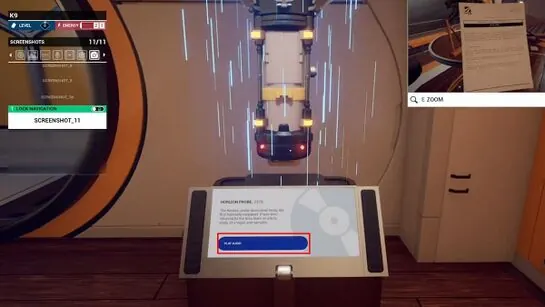
Horizon Probe Displays: Power Charges
The second display, a floating rock, has no power. Go around the back, pull the yellow handles to open it, and seat the power charges so the board reaches 12V. Each slot changes the voltage a charge gives out:
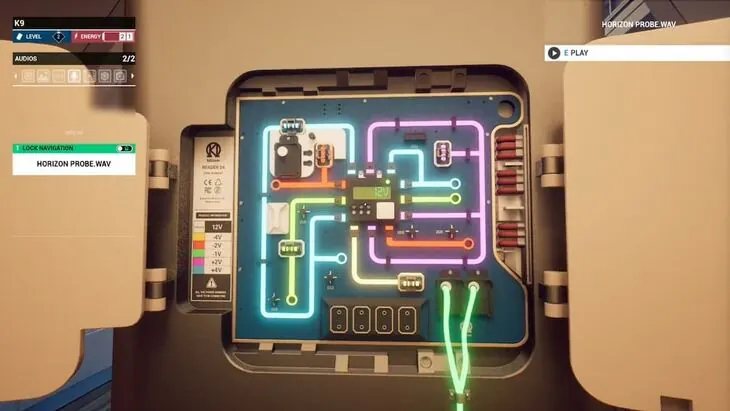
| Slot | Charge |
|---|---|
| Top left | Blue |
| Top left, under the blue one | Red |
| Top right | Pink |
| Bottom left | Green |
| Bottom right | Yellow |
Its audio plays far too fast to follow. Stand inside the anomaly zone while it plays and the speed evens out enough to hear the surname: Petrov.
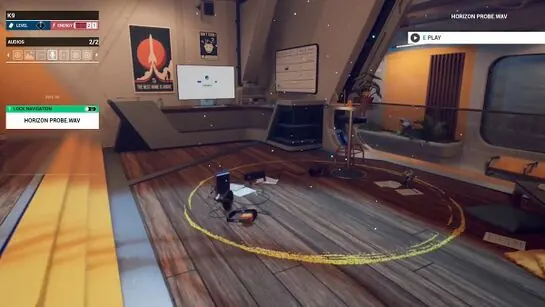
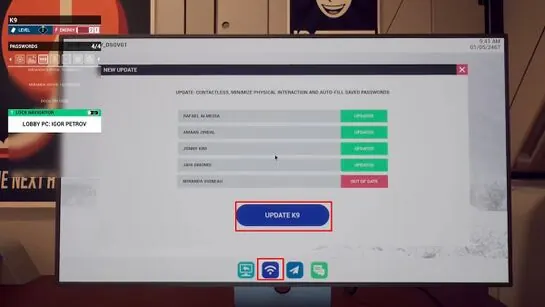
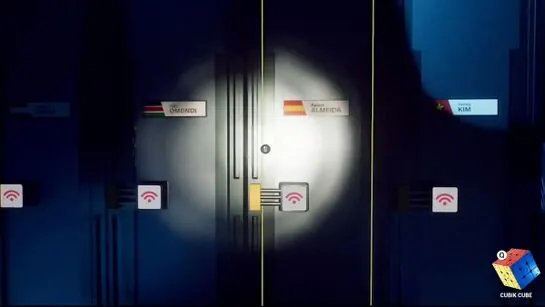
Log into the Lobby computer with igorpetrov. Press the wifi symbol at the bottom, choose “Update K9”, and hold M1 on the QR code. Logging in earns Slow Motion. Until now only the Lobby door accepted the level 2 card; after the K9 update the other level 2 doors open too. Remember this QR code, as it matters for a Tarot Card in Part 6.
Connector Hallway: Amaan’s Workstation
The Connector hallway door is right off the Lobby. Walk through it and pick up the memory cube on the way.
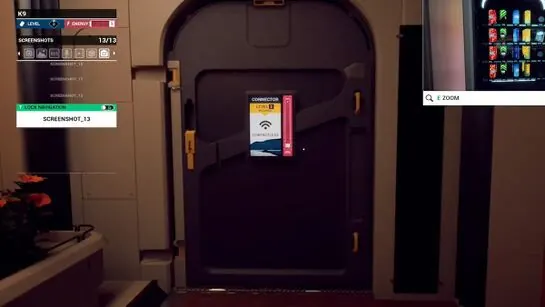
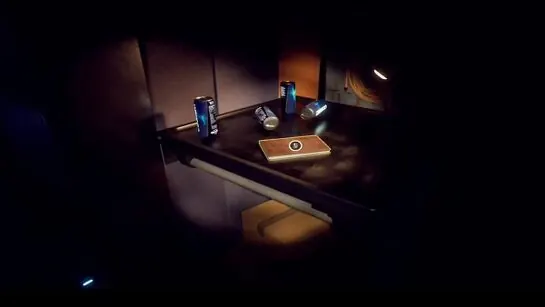
Keep going to the hole in the hull. On the left-hand table is Amaan’s journal, plus a soda can. Screenshot both sides of the can, since the back has its barcode. The right-hand table has an audio recording to play.
Pod Bay: Amaan’s Locker
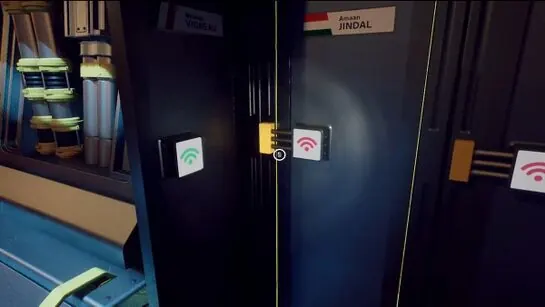
With about one energy block left, go to the Pod Bay and open Amaan’s locker next to Miranda’s. Screenshot Amaan’s birthday on the tablet inside and take the CD for Miranda’s player. Then loop.
Amaan’s Room: Computer Password and Terminal
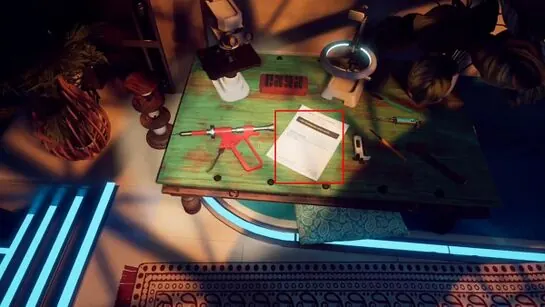
After looping, Amaan’s bedroom door in the hallway will open. Read the three loose manual pages first, since each carries a line of terminal code. One is on the low green table across from the computer, one is on the floor to the right of that table, and one is on the desk by the computer.
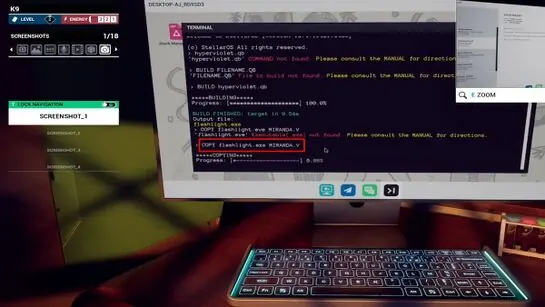
The computer’s hint asks for Amaan’s favourite soda, which is the can from the Connector hallway: Cosmik! Read the emails and messages, then open the black terminal button and enter:
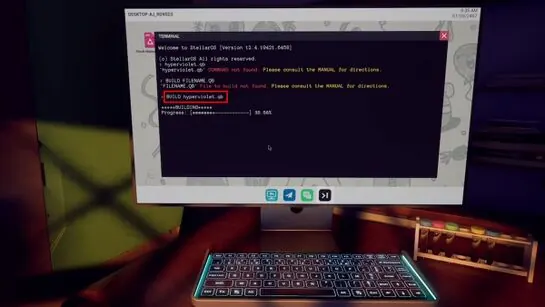
BUILD hyperviolet.qb
COPY flashlight.exe MIRANDA.V
Wait for the build to finish before typing the copy command. When the copy finishes, the Seer achievement pops and your flashlight gains the HV lens. Press F twice to switch to it. It is a blacklight that shows hidden writing, blood and fingerprints.
Amaan’s Room: HV Clues
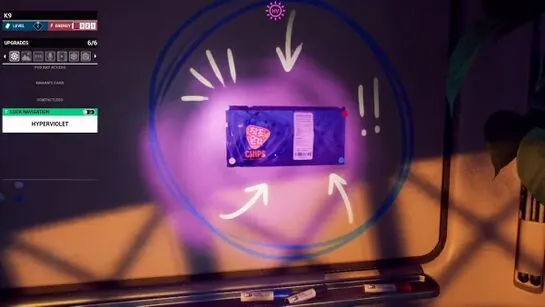
Sweep the room with the HV lens. On the whiteboard it reveals a chip bag with barcode numbers. Zoom in on them for a screenshot.
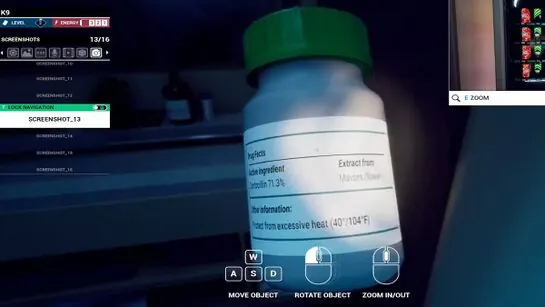
In the bathroom, screenshot the pill bottle on the sink. The flower name on its label is needed in Part 4.
Amaan’s Room: Safe
Amaan’s safe opens with his birthday from the tablet in his locker, which your K9 stores as 20/07/2406. Type /000/ first, then the date. What is inside is not covered on this page, and nothing later in this walkthrough needs it.
Pod Bay Vending Machine: The Multi-Pass
In the Pod Bay, shine the HV lens on the Stock Manager keypad of the left-hand vending machine. The pattern appears on the screen. Trace it to unlock.
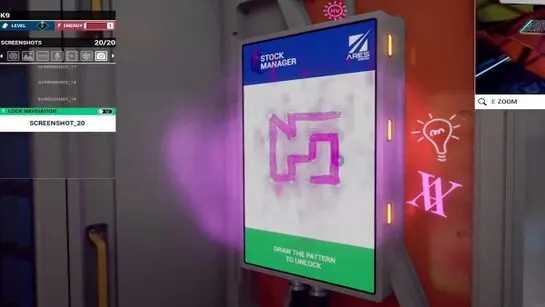
Press Manage Stock at the bottom. You have to restock three low items by entering their CP codes before the credits can be adjusted:
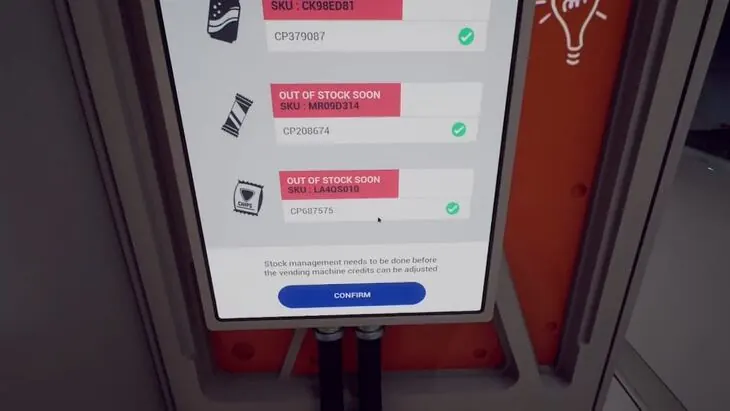
| Item | Where you saw it | CP code |
|---|---|---|
| Cosmik! Soda | Can in the Connector hallway | CP379087 |
| Mr. Lime Bar | Type 020 on the Kitchen vending machine to get one | CP208674 |
| Chips | Whiteboard in Amaan’s room | CP687575 |
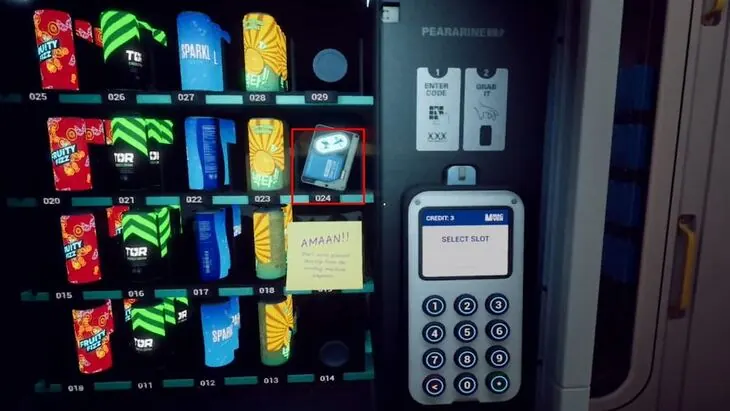
Press + next to Credits 0/3 as many times as you like, then key in 024 on the front of the vending machine. The Multi-Pass drops out. Scan its back to keep it and earn Promotor.
Part 3: The Quantum Cell
Garage: The Orbital Scout
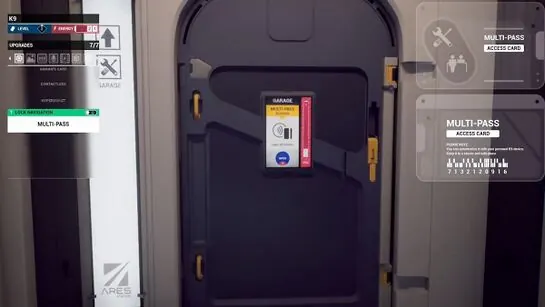
The Garage door is in the Pod Bay just past the vending machine, and the Multi-Pass opens it. There is a floating memory cube at the front of the room.
Head left into the next room. The Orbital Scout is straight ahead, with a procedure note to its left listing what it is missing. Climb the steps in front of it, pull the yellow handle, then press the red button on the left of the frame to open it.
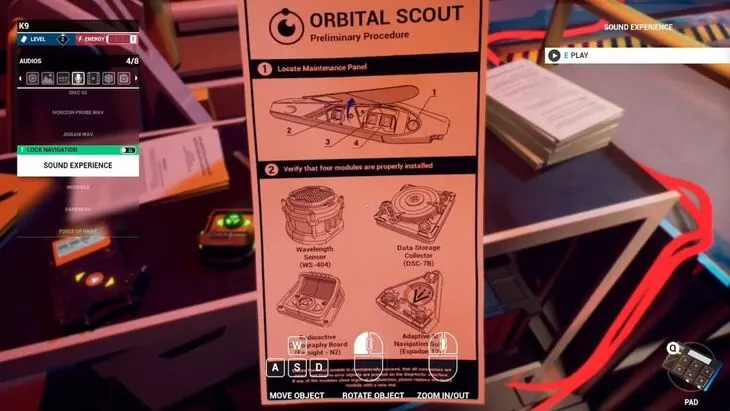
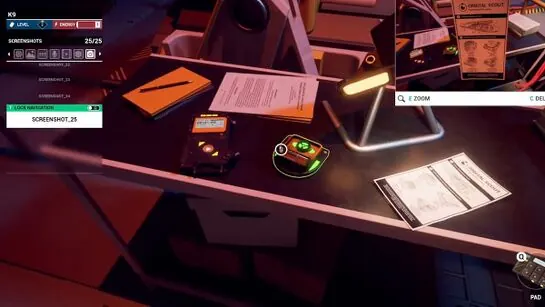
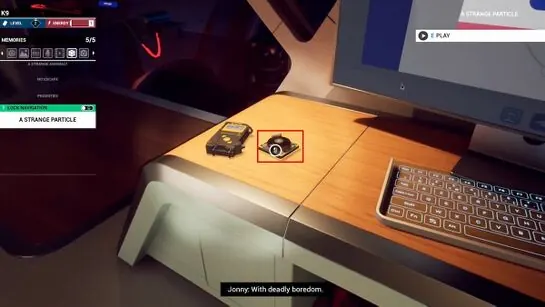
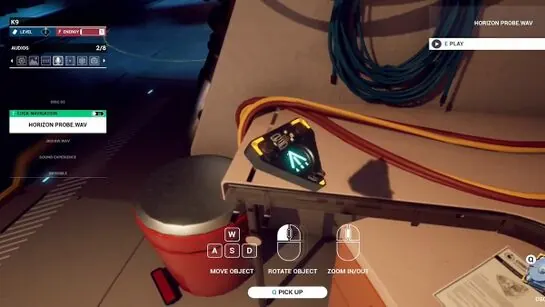
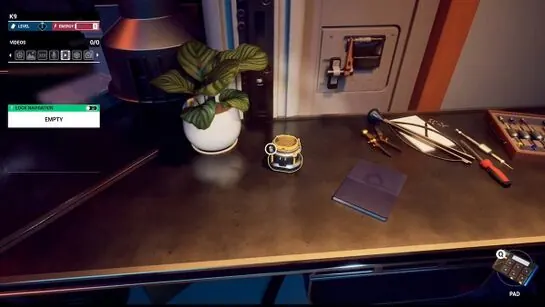
Fit these four parts into the frame:
| Part | Where it is |
|---|---|
| Radioactive Cartography Board | On the cart with the Orbital Scout instructions |
| Data Storage Collector | Upper level (ladder by the Garage entrance), next to the computer beside an audio recorder |
| Adaptive AI Navigation Suite | 3D printer room, left corner of the desk with the coloured-button safe |
| Wavelength Sensor | Desk with the journal, beyond the Orbital Scout frame |
The screenshots below show the four parts where they lie, in table order.
Stellarmap Route
With all four parts in, climb the ladder again. The Stellarmap is at the far end of the balcony, just left of the computer, and opens from there.
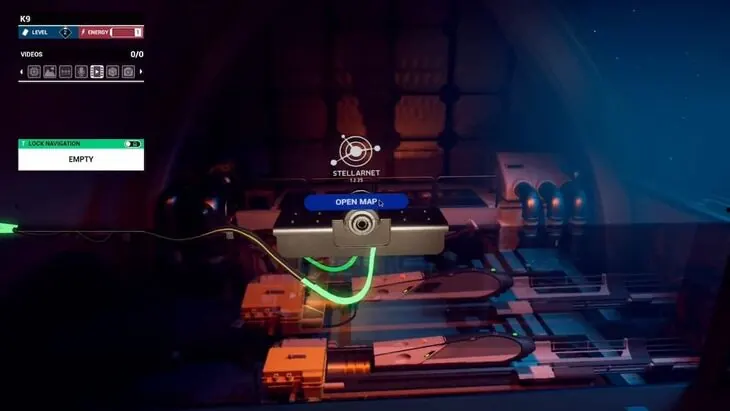
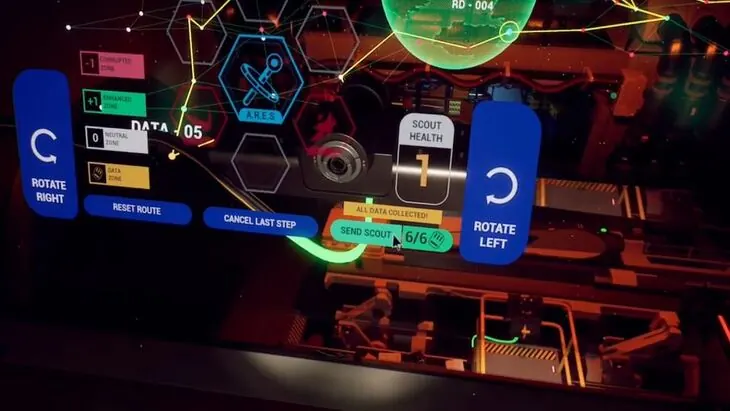
You need to route the probe through all six data zones and back to A.R.E.S alive. Yellow zones hold data, green zones heal the scout, red zones damage it, and white zones do nothing. This route works:
| Step | From | To |
|---|---|---|
| 1 | A.R.E.S | SCRP-01 |
| 2 | SCRP-01 | SCRP-02 |
| 3 | SCRP-02 | AST-AR1 |
| 4 | AST-AR1 | SDT-11 |
| 5 | SDT-11 | LUX-8 |
| 6 | LUX-8 | X-248 |
| 7 | X-248 | K-1066 |
| 8 | K-1066 | BTH-12 |
| 9 | BTH-12 | DATA-04 (data 1) |
| 10 | DATA-04 | NNS-7 |
| 11 | NNS-7 | RE-005 |
| 12 | RE-005 | VAN-26 |
| 13 | VAN-26 | ARK-18 |
| 14 | ARK-18 | X-303 |
| 15 | X-303 | Y-1KFT |
| 16 | Y-1KFT | TIE-1 |
| 17 | TIE-1 | DATA-01 (data 2) |
| 18 | DATA-01 | ORB-2 |
| 19 | ORB-2 | OA-9 |
| 20 | OA-9 | AQ-94 |
| 21 | AQ-94 | GW-11 |
| 22 | GW-11 | AW-13 |
| 23 | AW-13 | SHFT-1 |
| 24 | SHFT-1 | DATA-06 (data 3) |
| 25 | DATA-06 | ATV-3 |
| 26 | ATV-3 | SA-X |
| 27 | SA-X | MVL-30 |
| 28 | MVL-30 | VR-M |
| 29 | VR-M | DATA-03 (data 4) |
| 30 | DATA-03 | I2B-0 |
| 31 | I2B-0 | ORE-X |
| 32 | ORE-X | NH-9 |
| 33 | NH-9 | DATA-02 (data 5) |
| 34 | DATA-02 | MPLM-1 |
| 35 | MPLM-1 | ZX-22 |
| 36 | ZX-22 | XM-R |
| 37 | XM-R | ZX-2A |
| 38 | ZX-2A | DATA-05 (data 6) |
| 39 | DATA-05 | SAS-11 |
| 40 | SAS-11 | MA-6 |
| 41 | MA-6 | MER-A |
| 42 | MER-A | AUOS |
| 43 | AUOS | RD-004 |
| 44 | RD-004 | A.R.E.S |
Back at A.R.E.S with all six data, press Send Scout. The Voyager achievement unlocks and you get a new audio, Unknown Particle Waves. Press Play on it to save it to your K9.
Lobby: The Audio Controller Pad
Climb down the ladder to the Garage floor and take the audio controller pad from the desk with a computer on it. Carry it to the Horizon Probe model in the Lobby, play Unknown Particle Waves while standing in front of it, and copy the sounds on the pad in this order: 3, 2, 1, 4, 5, 6.
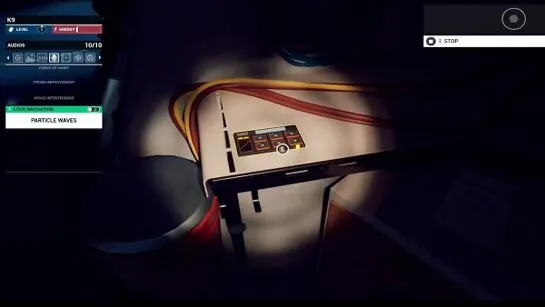
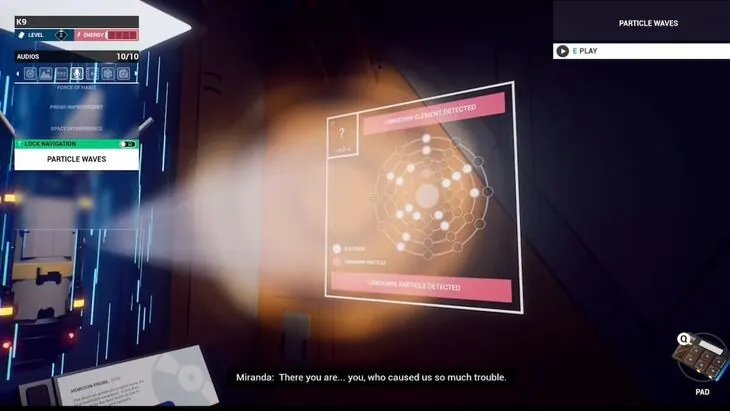
The probe then projects a circular symbol onto the wall to its right. Screenshot it.
Garage Computer: The Circle Symbol
Return to the Garage, looping first if you are out of energy, and use the upper-level computer near the Stellarmap. Its lock screen shows a ring of circles. Fill in the ones that match the symbol from the probe.
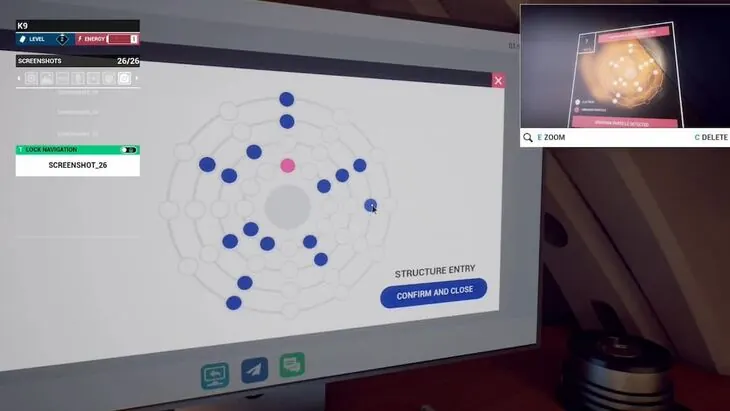
Play the three audios on the home screen and read the mail. An email from Jahi to Jonny contains the password 780812.
Kitchen: The Quantum Cell
The orange and black box sits by the Kitchen’s entrance from the hall. Enter 7-8-0-8-1-2 on its keypad to take the Quantum Cell.
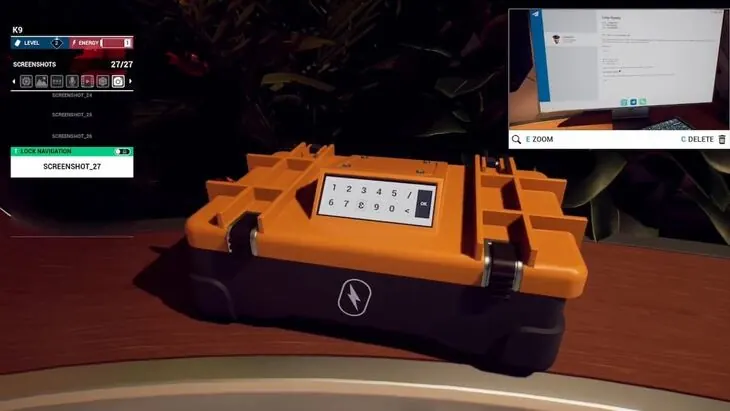
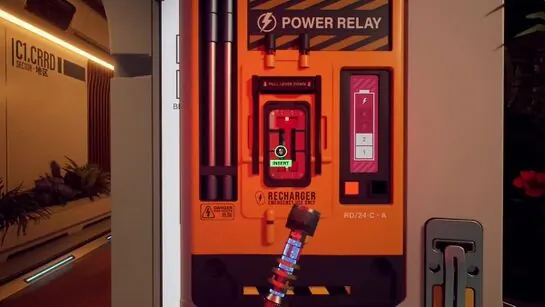
The Quantum Cell works once per loop. Put it in the power relay next to the Kitchen door and pull the handle for one extra energy block, which earns Person of Power the first time. Other relays around the ship use it to power something specific instead, and later sections say which.
Part 4: Access 3 and Railway Access
Observatory: Clues for the Plant Sequencer
Go through the Lobby into the Connector hallway and turn right where the memory cube was. That door is the Observatory.
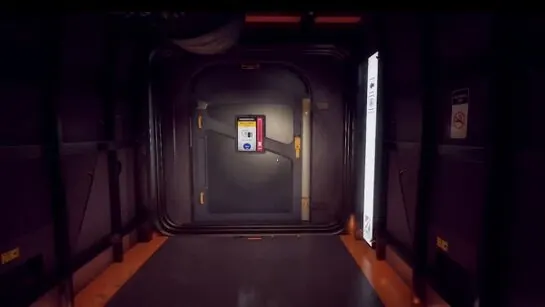
Inside, go left up to the platform with the vending machine for another floating memory cube, and read the laptop’s messages.
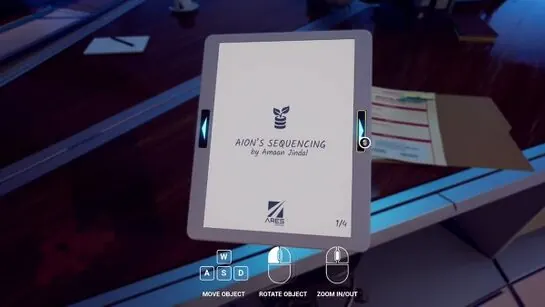
Down in the centre of the room is Amaan’s tablet about Aion’s Sequencing. Screenshot every flower slide on it.
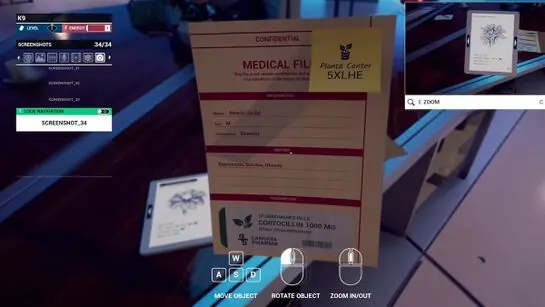
Beside the tablet, screenshot the post-it on the medical file. It reads “Planta Center” with the code 5XLHE.
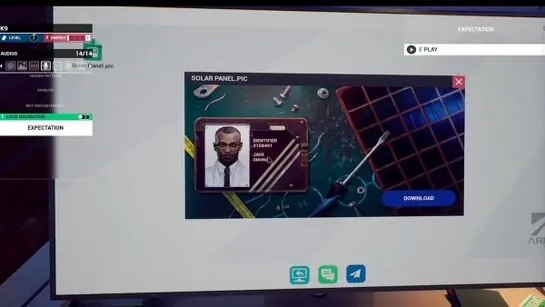
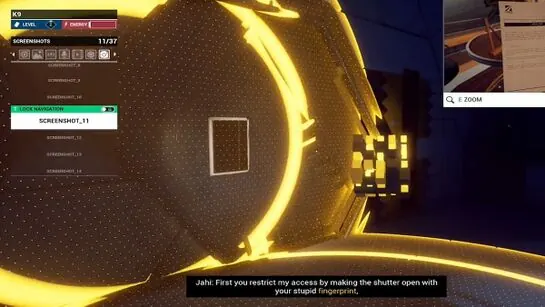
The computer on the right lets you Download the front of Jahi’s I.D. card. Its messages between Jahi and Jonny explain that the shutter here opens with Jonny’s fingerprint.
Cultivation Computer: Plant Sequencer
Loop if you need to, then take the dock to Cultivation and log into the computer with 5-X-L-H-E. First pick the three plants from Amaan’s tablet. The plant diagram in the Kitchen doorway, the pill bottle in Amaan’s bathroom and the plant in the Lobby all point to the same three:
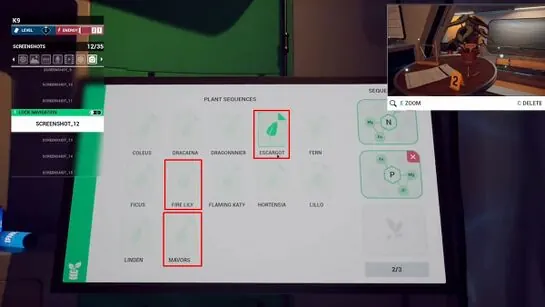
- Fire Lily
- Escargot
- Mavors
Next, fit all three element combinations into one sequence by clicking the circles and hexagons to cycle their elements. Set Z in the left hexagon, P in the bottom hexagon and N in the top hexagon.
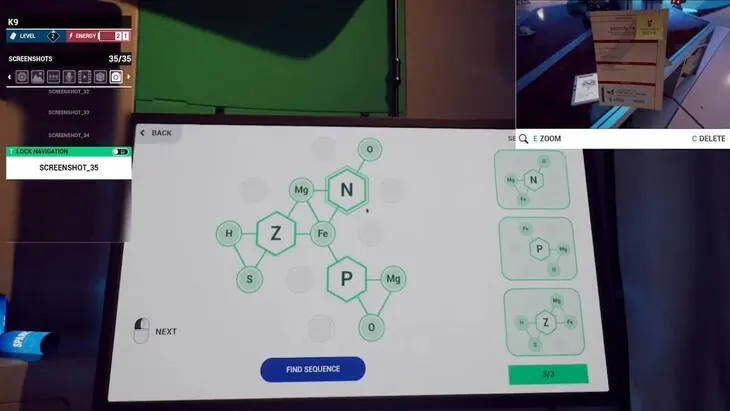
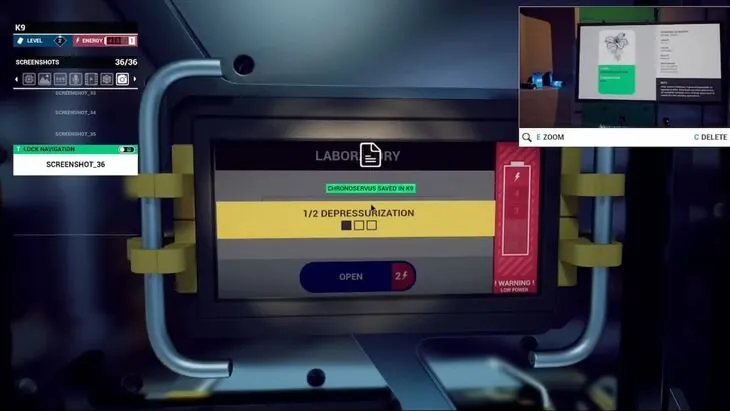
The solved sequence shows the Aion plant’s entry and earns Gardener. Screenshot its class name, Chronoservus.
Laboratory Door
Loop, then put the Quantum Cell in the Kitchen relay right away for the extra block. Go through the Lobby to the Connector hallway and follow it around to the left until you reach a computer by the Laboratory door. Enter Chronoservus and press Open. It costs two energy blocks, so you enter the Lab with none left.
Inside the Lab, go left to the large hangar doorway for a floating memory cube. It replays a fight between Jonny and Jahi, and the objects it mentions are the ones carrying Jonny’s fingerprints.
Laboratory: Jonny’s Fingerprint
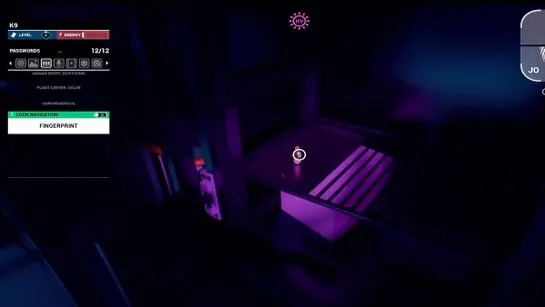
Switch to the HV lens, follow the blood, and scan the four fingerprint pieces:
| Piece | Object | Where |
|---|---|---|
| 1 | Small vial | Second fridge to the right of the memory cube spot |
| 2 | Pipe | On the floor in front of the computer to the right of the entrance |
| 3 | Lenses | Dispensed by the switch panel once it totals 29 |
| 4 | Item in the capsule | Locked capsule near the computer |
Pieces 1 and 2, the small vial and the pipe, only need scanning. The other two need a puzzle each.
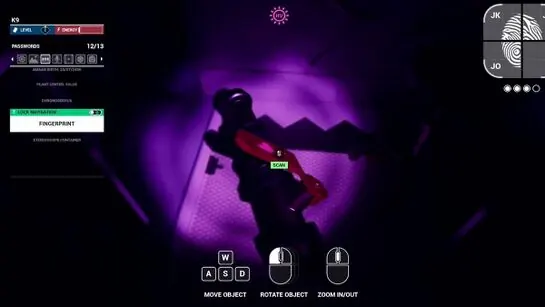
Laboratory: Switch Panel
The switch panel is in the corner to the right of the memory cube spot. Open it to see the empty slots, then find the four switches. You can only carry one at a time, so place each in the panel before fetching the next.
| Switch | Where it is |
|---|---|
| 1 | Counter left of the hangar door |
| 2 | Counter right of the hangar door, past the switch panel |
| 3 | Cabinet under the locked capsule, near the computer |
| 4 | Same counter as switch 1, in the cabinet a little further along |
Arrange them so the panel reads exactly 29. The panel has two rows of three slots. Fill all three in the top row plus the left slot of the lower row. The panel then dispenses lenses. Scan the fingerprint on them.
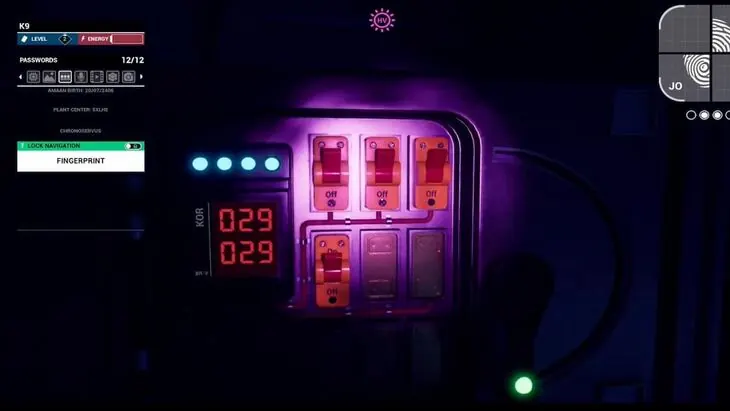
Laboratory: The Capsule
The last piece is on the object locked in the capsule near the computer. Its lock uses Rafael’s drawings, and there are two in the room. One is on the counter left of the hangar door, and the other is further along the counter with the switch panel.
Each drawing has a small patterned block in its left corner. Copy those two patterns onto the top and bottom grids of the capsule, open it, and scan the fingerprint on the item inside.
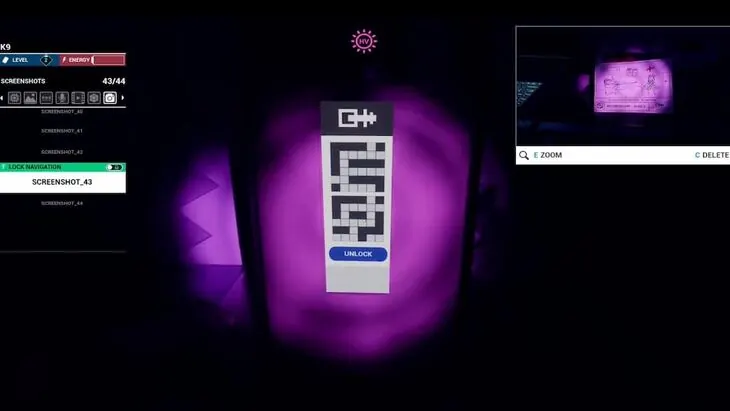
Observatory Light Puzzle
With the full fingerprint, loop and carry the Quantum Cell to the Observatory. The generator is on the front left, before the stairs. Slot the Quantum Cell into its relay and scan Jonny’s fingerprint.
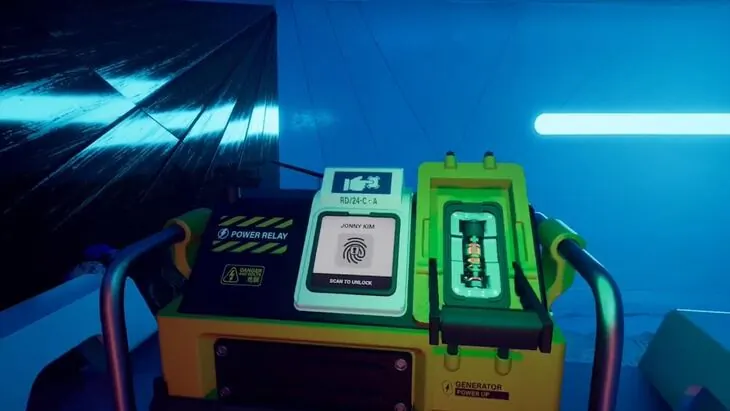
Two lights now shine onto a floor puzzle below. You need to carry light to the tall red-lit pillar on the right by turning the thick lit pillars towards the skinny ones, then rotating the floor pieces. It takes some trial and error, and there is more than one way to solve it.
Start by getting light into the far-left skinny pillar, which may already be lit, and into the skinny pillar right in front of the stairs.
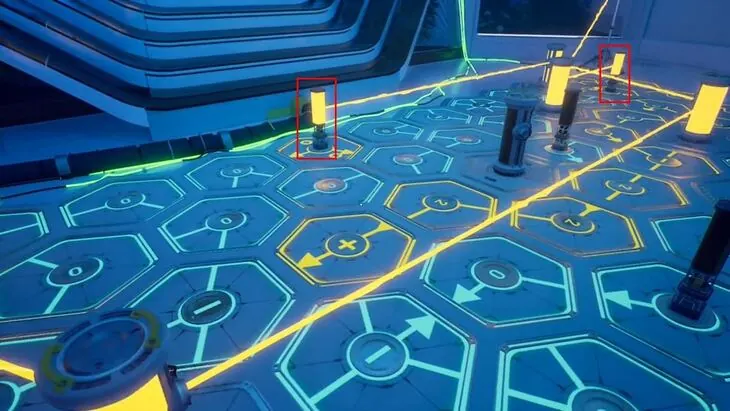
Then turn those two pillars’ arrows. Point the one in front of the stairs away from the stairs and a little to the left. Point the one on the left side down, towards the stairs.
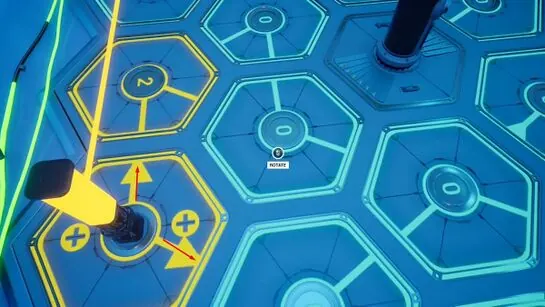
Now rotate the floor pieces outward from both skinny pillars. A correct path glows yellow and a wrong one turns red.
When the tall pillar turns green, climb the stairs and pull the handle to open the shutter. This earns Newton for the puzzle and Dazzled for seeing the sun.
Observatory: Jahi’s Card Back
Turn around from the shutter handle. The computer behind you now runs on sunlight. Open Stereoscope.pic on its home screen and Download it to get the back of Jahi’s access card.
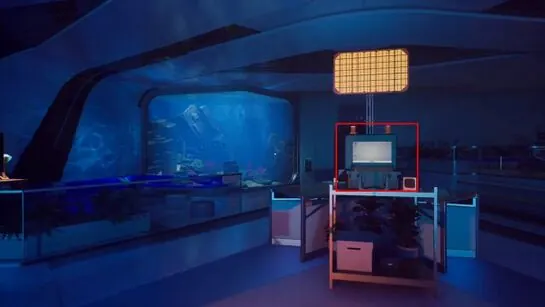
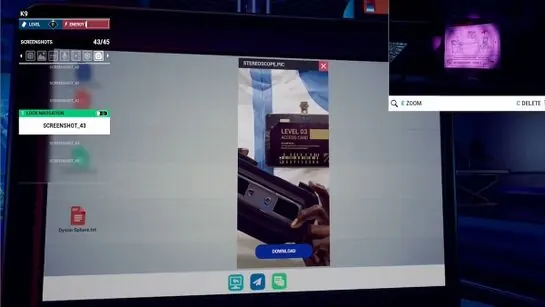
Card Builder: Jahi’s Level 3 Card
You now have both sides of Jahi’s I.D. Fetch Amaan’s broken card from the Cultivation box again with the key from Miranda’s locker, and take it to the Card Builder in the Pod Bay.
Insert the broken card and enter the Identifier from the front of Jahi’s I.D.: 3-1-6-8-4-0-1.
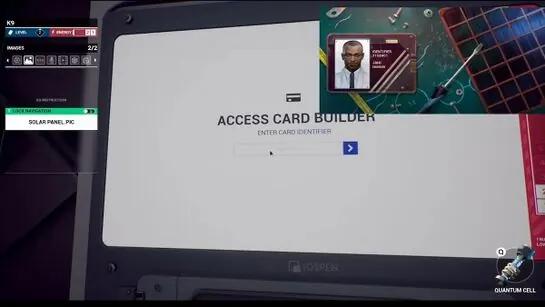
Copy the barcode from the Stereoscope picture of Jahi’s card back, print, and scan the new card. That is level 3 access.
Pod Bay: Jahi’s Locker
Open Jahi’s locker in the Pod Bay straight away. There is a CD for Miranda’s player inside.
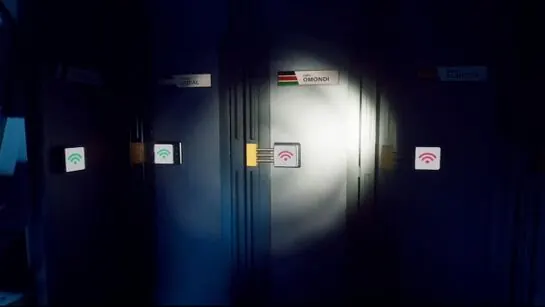
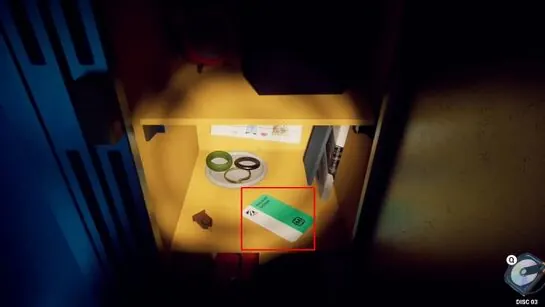
The Railway System card is on the second shelf. Scan its back for Railway Access.
Part 5: The Cubik’s Cube and Access 4
Miranda’s Room: Projector Connection
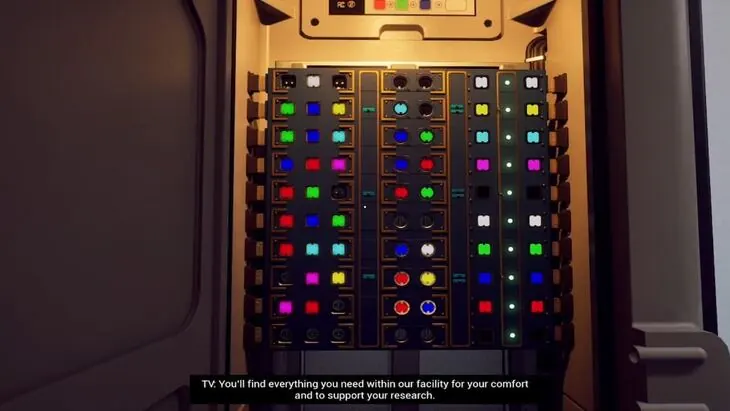
At the start of a loop, before leaving Miranda’s room, look at the projector screen on the right wall. It has no signal. Open the panel with the wifi symbol to its left.
The fix is to rearrange the square and circle sockets so each row makes one of the colour combinations shown above the grid. More than one layout works. These are the rows to build, one per line. Where the circle column says “no circle”, only the square colours are given for that row:
| Square | Circle |
|---|---|
| White | no circle |
| Green, Blue, Yellow | Cyan |
| Green, Blue, Cyan | Blue, Green |
| Blue, Red, Pink | Blue, Red |
| Red, Green | Red, Green |
| Red, Blue, Green | no circle |
| Red, Cyan, Cyan | Blue, White |
| Pink, Yellow | Red, Yellow |
| Pink, Red | Red, Blue |
A video plays once the signal returns. Screenshot the list of sponsors at the end.
Garage: Powering the Train
Take the Quantum Cell from the Kitchen with you instead of using it. Go through the Pod Bay into the Garage, climb the ladder, put the cell in the train’s power relay and pull the handle. Railway Access opens the train.
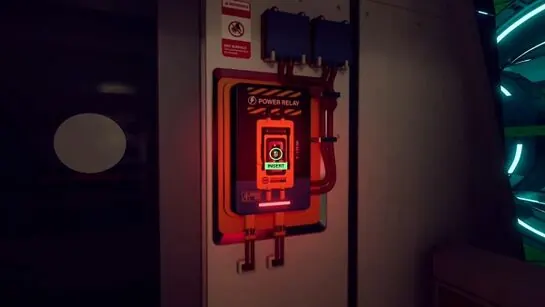
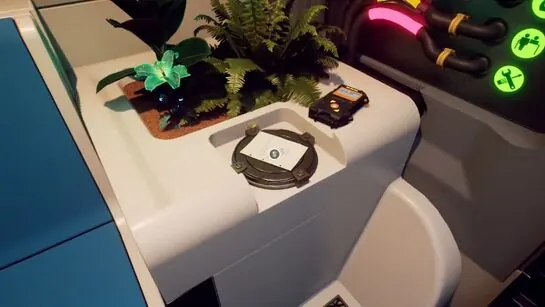
Inside, on the left, is the duplicator plate with a note and an audio recording. Anything left on the plate survives the loop, and in effect you get a copy of it.
Laboratory Upper Balcony: The Data Disk
On the train’s control panel to the right, press Laboratory. You arrive on the Lab’s top balcony. Grab the floating memory cube, then the Data Disk just past it.
The disk is not used in the Lab. Put it on the train’s duplicator plate so it is waiting for you next loop. Your first duplication earns Doppelganger.
Tarot Card: Amaan’s Locker Cabinet
With the train running, you can open the cabinet inside Amaan’s locker. It takes two keys. Take the key from Miranda’s locker, put it on the train’s duplicator plate and loop, so the next loop gives you the original from her locker plus the copy on the plate. Use both on the cabinet, turning the notches to fit as you did for the Cultivation box. The Tarot Card is inside.
Laboratory Computer: Ares’ Sponsor
Head right and lower the shortcut ladder to the Lab floor, which now has power. Under the upper level, next to the red microwave, the computer’s password hint asks for Ares’ sponsor. It is Vulcan Dynamics, from the sponsor list in the projector video.
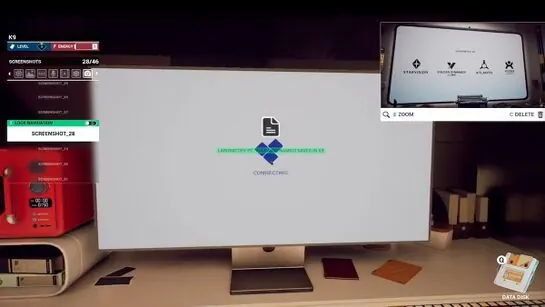
The computer controls the microwave beside it, but you need the right item to put inside. That comes in Part 6.
Rafael’s Laptop: Hexadecimal Puzzle
Take the train back and loop. Next loop, power the train with the Quantum Cell again, take the Data Disk off the duplicator, and ride to the Lobby. Rafael’s desk is on the left of the balcony above the Lobby. Slot the Data Disk into his laptop.
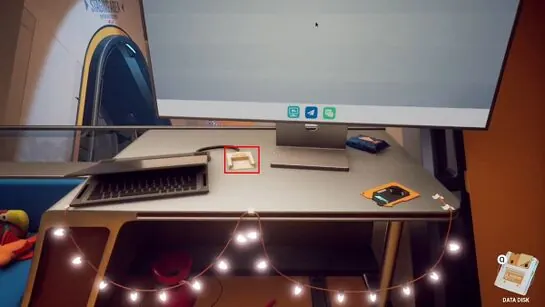
Read the anomaly documents and screenshot the one on the Microwave. Then open the .metadata terminal, which needs its corrupted hex bytes filled in before map.pic can be viewed. The rows above the red line show which byte stands for which character. The missing codes are:
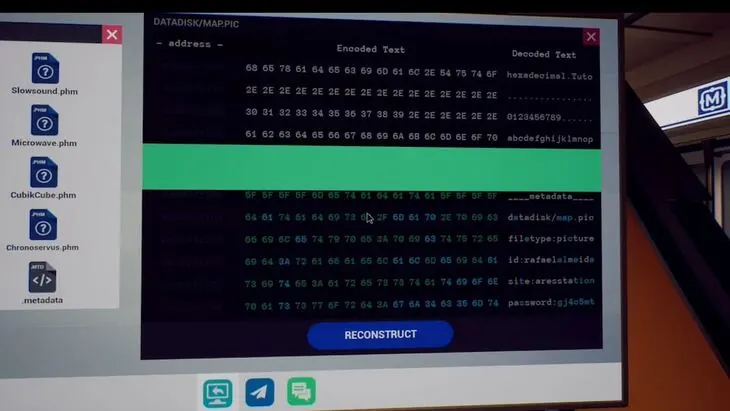
| Line | Missing codes |
|---|---|
| datadisk/map.pic | 61, 6D, 61, 70 |
| filetype:picture | 65, 63 |
| id:rafaelalmeida | 3A, 61, 6C, 65, 61 |
| site:aresstation | 74, 74, 69, 6F, 6E |
| password:gj4c5mt | 73, 67, 6A, 34, 63, 35, 6D, 74 |
The password line comes from the drawing of the desk on the wall behind you. Repairing all five earns Developer.
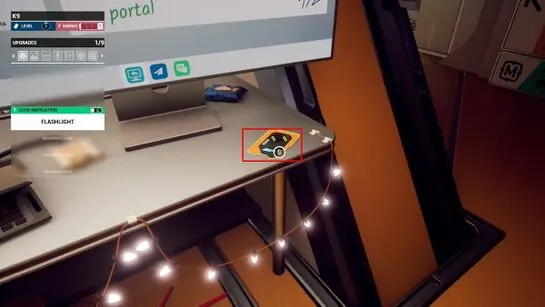
Open map.pic and screenshot it. Before leaving, put the Security card from the desk on the train’s duplicator plate, then ride back to the Garage.
Garage: The Coloured Button Safe
The colour grid on map.pic opens the safe with coloured buttons in the Garage. This is the grid from one playthrough. Because the map.pic clues can differ between players, copy the grid on your own screenshot if it does not match:
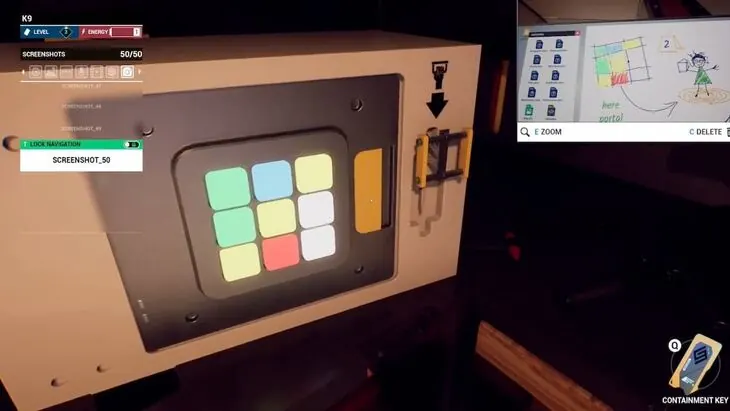
| Row | Left | Middle | Right |
|---|---|---|---|
| Top | Green | Blue | Yellow |
| Middle | Green | Yellow | White |
| Bottom | Yellow | Red | White |
Inside is the Cubik’s Cube. You do not have the instructions for it yet.
Tarot Card: Solving the Cubik’s Cube
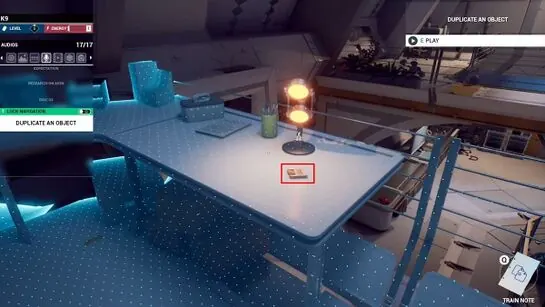
This is separate from the Shed trip below. Solve every side the way you would a normal Rubik’s Cube. It teleports you to a different balcony in the Garage, and the Tarot Card is on the bench in front of you.
Laboratory: Unit-01 Gear Puzzle
Loop, power the train, take the Security card off the duplicator and ride to the Lab. The terminal in the middle of the balcony accepts the Security card. Download permanent access first, so you never need the card again, then press Release.
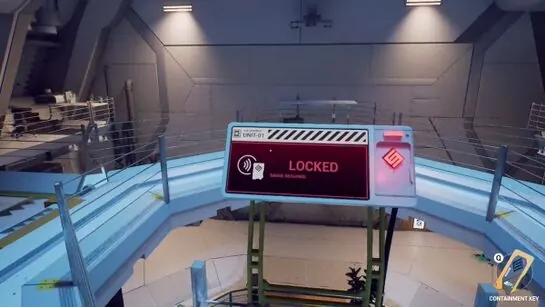
Climb down to the panel on the front of the Unit. It holds a set of gears with one missing. Take the gear with four notches, which starts in the bottom-left position, and put it on the duplicator plate.
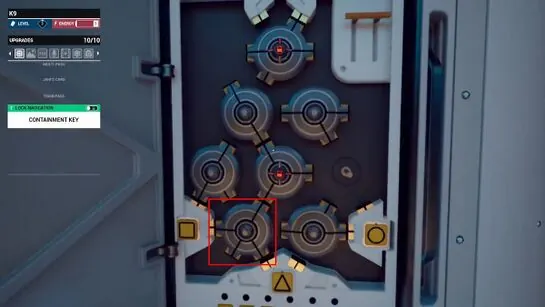
Next loop, bring the duplicated gear back and put it in the panel. The gears shift with each sequence, so line their notches up with the shapes at the bottom and the first gear at the top:
| Sequence | Shapes |
|---|---|
| 1 | Square, Triangle, Circle |
| 2 | Circle, Triangle |
| 3 | Square, Triangle |
| 4 | Square |
| 5 | Square, Triangle, Circle |
| 6 | Circle, Triangle |
Repairing the Unit earns Lockpick Master. Back up on the terminal, press Open Unit-01. The orange box holds the 2/2 note. Screenshot it, as it explains how to use the cube to reach the Shed.
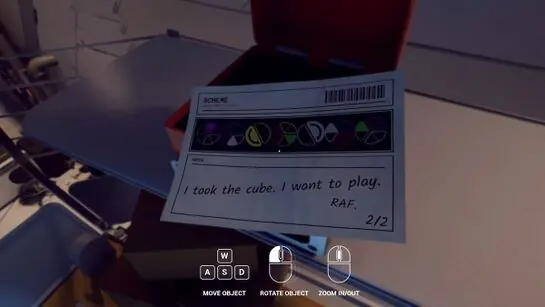
Using the Cubik’s Cube: Rafael’s Shed
Start a fresh loop for full energy and take the cube from the Garage safe. The clues are randomised per player, so your spot and your 2/2 diagram may differ from the example below, but the method is the same.
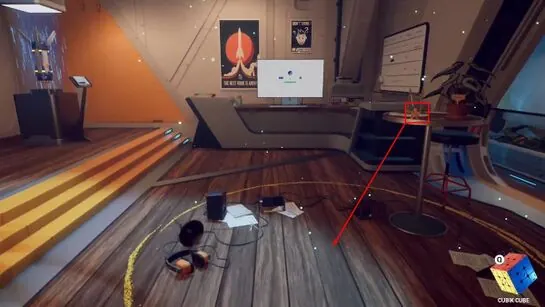
Where to stand comes from map.pic on Rafael’s laptop, the page marked 1/1. Next to its colour grid is a number with the words “here portal”. Only one number can be confirmed here: a 2 means the anomaly zone in the Lobby. The other spot known to come up is the yellow circle on the Garage floor, but which number points to it is not known. If your map.pic shows something other than 2, try the Garage circle.
The 2/2 note from the Unit-01 box tells you how to turn the cube once you are standing in the right spot. Each pie is one corner of the cube, identified by the three colours around it. The filled slice tells you which black line on that corner to press. A pie split into two halves of one colour means the centre piece of that colour, and you press the arrow that matches.
An example diagram played out like this:
| Step | Pie | Press |
|---|---|---|
| 1 | Pink top, green left, white right | Left line on the pink top |
| 2 | Blue top, pink left, white bottom | Left line on the white piece |
| 3 | Two yellow halves | Matching arrow on the yellow centre |
| 4 | Yellow top, red left, green right | Right line on the green side |
| 5 | Two white halves | Matching arrow on the white centre |
| 6 | Blue top, white left, red right | Top-left line on the white piece |
| 7 | Pink top, green left, white right | Top-left line on the green piece |
The two screenshots below show what a corner line and a centre arrow look like on the cube.
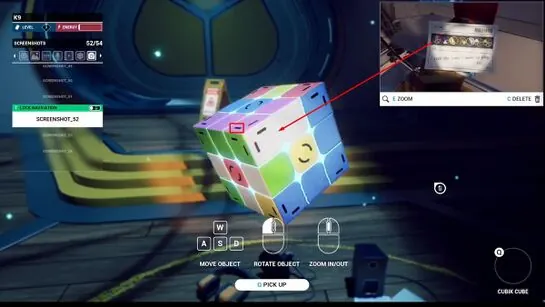
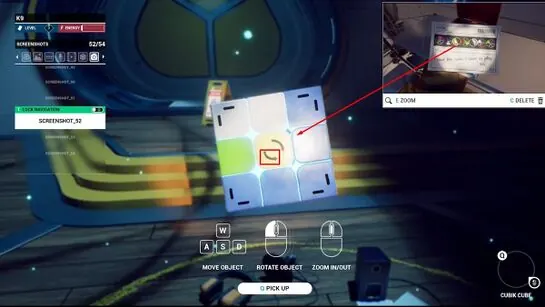
Every correct press makes the cube glow gold. If it does not, that press was wrong. After the last one you are teleported to the Shed.
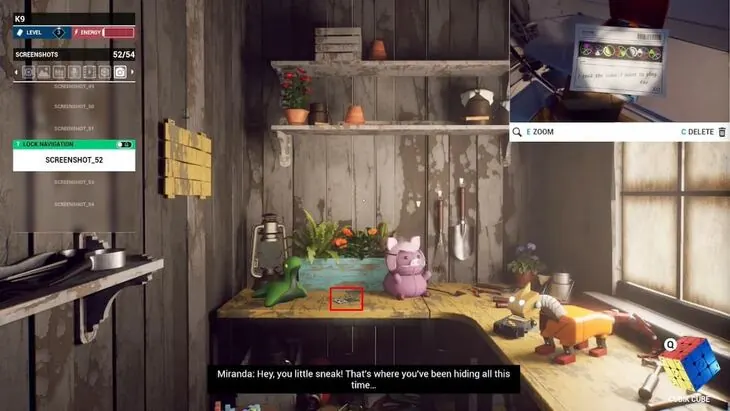
Take Rafael’s ID from the workbench and scan it for level 4 access. The audio recording to the right is optional. Nothing else is here, so open the cube and turn any piece to return to the Lobby.
Pod Bay: Rafael’s Locker
Open Rafael’s locker in the Pod Bay with level 4. Hold M1 on the QR code to download the schedule to your K9, and take the CD. Play it in Miranda’s room, because it holds the hint for Rafael’s password. Then loop.
Part 6: Access 5
Tarot Card: Rafael’s Tiny Card and the Microwave
Rafael’s room is one door down from Miranda’s. The 1/100 scale Tarot Card is on his bedside drawers.
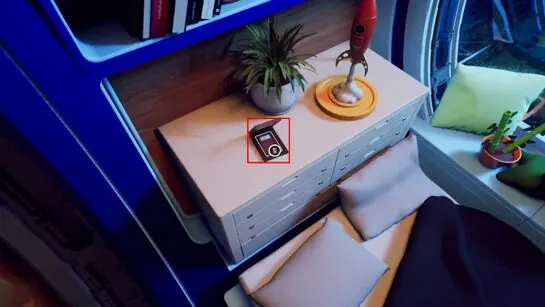
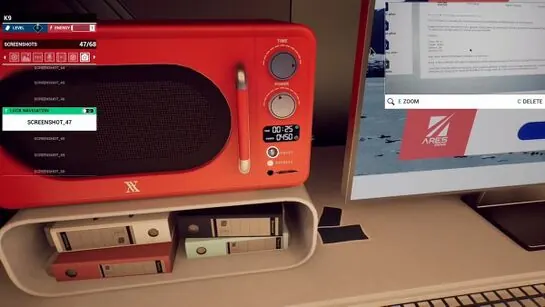
The Microwave document on the Data Disk has the settings to enlarge it. Put the tiny card in the Lab’s red microwave and run it with these settings:
| Setting | Value |
|---|---|
| Time | 25 minutes |
| Temperature | 450 |
| Defrost | On |
| Express | On |
When the timer ends, take the full-size card out.
Tarot Card: the Lobby Xylophone
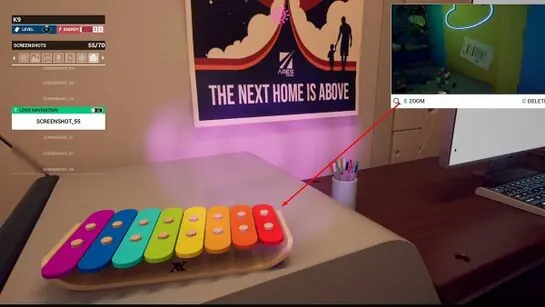
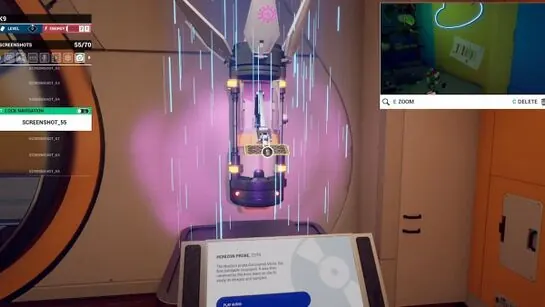
A drawing of coloured rectangles on the wall in Rafael’s room maps to the xylophone keys in the Lobby. Play the keys in the drawing’s order and the Horizon Probe lowers an arm holding the Tarot Card.
Rafael’s Computer: BlackVector
Rafael’s password hint is “Maezinha”, his name for Miranda from the locker CD. The password is Miranda. Seek.TXT on the desktop explains that his BlackVector program can unlock the incinerator. Read the messages, then open BlackVector from the bottom-right icon.
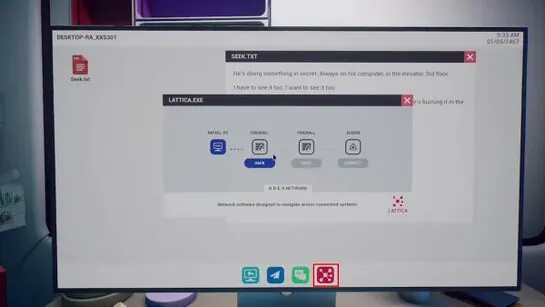
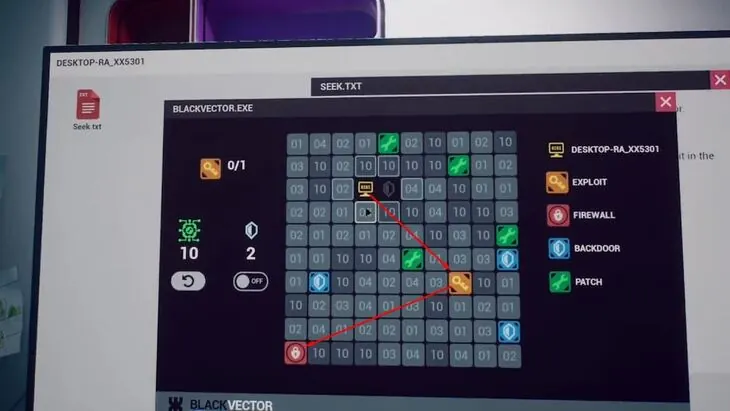
BlackVector runs two cycles. Each one asks you to steer the computer icon onto the key first, then onto the firewall icon. You get 10 moves per cycle, with extra moves from the green wrench tiles, and shields block a move against you.
The Timed Run: Incinerator, Garbage Disposal and USB Stick
The Robot Area computer is stuck on an update, and the way to stop it is a USB stick hidden in the Kitchen garbage disposal. Opening the disposal needs a tool locked in the Garage incinerator, and the incinerator can only be opened with the security down. Once the firewall drops you have 2 minutes before the incinerator runs. The schedule you downloaded from Rafael’s locker shows the ship’s timings in your K9, so keep it open. Start a fresh loop and do this quickly:
- In Rafael’s room, beat both BlackVector firewall cycles to disable security.
- Run to the Kitchen and put the Quantum Cell in the power relay for the extra block.
- Take the large round door on the left of the Kitchen into the Garage, not the Pod Bay route. Press the red button on the incinerator screen near the ladder. Its capsule opens, and the tool inside is what opens the garbage disposal.
- Back in the Kitchen, use the tool on the garbage disposal next to the fridge and take the USB stick.
- Unlock the Lobby, plug the USB stick into the Lobby computer and cancel the Robot Area computer’s update from there.
Stopping the update earns Saboteur and ends the timed part.
Robot Area Computer: Blueprint
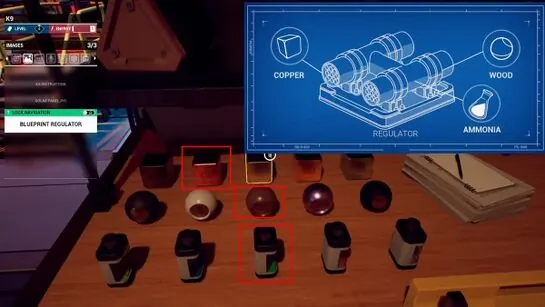
Take the dock to the Robot Area. Its computer now works. Download Blueprint.pic, which shows the Regulator and the three materials it is made from.
Greenhouse: Sun Box and Constellation Chest
Loop, carry the Quantum Cell through the Kitchen’s round door to the Garage, power the train and ride to the Lab. Level 4 opens the Greenhouse door. Inside are a chess board with a computer, a solar-powered box and a large chest, with a floating memory cube in front of the chess board.
At the sun controls, keep the left slider on the sun symbol and press the large sun rotation button until sunlight falls on the locked sun box beside the computer bench. The sun on the box turns green and it opens, giving you a book of constellations.
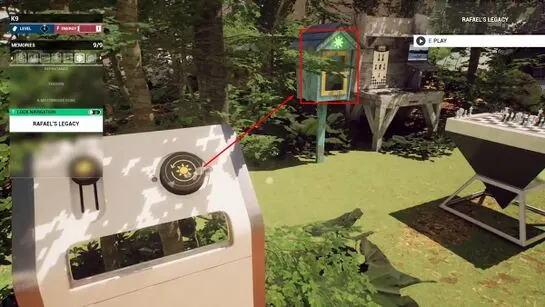
Move the left slider down to the moon and press the large constellation button on the right. Three constellations appear in the sky, one green, one yellow and one blue.

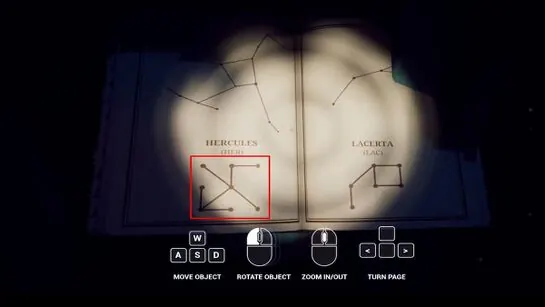
Match each sky constellation to its page in the book. The bottom of each page has a pattern. Screenshot all three.
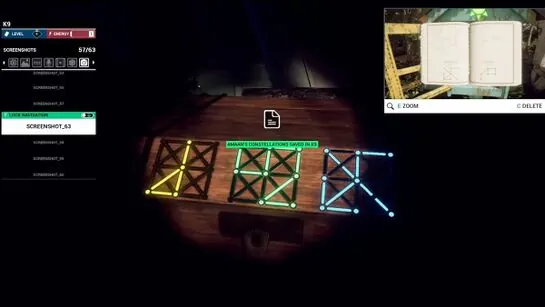
At the large chest, enter the three patterns, each in its constellation’s colour. The chest gives you the handle for Jahi’s door and the Astronomer achievement.
Tarot Card: the Greenhouse Chess Board
This card needs your phone. Scan the two QR codes in the game with a real phone camera, the K9 update on the Lobby computer and the schedule in Rafael’s locker, and note the URLs. The Greenhouse computer has two browser tabs. Type each URL in exactly, including http:// and every number and slash. They show two hex lists, one for the white pieces and one for the black. Screenshot both.
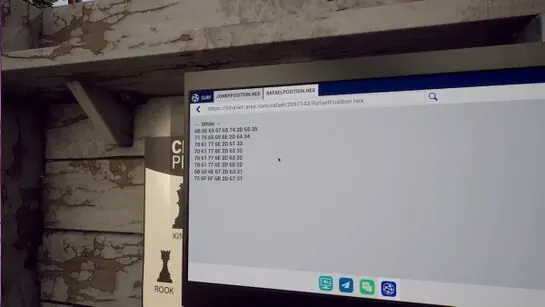
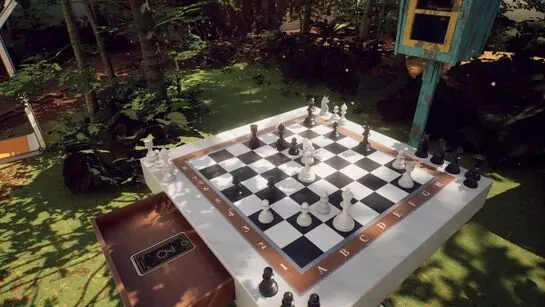
Bring the Data Disk to Rafael’s laptop again (lab balcony, duplicator plate, then the Lobby balcony) and use its hex dictionary to translate the lists into board positions. Positions change between players and playthroughs. Set the pieces on the chess board and its drawer opens with the Tarot Card.
Bedroom Hallway: Jahi’s Door
In the bedroom hallway, fit the handle into the exposed panel by Jahi’s door. Turn it until the power meter is full, and the door opens.
Tarot Card: Jahi’s Safe and the Vinyl
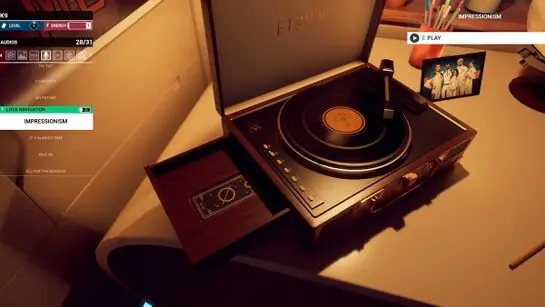
The date for Jahi’s safe is on the pocket watch left of the wall diagram: 21/05/2426. Enter /000/ first, then the date. Take the Vinyl, play it on the record player in Miranda’s room, and a copy saves to your K9.
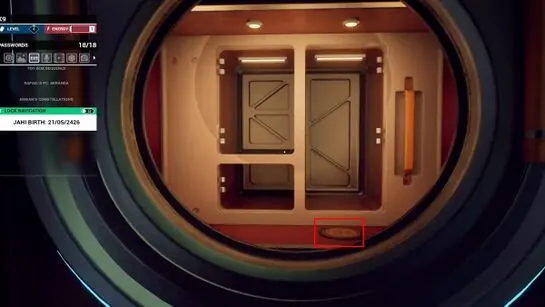
Stand in the anomaly zone in the Lobby and play it. It opens with Morse code. Decode the letters with the Morse poster in Jahi’s room, then press those lettered buttons on Miranda’s record player. A drawer opens with the Tarot Card.
Jahi’s Room: Clock Gears
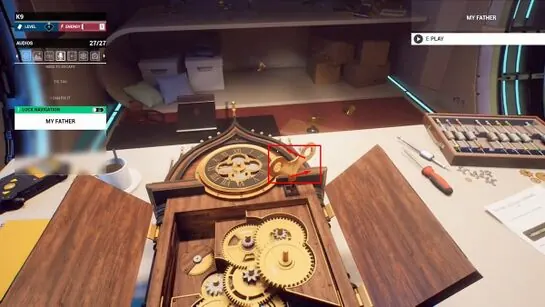
The clock lying on the table at the back of Jahi’s room is missing gears. The diagram on the opposite wall shows which gear goes in each position.
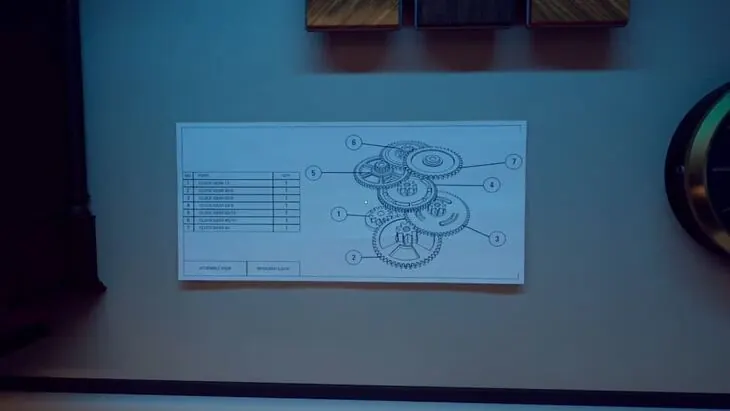
Every other clock in the room holds one gear with its number printed on it:
| Position | Gear | Where it is |
|---|---|---|
| 1 | Clock Gear 12 | On the table with the broken clock |
| 2 | Clock Gear 48/8 | Display at the bed’s head |
| 3 | Clock Gear 60/8 | Clock left of the wall diagram |
| 4 | Clock Gear 64/8 | Clock right of the bathroom doorway |
| 5 | Clock Gear 60/15 | Clock right of the wall diagram |
| 6 | Clock Gear 45/10 | Clock right of the closet |
| 7 | Clock Gear 40 | Standing clock left of the bathroom doorway |
With every gear in place, wind the clock counterclockwise. Time runs backwards and repairs the computer on Jahi’s desk. This earns Chronos.
Jahi’s Computer: Terminal
Press the Terminal button on Jahi’s computer. It works like Amaan’s, and the manual pages around the room give the commands. Extracting needs admin rights, so run these in order:
ASROOT EXTRACT DataLensArchive.qpak
CAT Readme.note
BUILD DataLensInstaller.qb
Datalens.exe DataLens train_components_list.dtl
The last command opens the components list for the train part, which the screen calls the Gravity Generator BX-4568. Screenshot it. Blueprint.pic from the Robot Area computer calls the same part the Regulator, and the rest of this guide uses that name.
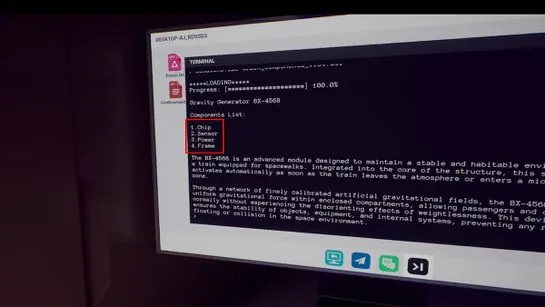
Garage Printer: The Regulator
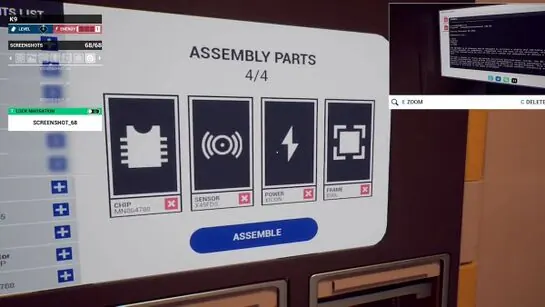
Open the access 4 printer in the Garage. On its screen, select the four components from Jahi’s list: Chip, Sensor, Power and Frame.
In the material slots under the screen, put the three materials from Blueprint.pic: Copper, Wood and Ammonia.
Press Assemble and take the Regulator from the right side of the machine. This earns Assembler.
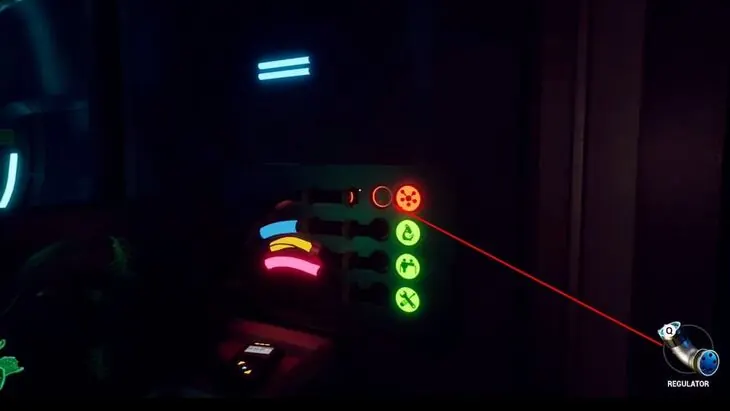
Climb to the train and power it with the Quantum Cell. Put the Regulator in the slot above the duplicator plate, in the left corner. It stays fitted through every loop, and the train can now reach the Fusion Core.
Fusion Core: Level 5 Access
Loop if needed, power the train and choose Fusion Core. One way leads out to a balcony above the Greenhouse, where you can lower a shortcut ladder and play the audio recording on the workbench beside it.
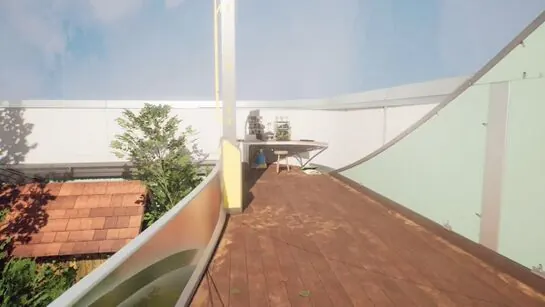
The other way leads through the far side of the train into a room with spacesuits on the left. Open the level 4 door to find a broken walkway leading to a control room. The level 5 access card is on your left. Scan its back.
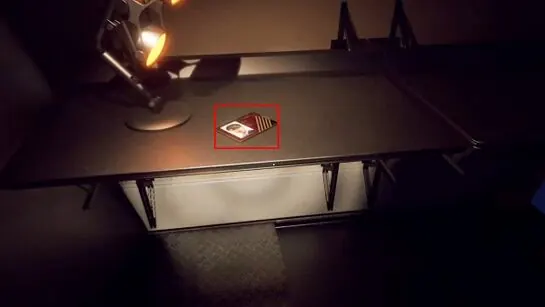
A floating memory cube waits at the very end of the broken walkway.
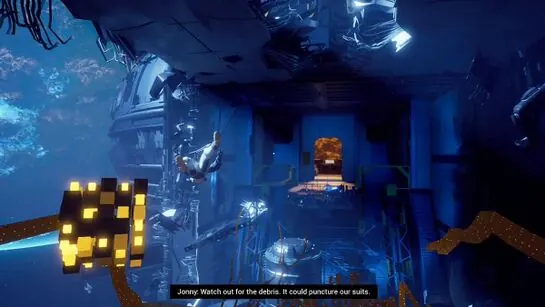
Pod Bay: Jonny’s Locker
Take the train back to the Garage, walk through to the Pod Bay and open Jonny’s locker. There is a document to read and a CD for Miranda’s player.
Loop to restore energy. Level 5 opens the last part of the game, and this is a good point to spend a few loops on any Tarot Cards you still need.
Part 7: How to Get Both Endings
Ending 1: Jonny’s Door and Pod 01
This is the standard ending, and it needs no collectibles. In the bedroom hallway, open Jonny’s door with level 5. It leads into a blue portal instead of his room. Stepping through earns Traveller.
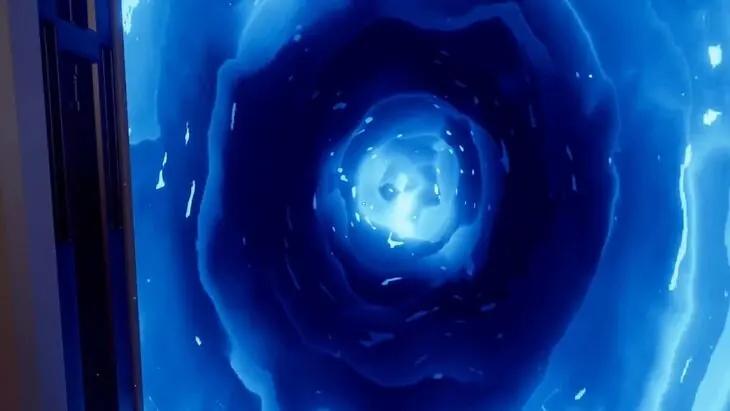
You come out in the Fusion Core control room, on the far side of the broken walkway. The console needs energy, so arrive with at least one block left. Choose Pods, press Unlock on Pod 01, and pull down the yellow handle on the right.
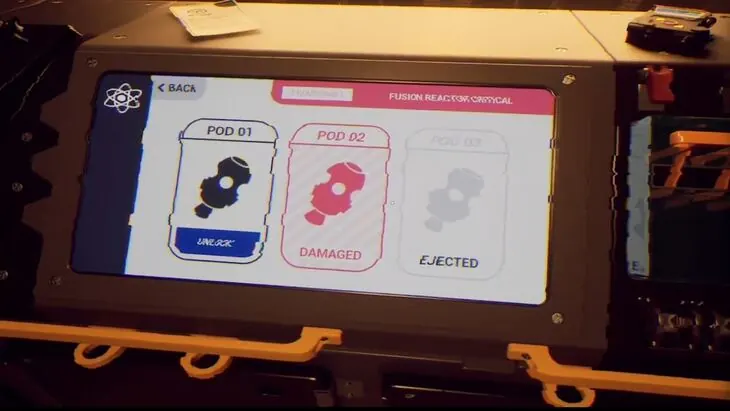
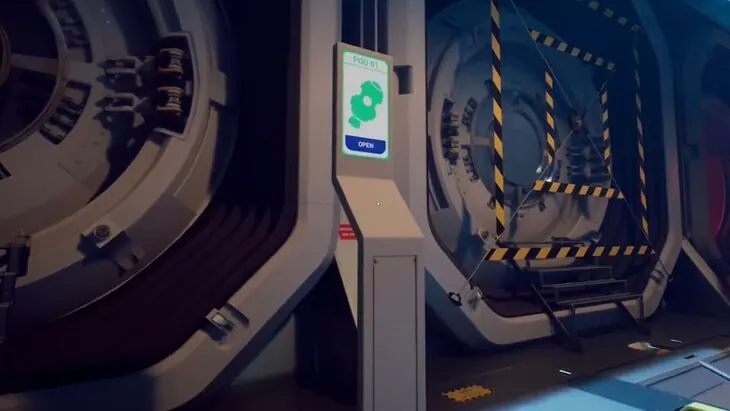
Return through the portal and go to the Pod Bay. The first pod on the left is now unlocked. Press Open on its screen to play the final cutscene and earn Escape Room.
Ending 2: The Secret Ending
You need all seven Tarot Cards, with a screenshot of the symbol on each one. The last card only becomes available with level 5. The three steps below are the route to this ending, in order.
Tarot Card: the Hidden HV Letters
Seven numbered letters are painted on walls around the station, visible only with the HV lens:
- Bedroom hallway
- Upper Garage
- Upper Lobby (from the train, or look up at the left corner of the balcony from the Lobby floor)
- Observatory
- Upper Greenhouse (from the Fusion Core by train)
- Jahi’s bedroom
- Fusion Core (through the portal in Jonny’s doorway)
Put the letters in number order to spell a seven-letter word. The letters change between players and playthroughs. That word is the name of a hidden .qpak file on Amaan’s computer.
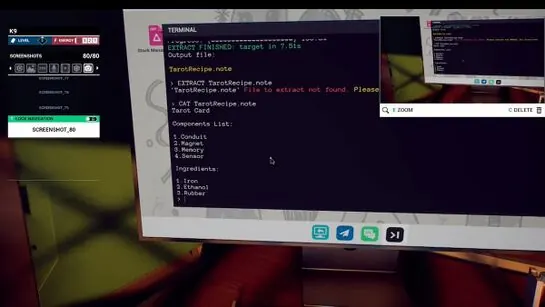
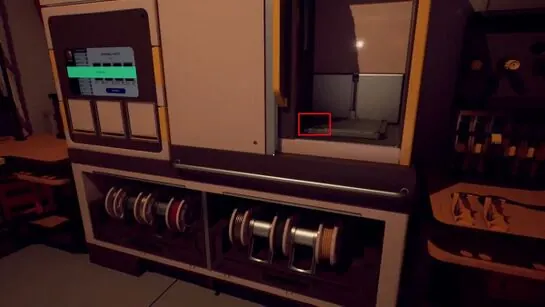
On Amaan’s terminal, run EXTRACT WORD.qpak, replacing WORD with your seven letters, to get TarotRecipe.note. Then run CAT TarotRecipe.note. Unlike Jahi’s archive, this file extracts without the ASROOT prefix. The note lists components and ingredients. Take them to the manufacturing machine in the Garage, which needs level 4 clearance, and enter that recipe there to make the final Tarot Card.
The Storage Room Safe
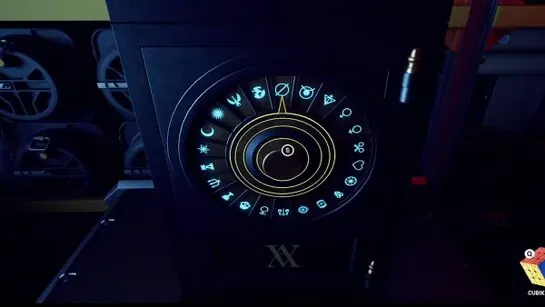
Remember the storage room only opens once your energy has run out. Inside, find the safe with a note about the Arcade Coin. Its dial carries the same symbols as the Tarot Cards. Hold the centre knob to turn the arrow, and point it at each card’s symbol in turn, in the order of the cards. This page cannot tell you what sets that order, so check your card screenshots for anything printed on them, such as a number, and follow it. Take the Arcade Coin from the open safe.
The Arcade Minigame
Do not press the arcade machine’s screen, as that starts a new loop. Look down at the front of the machine and put the coin in the slot.
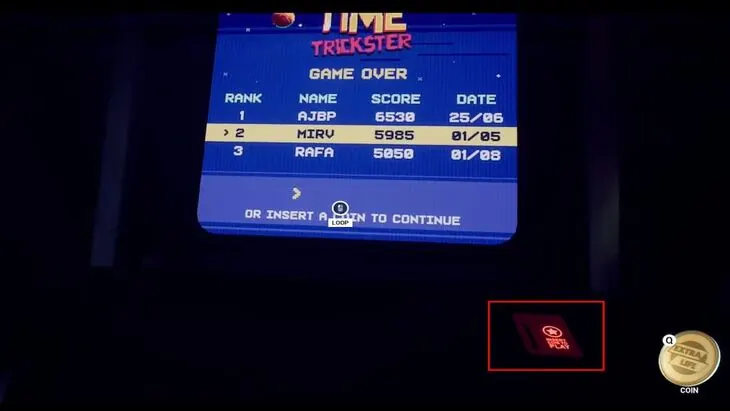
The screen switches to a space shooter. Move with WASD and fire with M1. You need a score above 6,530, which means reaching the end and surviving the boss, and you only have three lives. Dodging matters more than shooting.
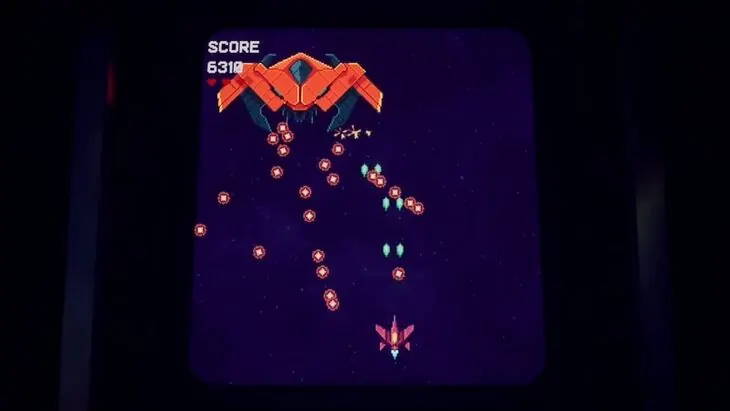
If the boss is too fast, capping your frame rate at 30 FPS slows the game down enough to make its fire easier to dodge. That works as of the launch build. Losing all three lives means trying again on another loop.
After setting the new high score, press the screen to loop. You wake into the secret ending cutscene and earn Back to the past.
Achievement Checklist
| Achievement | How it unlocks | Part |
|---|---|---|
| Take a Break | Enter any slot code on the Kitchen vending machine | 1 |
| Escape Artist | Print the Pod Bay Access card | 1 |
| Trickster | Loop at the arcade machine for the first time | 1 |
| Multi-Pass | Print Amaan’s card at the Card Builder | 2 |
| Slow Motion | Log into the Lobby computer | 2 |
| Seer | Finish the terminal commands in Amaan’s room | 2 |
| Promotor | Get the Multi-Pass from the Pod Bay vending machine | 2 |
| Voyager | Send the scout home with all six data on the Stellarmap | 3 |
| Person of Power | Use the Quantum Cell in any relay | 3 |
| Gardener | Complete the plant sequencer | 4 |
| Newton | Solve the Observatory light puzzle | 4 |
| Dazzled | Open the Observatory shutter | 4 |
| Doppelganger | Save an item on the duplicator plate | 5 |
| Developer | Repair the hex code on Rafael’s laptop | 5 |
| Lockpick Master | Repair the Unit-01 gears | 5 |
| Saboteur | Cancel the Robot Area computer’s update from the Lobby computer | 6 |
| Astronomer | Open the Greenhouse constellation chest | 6 |
| Chronos | Rewind the clock in Jahi’s room | 6 |
| Assembler | Build the Regulator | 6 |
| Traveller | Step through the portal in Jonny’s doorway | 7 |
| Escape Room | Reach the first ending | 7 |
| Back to the past | Reach the secret ending | 7 |
| Optimizer | Finish in 25 loops or fewer | Any |
More Rivage guides
-
achievementsRivage: How to Get the Optimizer Achievement
How to get the Optimizer achievement in Rivage by finishing in 25 loops or fewer, with a loop-by-loop route that reaches the ending on loop 17.
Published October 3, 2026