Now THAT'S a Big Dragon!: All 21 Achievements
Build Warriors and Wizards for damage, Elves for steady damage and gold, Thieves for early gold, Bards for the Inspire multiplier, and Clerics to recruit the rest for free. That is eleven of the twenty-one achievements in Now THAT’S a Big Dragon! taken care of: nine are counters that fill while you play, and two are the dragons you have to kill anyway.
The other ten are the ones people search for by name: Tired Fingers, ORNITHOGEDDON, Kill the Phoenix, Cacofonix, Found the Way, Deep Secrets, King Slayer, Clicker Game of Thrones, IMPOSSIBLE and Resources Management.
Spoiler warning: the sections below name the bosses and say what is waiting at the bottom of the last chapter’s dungeon.
| Achievement | What it takes |
|---|---|
| Mini Dragon Slayer | Kill the baby dragon, Tuth’orieth |
| Dragon Slayer | Kill the big dragon, Forth’aarh |
| 10 Thousand Slices | Hit the enemy 10,000 times with your own clicks |
| Tired Fingers | Kill Tuth’orieth in the tutorial fight using clicks only |
| Hunting Season | Kill 10 birds |
| ORNITHOGEDDON | Kill 100 birds |
| Kill the Phoenix | Kill 10 special birds |
| Banker | Reach 1 billion gold |
| Still Less Than Elon | Reach 100 billion gold across all runs |
| Massive Attack | Cause more than 1M damage at once |
| Team Work Makes the Dragons Hurt | Deal 100 billion damage across all runs |
| Bhardal’s Legacy | Recruit 10,000 Thieves |
| Conclave | Recruit 3,000 Clerics |
| Full Performance | Recruit 5,000 Bards |
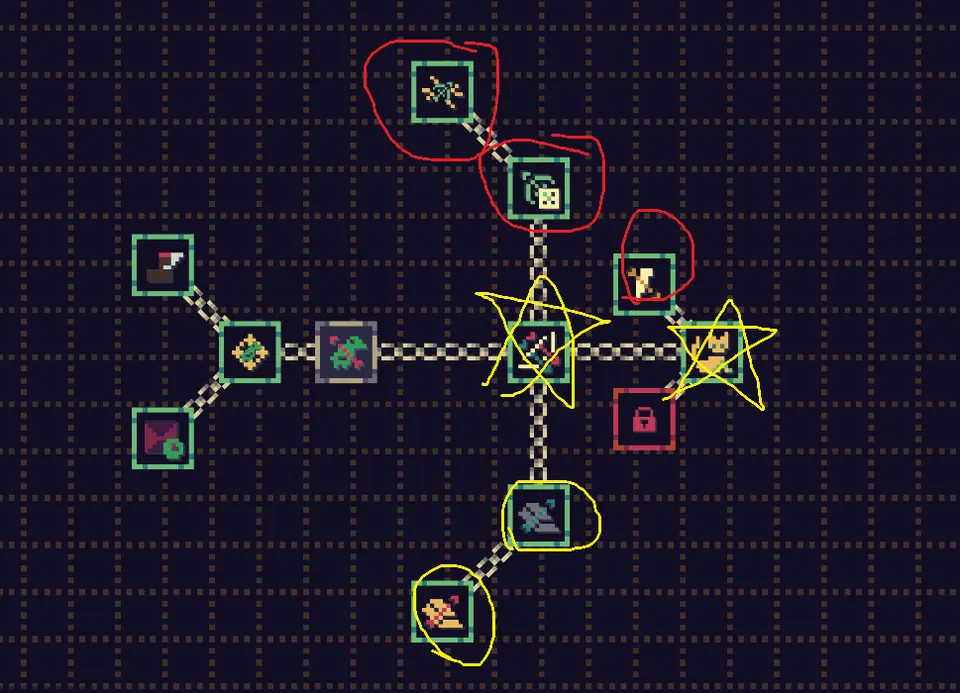
| Cacofonix | Buy one repeatable Bard upgrade 50 times |
| Found the Way | Clear dungeon level 1 |
| Deep Secrets | Reach dungeon level 11 on the last chapter |
| King Slayer | On dungeon level 11 of the last chapter, reject the King’s bribe and click him |
| Clicker Game of Thrones | Click the mini king inside the castle |
| IMPOSSIBLE | Deal 1,000,000,000 damage to Big Dummy before it heals |
| Resources Management | Beat Forth’aarh again in the resource chapter |
Lifetime Stats
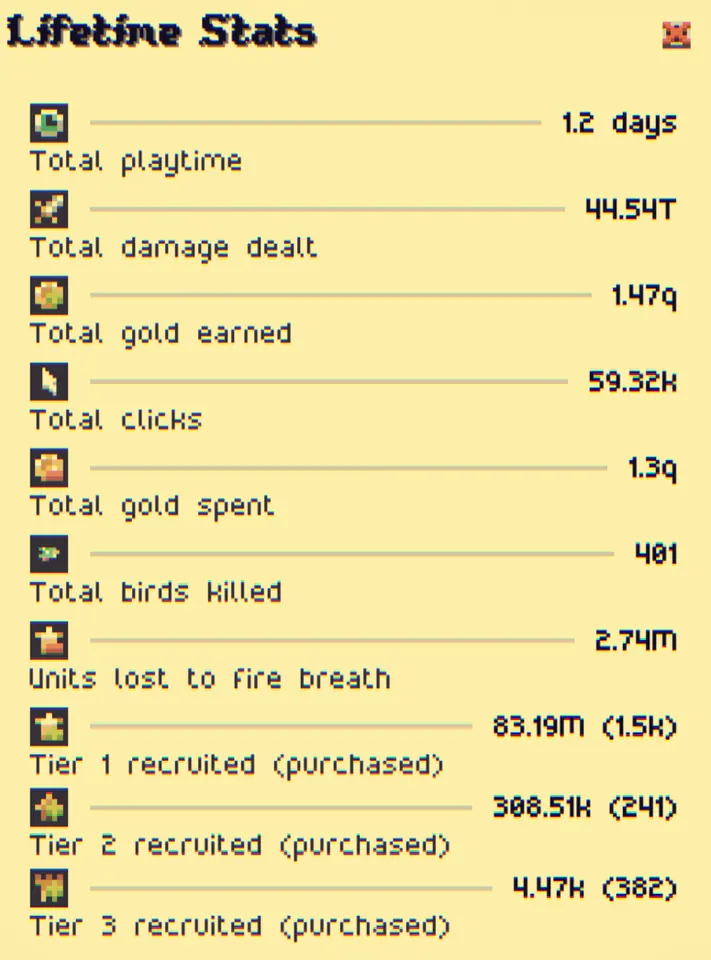
Half of that list is read off one screen. The button under the dragon’s health bar opens Lifetime Stats, and that panel counts total clicks, how many birds you have killed, total gold earned, total damage dealt and how many Tier 1, Tier 2 and Tier 3 units you have recruited so far. Check there before you grind anything.
Troops and what each tree is for
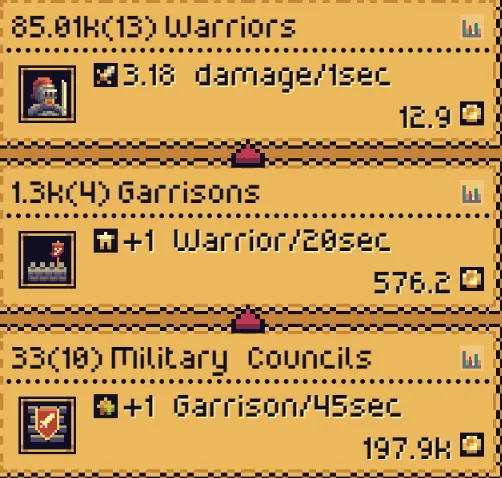
Buildings come in three tiers. Tier 1 is the troop that actually does the work, Tier 2 produces Tier 1 over time, and Tier 3 produces Tier 2. A Tier 3 building never touches the dragon. What it does is keep the factories coming while you are looking somewhere else, which is what makes the recruitment achievements arrive on their own.
| Troop | Tier 2 building | Tier 3 building | What it is for |
|---|---|---|---|
| Warriors | Garrisons | Military Councils | Damage early, most of your gold late |
| Wizards | Wizardry Academies | Archmage’s Nexus | Damage, and it scales hard late |
| Elves | Archer’s Outposts | Ancient Forests | Steady damage and a good gold income |
| Thieves | Thieves Guilds | Shadow Congresses | Poison damage and early gold |
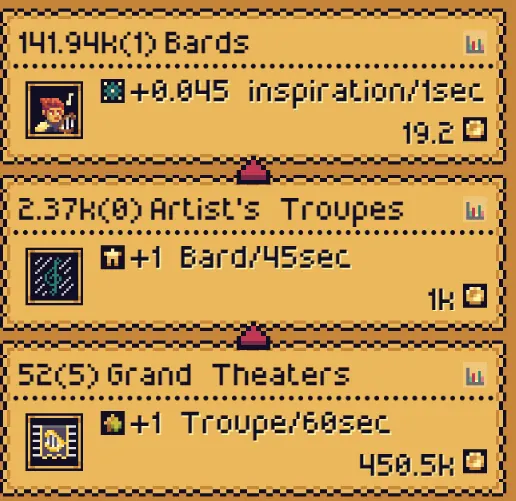
| Bards | Artist’s Troupes | Grand Theaters | Inspiration, which becomes the damage multiplier |
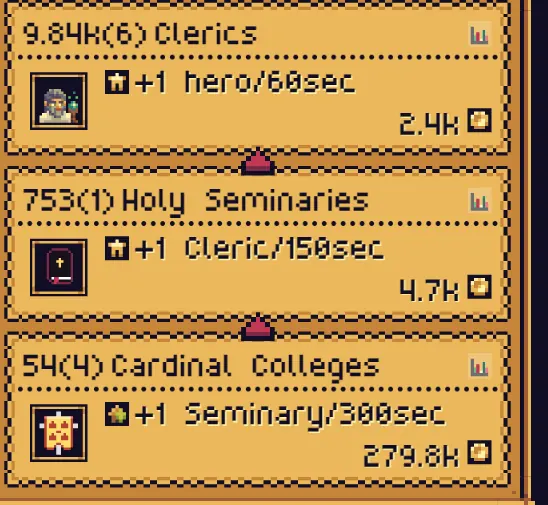
| Clerics | Holy Seminaries | Cardinal Colleges | A free recruit per Cleric per minute |
These are the upgrades worth going out of your way for. Most of what is left in the trees is a straight number increase, apart from the ones that counter Dragon’s Breath, which get their own section below.
| Tree | What to buy, and what it does |
|---|---|
| Warriors | War Cry: fires Inspire on its own whenever the meter is full |
| Wizards | The upgrade at the bottom of the tree, which raises the Warriors’ attack power by a lot |
| Elves | Hunter’s Eye: the archers shoot the birds down for you |
| Elves | Hunting Season: spawns extra birds |
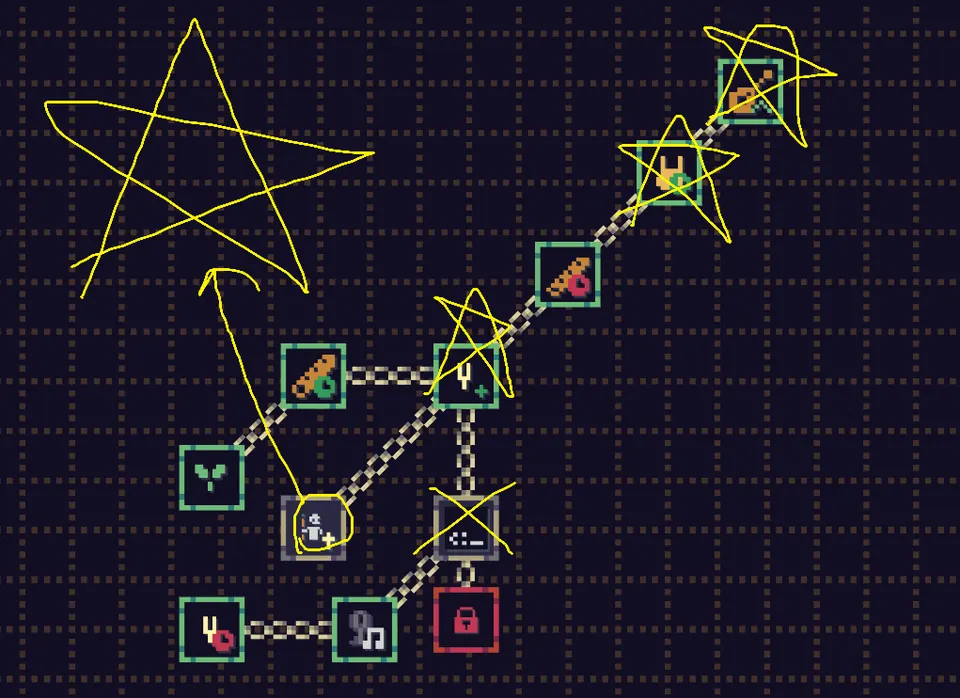
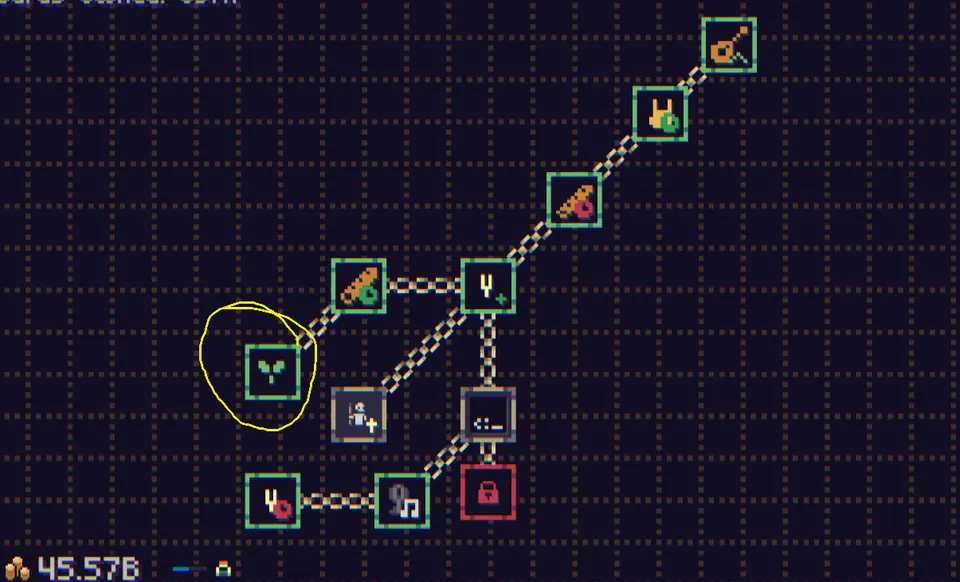
| Bards | The repeatable singing upgrade, which is the one Cacofonix counts |
| Clerics | Power Transfer: mana back with every recruitment |
| Clerics | The Phoenix upgrade, which turns ordinary birds into Phoenix birds |
| Cursor | The Tip of the Cursor: your clicks hit the dragon faster |
One piece of the interface is worth knowing before you start spending. Press the wrong troop and the money is not gone: the small button in the row under the health bar lets you rewind that purchase within ten seconds.

Warriors
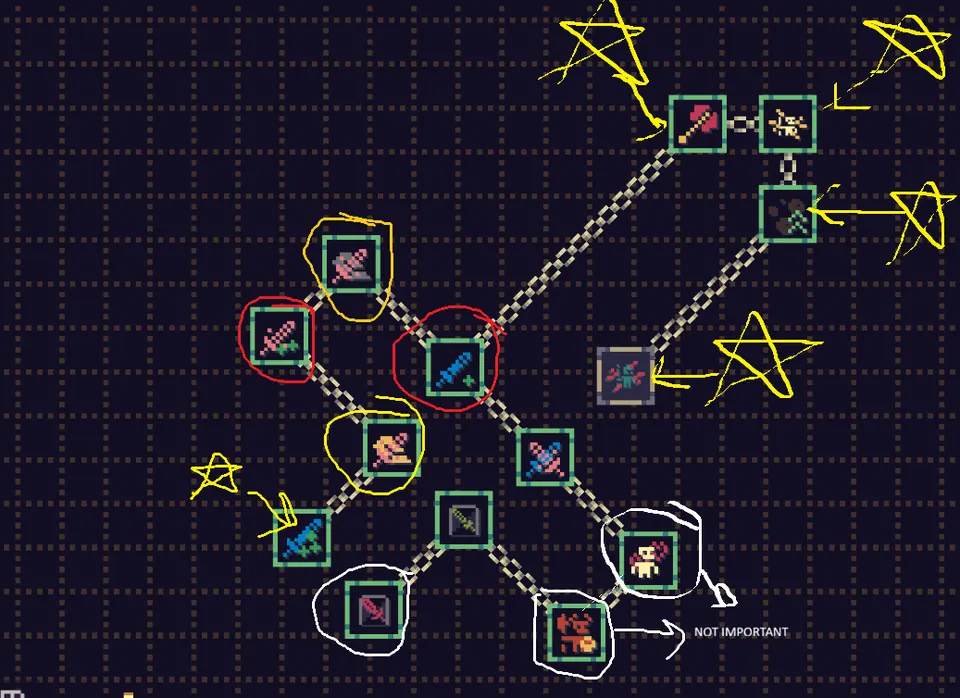
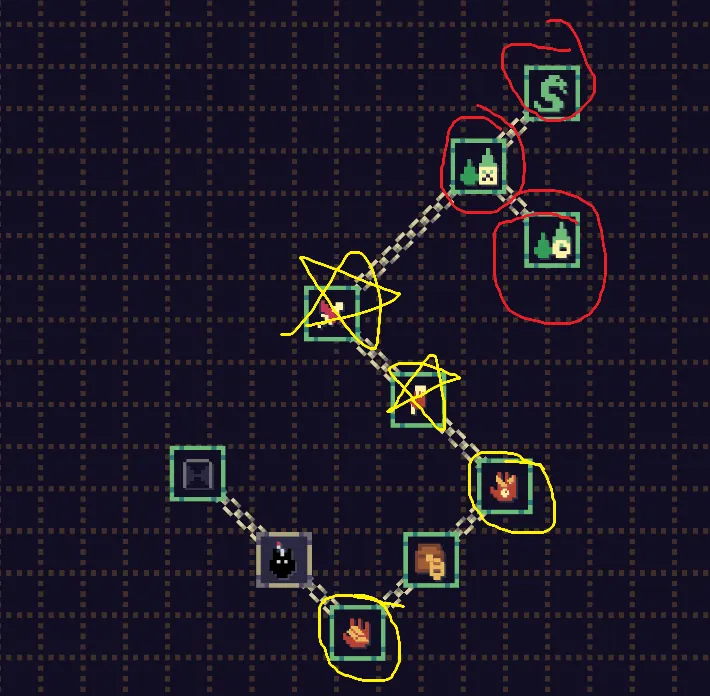
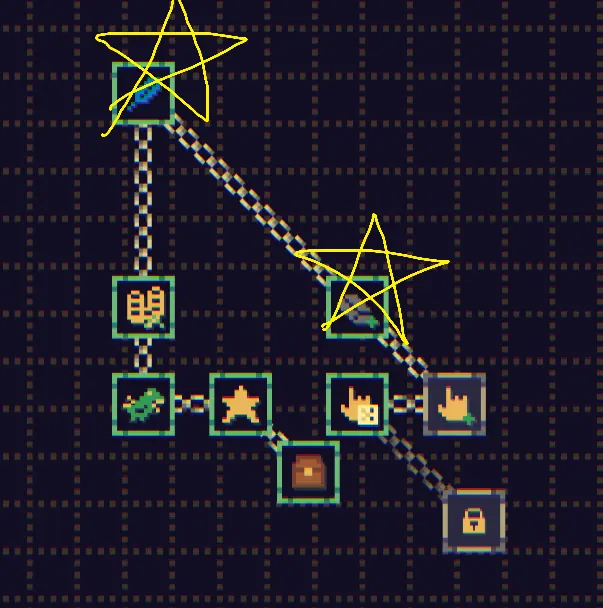
Warriors are easy to recruit, they deal good damage from the first minute, and by the late game they bring in more gold than anything else in the army. Take the upgrades marked with stars first, and do not stop before War Cry at the end of the sword branch.
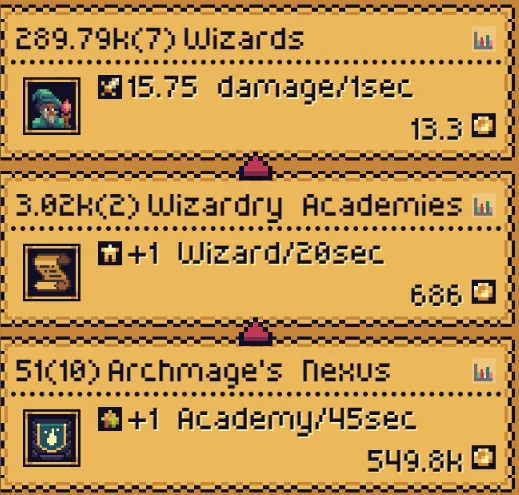
Wizards
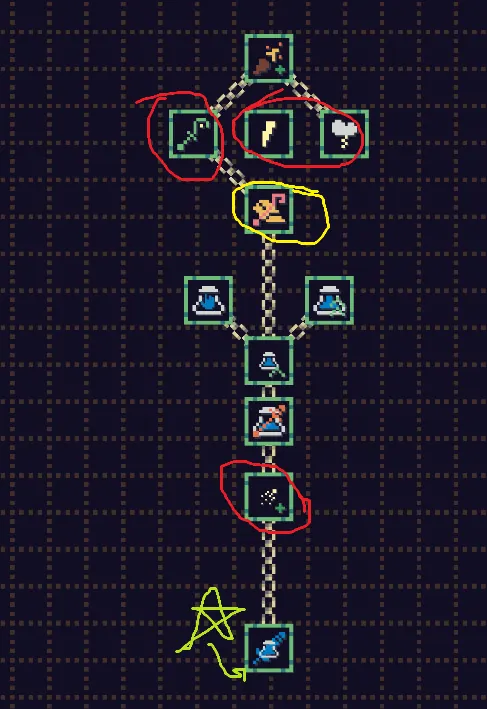
Wizards do good damage, especially in the Resources Management chapter, and they have great synergy with Warriors. Work down their tree and pick up the Wizards’ Mana stats on the way; the upgrade at the bottom is the one that pays for the trip.
Elves
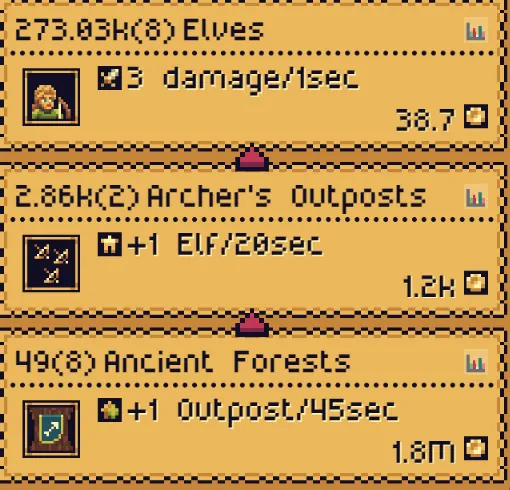
Elves deal moderate damage, bring a good gold income, and are immune to Dragon’s Breath. Their recruitment time is fast on top of that, so a stack of Elves builds up quickly and then stays built.
Thieves
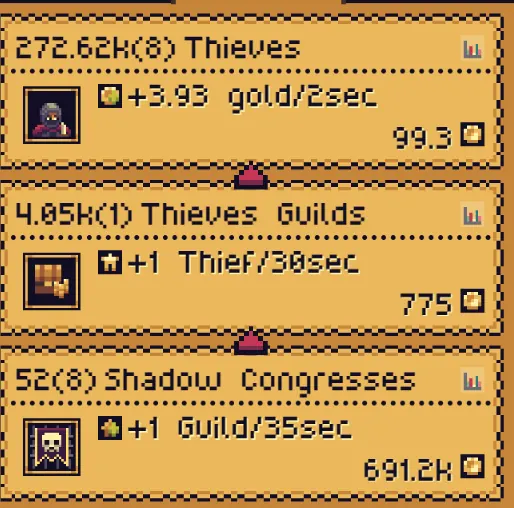
Thieves deal solid poison damage and provide the majority of your gold income in the early game. Later on the Warriors’ gold income passes them, and Thieves stay in the army mainly for the poison.
Bards
Bards fill the Inspiration Meter, and that is the whole point of them. With the right upgrades, Inspire makes all your troops deal as much as 6.5x more damage to the dragon, which is the figure as of the current build. One upgrade in their tree also hands you free Clerics.
Clerics
Each Cleric recruits a free unit every minute, so a few thousand Clerics quietly add that many more troops to the field every minute. Stacking their Tier 2 and Tier 3 buildings is what turns Conclave and Full Performance into a waiting game. The exception is the Resources Management chapter, where they are not that good.
Dragon’s Breath
Dragon’s Breath is the dragon’s answer to a big army: it kills your troops outright. Three of the trees carry an upgrade against it, and they are the ones people skip on the way to the damage nodes. Take all three. Elves come through the attack untouched on their own, but nothing else in the army does.
| Tree | What to buy, and what it does |
|---|---|
| Warriors | Fire Armor: cuts the troops lost to the attack |
| Thieves | The dodge upgrade, a 50% chance to avoid the attack |
| Elves | Ice Arrows: delays the attack |
Mini Dragon Slayer
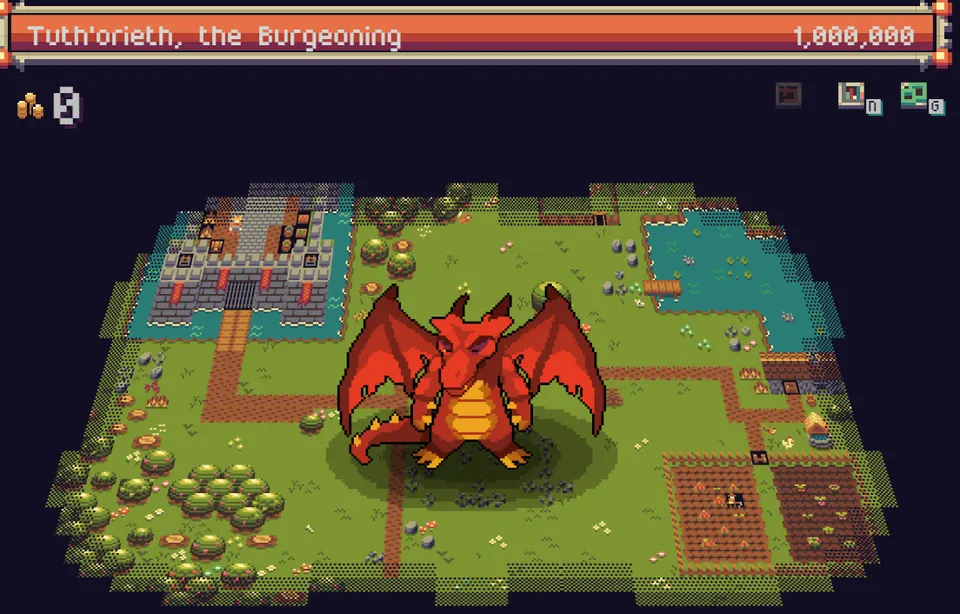
Mini Dragon Slayer is the tutorial fight. The baby dragon is Tuth’orieth, the Burgeoning, with a million HP, and it is a straightforward kill. Keep buying upgrades while you fight instead of hoarding gold, because it does heat up towards the end.
Dragon Slayer
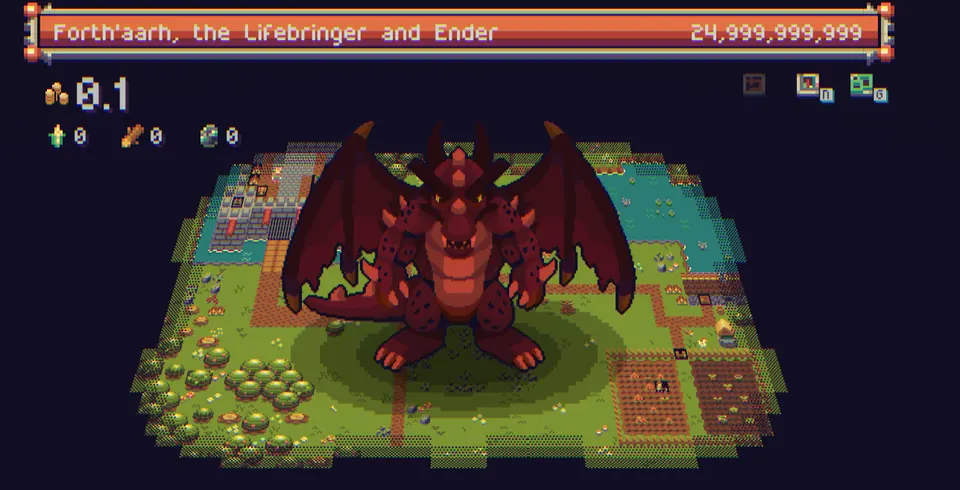
Dragon Slayer is the big one: Forth’aarh, the Lifebringer and Ender, with just under 25 billion HP. It goes down quickly once you have some upgrades.
For the kill itself the checklist is short. Warriors and Wizards for damage, Elves for damage that survives, poison and lightning stacked underneath, and Inspire fired for the multiplier. With all of that running, the dragon should not be much of a problem.
Engineering: Catapults, Builders and Engineers
Engineering is a new mechanic that turns up partway through the Forth’aarh fight. It adds a tab of its own with three units in it, and it is worth spending on before you go back to hitting the dragon.
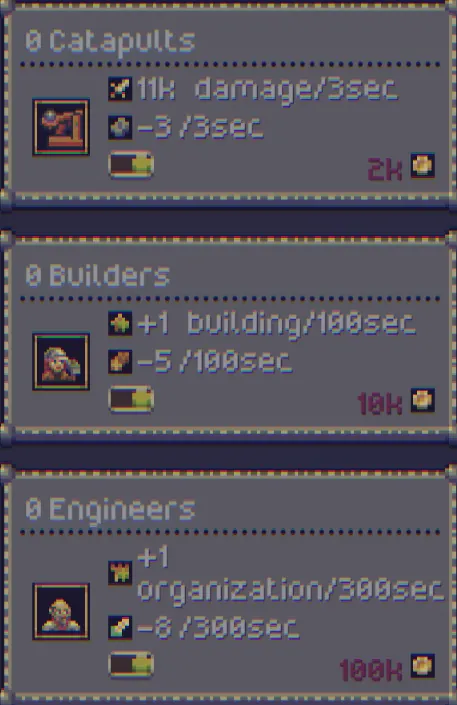
| Unit | What it does |
|---|---|
| Catapults | Solid damage every 3 seconds |
| Builders | Build a Tier 2 building on their own every 100 seconds |
| Engineers | Build a Tier 3 building on their own every 300 seconds |
Catapults are the ones to buy, and twenty to thirty of them is a fair target. They push gold income up fast as well as hitting hard.
10 Thousand Slices
You need 10,000 hits on the dragon with your own clicks. It builds up naturally as you play, and holding Z instead of clicking counts, so you can leave a finger on it while you do something else. The important upgrades here are the ones on the cursor branch.
Tired Fingers
Tired Fingers is that same tutorial fight against Tuth’orieth, this time with clicks only. Prioritize the two click upgrades at the top of the cursor branch and after that it is only a matter of time.
Hunting Season
Birds carrying gold coins turn up at random times and fly across the screen. Click ten of them and this one is done. Nothing about it needs planning.
ORNITHOGEDDON
ORNITHOGEDDON wants 100 birds, and clicking every one of them is the slow way to do it. Two upgrades in the Elves tree do the job instead. Maxing Hunter’s Eye lets the archers kill every bird on the screen, so you do not have to click on them at all. Hunting Season, which confusingly shares its name with the achievement above, spawns three birds at a time up to ten times, so a maxed one is worth about 30 birds.
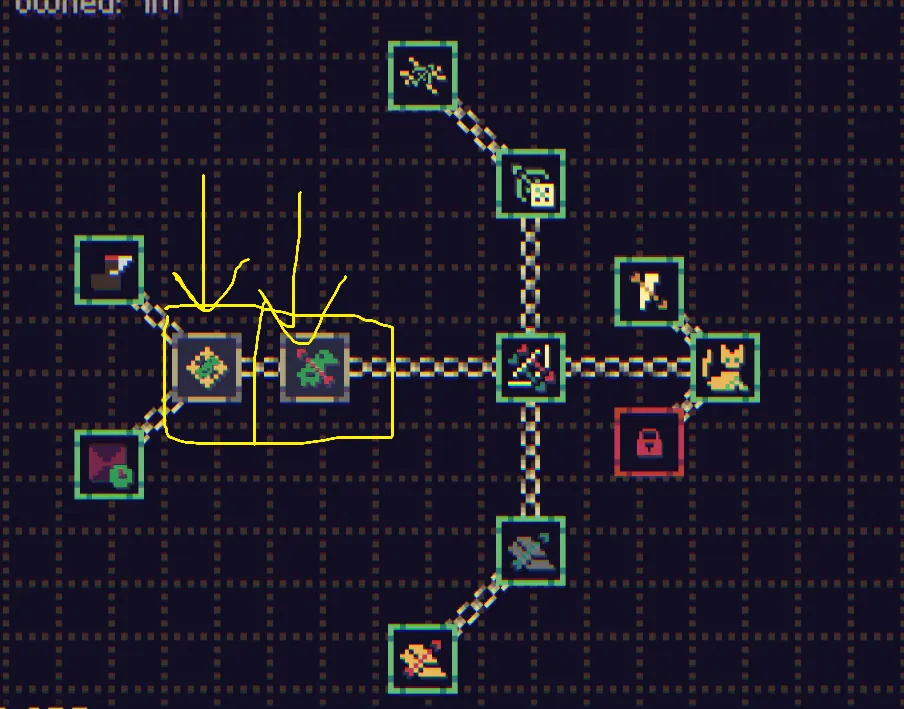
Kill the Phoenix
Kill the Phoenix counts 10 special birds.
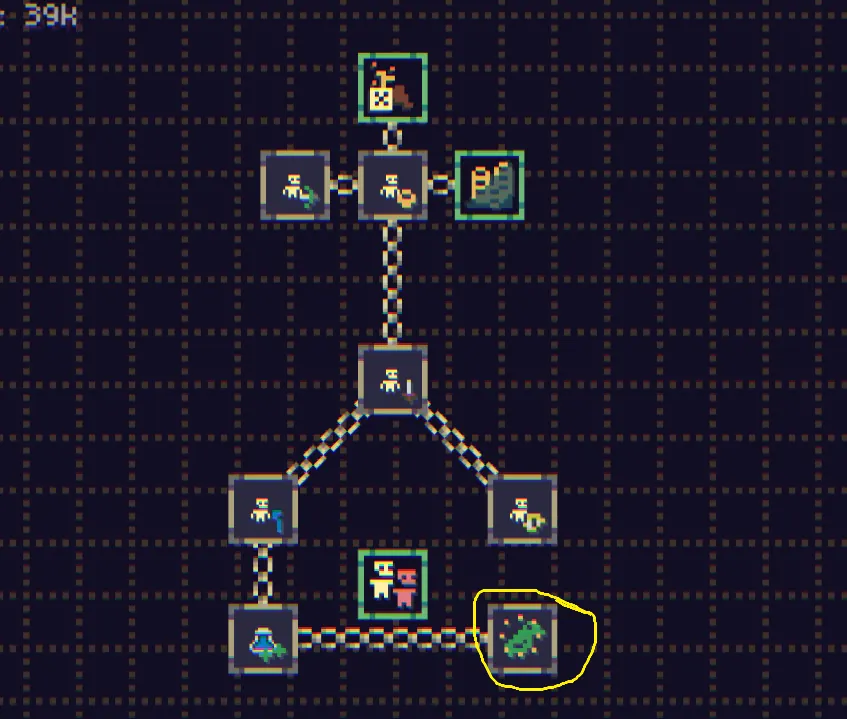
The Clerics’ Phoenix upgrade is where it starts. Whether a bird turns is random, so buy it first and then stack the Elves’ bird spawner: more birds in the air means more rolls of the dice.
Banker
Banker is one billion gold. You will unlock it naturally after playing for a while. To hurry it along, take every gold-related upgrade you can afford.
Still Less Than Elon
Still Less Than Elon is 100 billion gold across all runs, so it is the lifetime figure rather than a single run. Troops scale well enough that it arrives without you aiming at it. If it is the last one you are missing, the gold keeps counting in Truly Endless Mode, which is the place to sit and let it climb.
Massive Attack
Once the Inspire multiplier is fully upgraded and you fire it off, a single hit clears more than 1M damage on its own, which is all this one asks for.
Team Work Makes the Dragons Hurt
There is nothing to do here beyond playing. The damage counter carries across every run rather than resetting, so it fills alongside everything else on this page. If the total is still short at the end of the campaign, top it up in Truly Endless Mode.
Bhardal’s Legacy
Bhardal’s Legacy used to be a Chapter 1 clear using only Thieves. As of the current build it counts Thieves recruited instead, and the number is 10,000. Leave Thieves Guilds and Shadow Congresses running and it gets there on its own, and Truly Endless Mode is the easiest place to let that happen.
Conclave
Conclave was changed in the same way as Bhardal’s Legacy. It used to be a Chapter 1 clear using Clerics, and as of the current build it is 3,000 Clerics recruited. Crank up Holy Seminaries and Cardinal Colleges and the count arrives quickly.
Full Performance
Full Performance is 5,000 Bards. Artist’s Troupes and Grand Theaters do the recruiting, and Clerics stacked alongside them push the number up faster.
Cacofonix
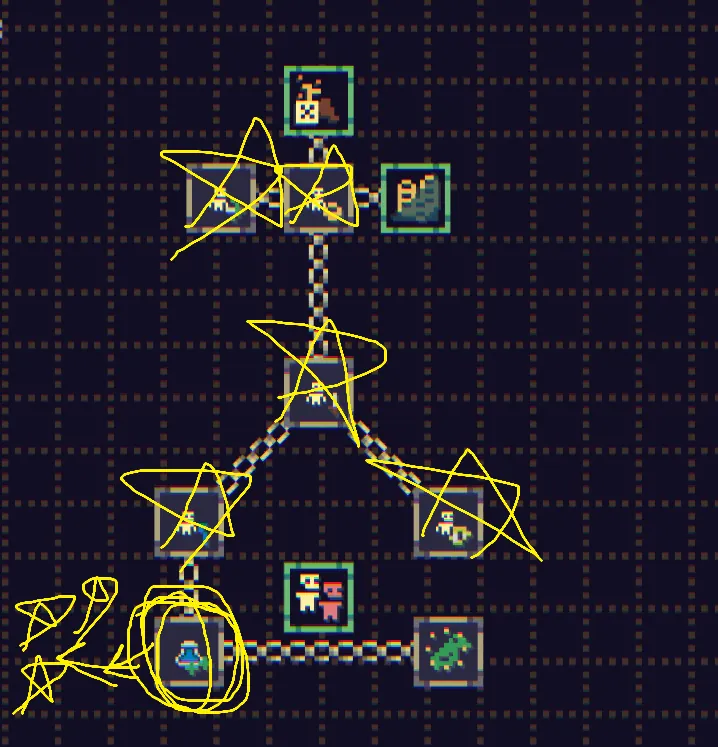
Cacofonix counts one repeatable upgrade in the Bards tree, taken 50 times. It is the node ringed below. Nothing else moves the counter, so buy it every time it comes back up.
Found the Way
Found the Way is dungeon level 1, cleared in the opening stage. There is nothing to prepare for. It is the shallow end of the same dungeon that Deep Secrets asks you to reach the bottom of.
Deep Secrets
Deep Secrets needs dungeon level 11 on the last chapter, in Truly Endless Mode. Getting that deep runs on the dungeon upgrades, the ones scattered through the troop trees that do not add damage or gold, so buy those alongside the damage nodes if you want to go past the shallow levels.
King Slayer
King Slayer is on dungeon level 11 of the last chapter, in Truly Endless Mode, the same run that gives you Deep Secrets. When you reach the King he offers you a bribe. Reject it, then click on him.
Clicker Game of Thrones
Clicker Game of Thrones is the quickest one on the list. There is a mini king standing inside the castle on the map. Click on him and it pops.
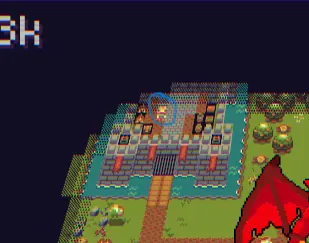
IMPOSSIBLE
IMPOSSIBLE is the Big Dummy fight, the one the game calls the fake endless mode.
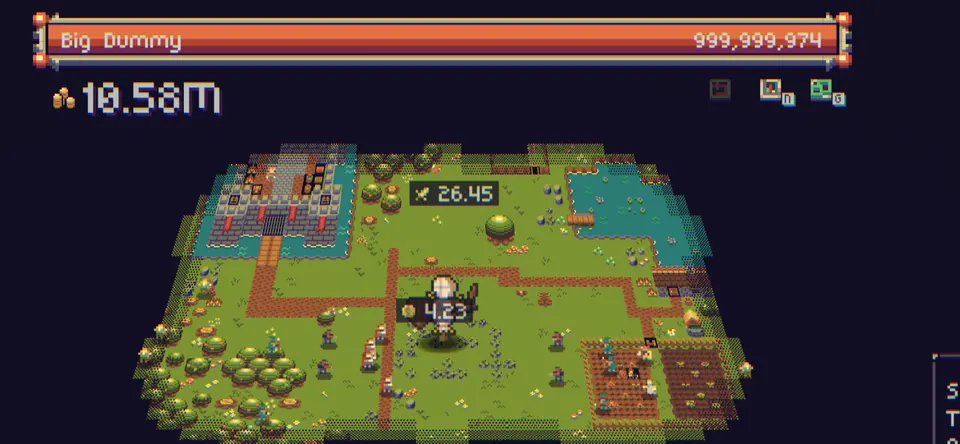
Big Dummy regenerates its health, so the job is to deal 1,000,000,000 damage before it heals back up. Everything above applies at once: Inspire up, poison stacked, Elves surviving the breath, and as many Catapults as you can pay for.
Resources Management
Resources Management is the chapter most people stall on. It is Forth’aarh again, but now the army eats Food, Wood and Ore.
| Producer | Output |
|---|---|
| Farmers | +10 Food every 7 seconds |
| Lumberjacks | +5 Wood every 5 seconds |
| Miners | +8 Ore every 5 seconds |
The Fire button at the bottom of the screen dismisses troops, which lowers what you are consuming. That is the lever to pull when consumption has run ahead of production.
Apprenticeships
Apprenticeships turn up as an event partway through the chapter. They work like Tier 2 buildings for your workers, handing you Farmers, Lumberjacks and Miners automatically. Buy them every time they are offered, because production is what the whole chapter turns on.
How to run the chapter
- Open with the click upgrades and pick up a few troops along the way. The early part is loose enough that you do not have to think about resources yet.
- Get Catapults as soon as you can. Their Ore consumption is low for what they bring in, which makes them the one thing in the Engineering tab worth the resources here.
- Buy Thieves for early gold. Skip Clerics at the start, or take 500 to 1,000 of them and switch their production off afterwards. Skipping the troop does not mean skipping the tree, though: Power Transfer is still worth buying in this chapter.
- At around 1,000 Bards, switch those off too, and turn their Tier 2 buildings back on only to replace whatever the breath kills.
- Settle on Warriors and Wizards for damage with Elves supporting. This is the chapter where the three Dragon’s Breath upgrades earn their money, and if you would rather not juggle any of that, Elves on their own give a stable damage output.
Above all, watch the resource balance and keep the blue bar higher than the red one. Do not let the army grow faster than the economy feeding it.